It’s actually really easy to tell when the dough is ready. The simplest way is to just examine the dough visually. With practice, you’ll instantly be able to know when the dough’s ready just by looking at it.

In this article I’ll give you a few pointers to help you out with proofing. Keep reading to find out everything you need to know. Alternatively, use the table of contents below to skip to any section you like.
Also, you can return to the contents at any time by pressing the green button at the top right of the screen.
The poke test is a quick little check to see if your pizza dough is properly proofed. It is usually the first test that is recommended to beginners. I’ll explain what it is and how it works.
The idea is to poke the dough with one finger, pressing the dough in by about half an inch. Then notice what happens:
One little tip is to make sure to lightly wet your finger first. This ensures that your finger doesn’t stick to the dough, ruining the test.
It is a nice little test but I would say that it’s not 100% accurate. Different doughs and dough temperatures can produce different results. Also, each person will do the test slightly differently. I think it’s misleading for people to think this is the only way to check the dough.
In reality, most bakers probably don’t use the test. I never use it myself, in fact. For me, it’s much more reliable to simply observe the dough. With just one look I can instantly tell if the dough is properly proofed or not.
Although proofing is a good thing, you can have too much of it (like most things in life I guess)! An over-proofed dough can even be worse than an under-proofed dough so it’s crucial to avoid this.
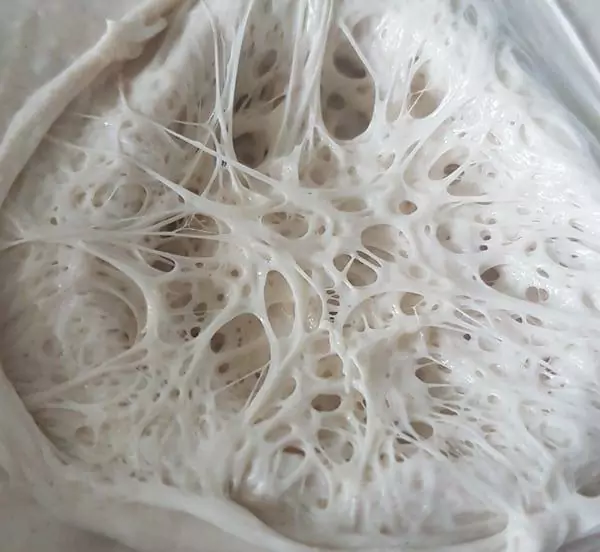
The process of fermentation (proofing) creates gas in the dough. This gas (carbon dixoide) causes bubbles to form within the dough. Assuming you have kneaded the dough adequately, the gas is trapped within the gluten network. This process allows the dough to rise and it is what we know as proofing.
If left too long, the yeast will produce more gas than the gluten network can handle. This leads to a collapse of the gluten network – losing all that beautiful gas that was trapped.
If this happens, you can reshape the dough and allow it to proof again (this is known as “knocking back”) but it’s not ideal. When the dough reaches the stage of collapse it will never be quite the same again.
Fortuantely, spotting over-proofing is quite easy. With experience, you’ll know your dough is over-proofing before it actually reaches the stage of collapse.
The simple to spot signs of over-proofing are as follows:
With properly proofed dough it’s possible to have a few very small bubbles in the dough but these should be barely noticeable, if at all.
Also, properly proofed dough can lose it’s shape slightly but it should still look like a dough ball. If the dough starts looking too sloppy, there’s a good chance it’s over-proofing.

There is also a chance that you didn’t develop the gluten network well enough during kneading if you have this issue. However, even with an under-kneaded dough you usually can get away with it as long as the dough is not over-proofed.
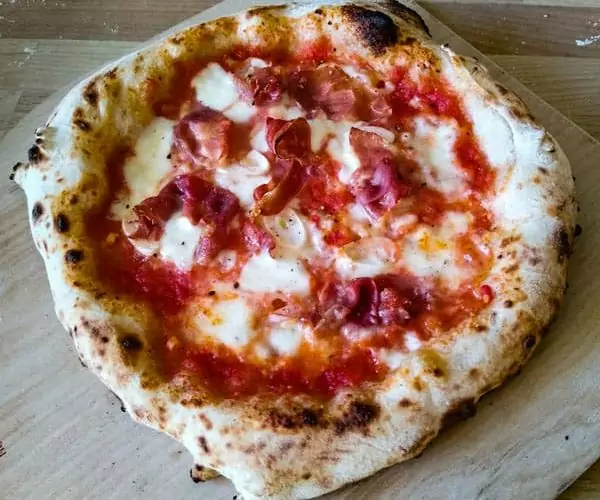
If the dough overproofs to the point of collapse (as in the picture above), then the dough loses a lot of strength. It may be quite easy to stretch but it will also be too sticky to work with and it will tear easily.
With experience, you can work with slightly over-proofed dough and still make great pizza. However, after a certain point the dough becomes almost impossible to work with. At best, you’ll end up with a small, thick pizza (since you can’t stretch it thinly).

In general, especially for beginners, I recommend staying on the side of slighly under-proofed if anything. An under-proofed dough will still rise a bit during baking and will typically be much stronger (less likely to rip etc).
Fortunately though, there is a technique that can save slightly over-proofed dough. It’s known as “knocking back” and I highly recommend everyone to learn it since we all experience overproofing from time to time. Click here to check out my article on fixing over-proofed dough (knocking back).
Although underproofed dough may be preferable to overproofed, we don’t want our dough to be very underproofed. If the dough is too underproofed it won’t rise much and we’ll still end up with dense pizza. Luckily, it’s quite easy to check for underproofing.

Most of the signs are just the opposite of overproofing:
You can think of underproofed dough as being “lifeless”. It will probably look as though not much has happened – that’s because not much has happened. The yeast hasn’t been fermenting much and hasn’t produced much of that lovely carbon dixoide (if there’s such a thing) we’re looking for.

Luckily, with underproofed dough we can simply give it more time and it should continue to proof. Additionally, you could place the dough in a warmer place to speed the process up. However, too much heat would kill the yeast. Ideally, you don’t want to proof the dough at temperatures above about 30C/90F.
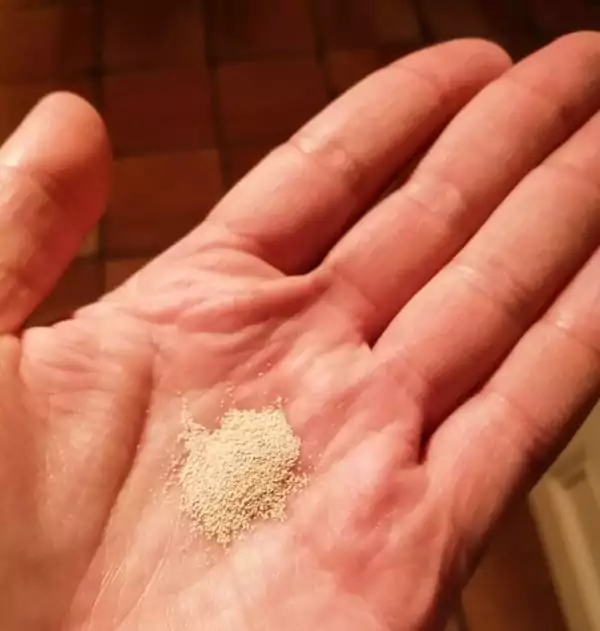
If you’re struggling, it is also possible that you didn’t add enough yeast or that your yeast in not fresh. Always ensure you have good yeast – it’s the magic ingredient that has to work well!
Underproofed dough is typically considered the lesser of two evils. The dough should still be strong since the gluten network hasn’t been over-worked. However, the dough will probably be tough and difficult to stretch.
Personally, I’d rather have slightly underproofed dough than slightly overproofed dough. However, I’d rather have slightly overproofed dough than very underproofed dough. (That’s a bit of a riddle I know!)
If your dough is either very overproofed (collapsing) or very underproofed (barely risen at all), it’s pretty much unusable. In either scenario you’ll end up with a thick and dense pizza that’s difficult to chew and digest (not great, trust me I’ve been there)!
You need the dough to have risen a decent amount so that you can get the light and airy crust. Also, proofing helps with shaping. It softens the dough and makes it more elastic – allowing for the proper stretching of the pizza.
The stretching is a crucial step in the pizza making process. It’s not just for show, it sets the thickness of the base and the crust as well as getting a nice round shape to ensure even cooking.
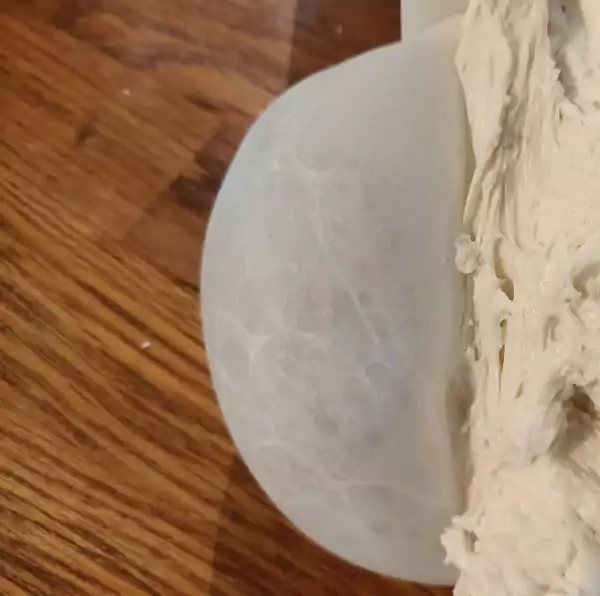
With that being said, let’s take a look at some properly proofed dough. After all, that’s what we’re aiming for!
Perfectly proofed pizza dough is a beatiful thing. As your pizza making skills develop, you’ll get a great sense of pride in your dough when it’s just right. Luckily, it’s easy to achieve, it just takes practice but I can set you off on the right foot.
The following are the hallmarks of a beautifully proofed pizza dough:

Aside from the expanding of the dough (by roughly double), it should also “relax” somewhat. Imagine the dough has melted slightly with heat. The surface of the dough should also be vey smooth.
The general idea is to leave the dough long enough so that it’s become almost as airy as it can. The limit is known as the “saturation point” for those technicians out there! However, we don’t want to quite reach the limit since once we pass it, the quality of the dough starts deteriorating (overproofing).
That’s why, as mentioned previously, we should err on the side of caution. If anything, our dough should be slightly underproofed. There’s an acceptable window where anything close to the “saturation point” still produces excellent pizza.

With experience, you’ll be able to look at your dough and know exactly how long to leave it until it’s “perfectly” proofed.
For beginners, the poke test is a decent starting point. However, I don’t think there’s any substitute for simply inspecting the dough visually and knowing what to look for.
This does get much easier with experience but hopefully I’ve given you some good pointers in this article. It really isn’t difficult and don’t worry about it too much. If the dough looks good, the chances are it will make good pizza!
Feel free to leave me any questions in the comments section below and good luck!

I’m Tom Rothwell and I’m super passionate about all kinds of homemade pizza! In the last few years I've been on a quest to find the perfect pizza. Now I'm sharing what I've found out with the world!
If you're interested in hiring me for your event in the UK, feel free to check out my website with the link below.
Pizza Catering


I often get asked what type of oven I use for my pizzas. Well, I use a pizza oven made by a company called Ooni.
The range of pizza ovens that Ooni offers is just brilliant. They cover all bases, and all price points. There's affordable and portable models such as the Fyra 12 Pizza Oven and then there's state-of-the-art models such as the Karu 16 Pizza Oven pictured below.
In all honesty, I would say that the oven makes a huge difference. If you're looking to make authentic Italian pizza, a pizza oven is a must.
By clicking the link below and purchasing from Ooni, you would be supporting this website. I've been using their ovens for a long time now and I wouldn't recommend them if I didn't believe in their products.
Time to make some amazing pizza!
I’m Tom Rothwell and I’m super passionate about all kinds of homemade pizza! In the last few years I've been on a quest to find the perfect pizza. Now I'm sharing what I've found out with the world!
If you're interested in hiring me for your event in the UK, feel free to check out my website with the link below.
Pizza Catering