This is perhaps the most authentic Neapolitan pizza recipe you will find! What’s more, it’s really easy with just 4 ingredients; flour, water, salt, and yeast.
Check out my video below with step-by-step instructions. And keep on reading for more detailed information and some background on Neapolitan pizza.
The recipe is at the bottom of the page.

If you want to dive straight in, you can click here to jump to the recipe. Alternatively, keep reading to find out everything you need to know about this recipe, and Neapolitan pizza.
Authentic Neapolitan pizza originates from the birthplace of pizza, Naples. It involves simple ingredients and traditional methods that have been largely forgotten for quite a while. Luckily it is bouncing back, with many people finding this beautiful style of pizza for the first time.

American style pizza has mostly taken over Italian pizza with takeaways across the world. But fortunately, the traditional Italian pizzas are making a resurgence.
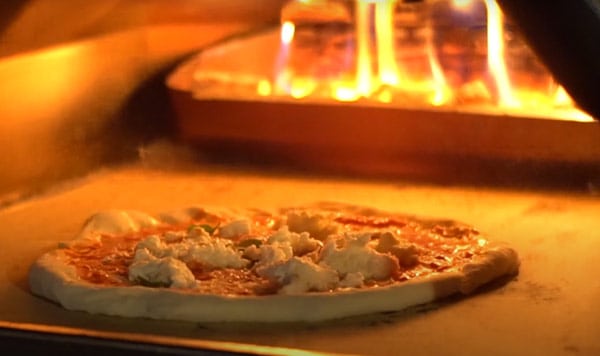
That’s not to say that American style pizzas can’t be nice because they can. But for me, and many more people like me, nothing comes close to an authentic Italian Neapolitan pizza.
Whilst there are no strict rules for the production of American style pizza, this is not the case for Neapolitan style pizza. There are strict guidelines set out by the Neapolitan Pizza Association (AVPN). Pizza cannot be officially classified as Neapolitan unless it closely follows he rules.

I suppose this could be compared to the production of Champagne. In order to be officially called Neapolitan, the pizza maker has to use traditional ingredients and methods.
I can understand why to some people this may seem pretentious. But to me, this is a great thing because it protects the Neapolitan pizza and prevents it from dying out. For myself, and many other people who have tried it, Neapolitan pizza is the ultimate.
Keep reading to find out how Neapolitan pizza is different to other types of pizza. Alternatively, feel free to click here to jump to the recipe.
The key characteristics of a perfect Neapolitan pizza are a really thin base with a crispy but light and airy crust. The classic Neapolitan pizza is the Margherita. This is typically topped with tomato sauce, fresh mozzarella cheese, fresh basil, and extra virgin olive oil. Parmesan cheese is also a popular addition as well as many other ingredients.
Meat is not actually a common ingredient in Neapolitan pizza, with cheese being the star of the show. However, there are many more Neapolitan style meat pizzas around today. The most common meat is generally some form of Italian salami.

The other main characteristic of an authentic Neapolitan pizza, the true classic, is that it’s wood fired. This means that it’s cooked in a traditional pizza oven that uses wood as fuel.
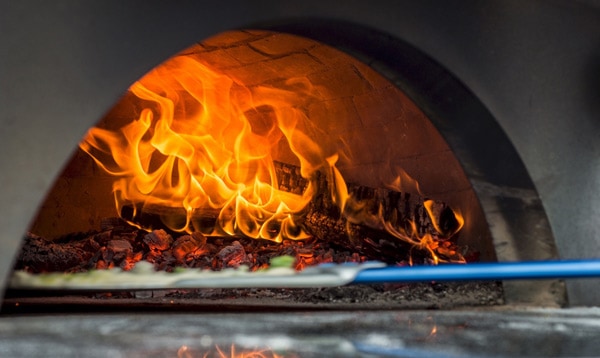
The flames lick over the pizza as it’s cooking, producing some charring and a slightly smoky taste, not unlike barbecuing. What’s more, the extreme heat produced allows for oven temperatures of up to 500 degrees Celsius (over 900 degrees Fahrenheit)!
To find out more about exactly what wood fired ovens are all about, check out my article on wood fired pizza here.
This extreme heat allows for exceptional rise in crust, allowing for a crispy yet light and soft pizza at the same time! It really is pizza heaven!
Next, I’ll talk a bit more about one of the keys to making truly authentic Neapolitan pizza – the pizza oven. You can always click here to jump to the recipe if you prefer.
Well, yes and no. A traditional brick wood fired oven is very large and heavy, and expensive to buy or construct. So in that sense they probably are impractical for most people.
However, there are many affordable and compact pizza ovens on the market these days. For example the excellent range of pizza ovens made by a company called Ooni.
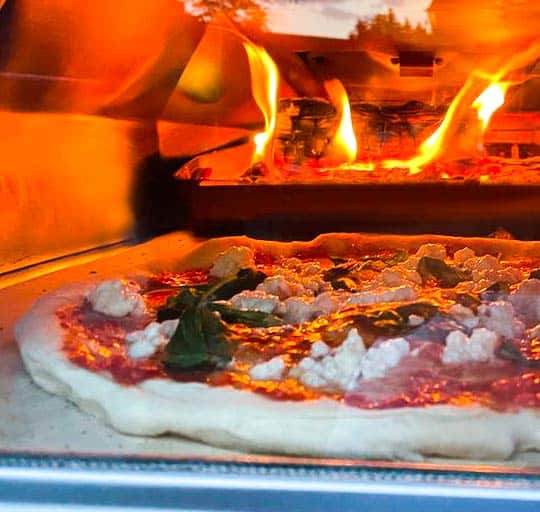
They are small, portable, and reasonably priced. What’s more, they make amazing pizza! They reach temperatures of 500C/900F and cook Neapolitan style pizzas in under 90 seconds!
They have both gas and solid fuel options depending on your preference. I have one that runs off wood pellets and wood than runs off wood or charcoal. I love them both. It can be more time consuming managing the fire, which is why some people prefer the gas ones.

Excellent pizzas can still be made in a regular oven but in my view they can’t match a pizza made in a pizza oven!
The only downside is that you’ll want to eat lots of pizza!
By clicking any of the Ooni links, you would be supporting this website. I’ve been using their ovens for a long time now and I wouldn’t recommend them if I didn’t believe in their products.
For me, what makes a Neapolitan pizza is that it’s made with quality ingredients, time tested methods, and artisan techniques. But most of all, it’s the fact that it’s made with love! When you make Neapolitan pizza, the perfect Neapolitan pizza, you make it with a passion!
Many people say “isn’t pizza just pizza?”.
Well… No! It isn’t!

It’s not just pizza, it’s a taste and texture sensation that’s amongst the most rewarding foods in the world to make and eat.
The dough is always made from scratch with the best quality ingredients. Also, the pizza is always shaped by hand using traditional methods.
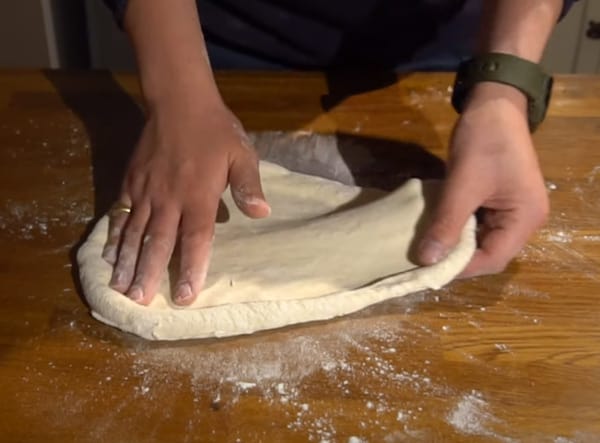
This approach, along with a long proof time, allows for exceptional flavour and texture in the dough. It can be compared to artisan sourdough bread making. In fact, you can also make Neapolitan pizza with homemade sourdough!
Feel free to check out my sourdough pizza articles here if that’s something you’re interested in.
Neapolitan pizza is not typically thin crust. It tends to have a thin base with a large, well-risen crust. The thin base is extremely important as it allows the pizza to become crispy and soft at the same time.
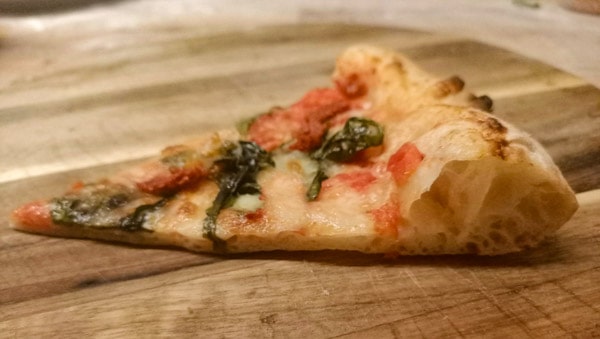
Also, since the pizza is cooked at very quickly (less than 90 seconds) a thick base often leads to undercooked dough.
If you are thinking of thin crust pizza, you are probably thinking of a style called Romana pizza (Roman pizza).
However, Neapolitan pizza has a thick crust, and is not to be confused with the very crispy and thin crust Romana pizza.
Both Neapolitan style pizza and Roman style pizza are renowned for their excellence. A Romana pizza appeals to those like a really crispy thin crust and a Neapolitan pizza appeals to those that like a thicker crust that is soft in the middle but still crispy on the outside.

For me, the Neapolitan pizza is the best as you get the really thin base with a crispy crust, but with the added benefit of a soft, baguette-like interior to the crust.
Of course, this mostly comes down to personal preference. I think everyone should try both styles of pizza before deciding which they prefer. Both Neapolian style and Roman style pizzas are delicious!
First the dough is made, and often mixed by hand. Then the dough is proved for around 24 hours. Yes, I know this sounds like a long time but it makes for a much tastier dough with an improved texture.
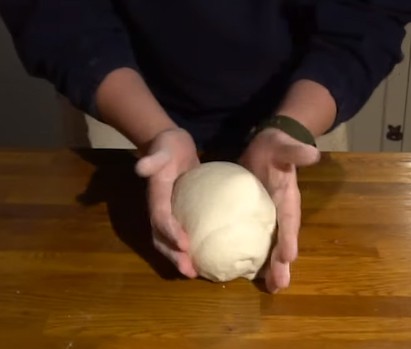
Then the dough is balled, before being shaped into a pizza, topped, and then loaded into the oven.
I’ve been working on a Neapolitan pizza from scratch series which features videos. Feel free to check it out if you like learning by watching.
All great dough starts with quality flour and Neapolitan pizza is no different. The best type of flour to make Neapolitan pizza is generally considered to be 00 flour.
00 flour (double zero flour) is an Italian flour which is finely milled (this is what 00 refers to). This leads to a very soft dough that produces a pizza with a delicate, easy to eat, texture.
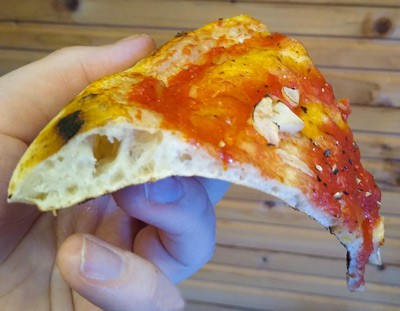
Typically, the best flour to make Neapolitan pizza is not just any 00 flour. Generally, specialist 00 pizza flour is used. These 00 pizza flours have been formulated by the producers to produce the ideal characteristics in pizza dough.
Flour for Neapolitan pizza should produce a stretchy and strong dough. This is because the pizza has to be stretched very thinly and proofed (fermented) for a long time.
Probably the most commonly available “professional” 00 pizza flour is called Caputo Pizzeria. It is made by a company called “Caputo” is used by many Neapolitan style pizzerias. I have used this flour for a long time so I feel like I’m in a good position to recommend it.
You can often get Caputo flour on Amazon, click here to check. If you can’t get Caputo any 00 or 0 pizza flour should work well. They are finer flours that also create a lot of strength and stretchiness in the dough.
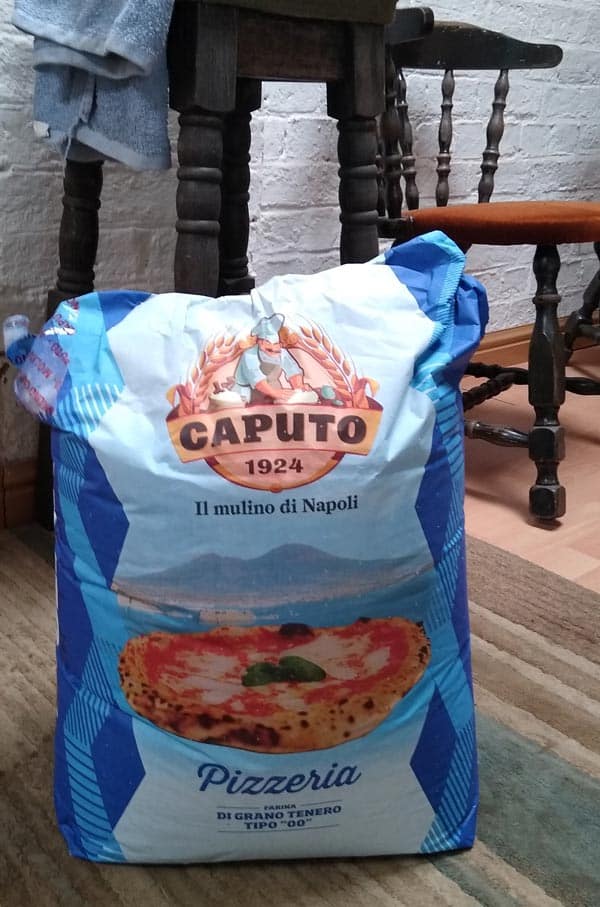
Buying a large chef bag usually offers the best value but you can often get small 1kg bags too. If you make pizza fairly regularly though you’ll probably get through a bag before it’s use by date (probably 8-12 months). I also use it to make fresh pasta.
As with any great pizza, or bread for that matter, the magic ingredient is yeast! There really is no substitute for yeast, it makes the pizza rise and gives it lovely light and airy crust. Fortunately, you can make amazing Neapolitan pizza with instant yeast that is easy to get hold of.
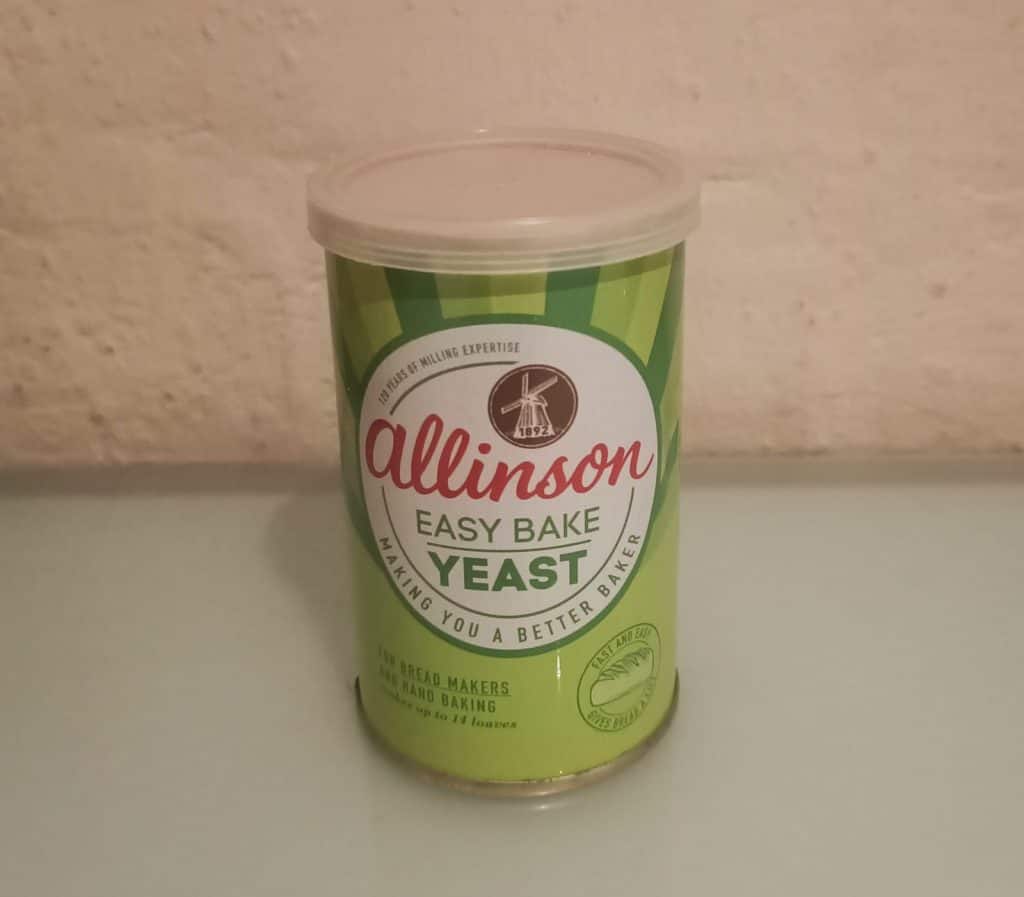
You won’t need a lot, just 1 tub will be fine. This is because when we make Neapolitan pizza with instant yeast we only use a tiny amount, due to the long proof time.
Instant dried yeast is really easy to work with and usually lasts for many months in a cool cupboard or the fridge. Even if you intend on using a different type of yeast, it’s always good to have some dried yeast as a backup.
The other type of yeast that I recommend is fresh baker’s yeast. It’s also known as cake yeast because of it’s consistency (not because it’s used in cakes!). I find that this yeast produces a little more flavour in the dough but it doesn’t keep as well. Although, you can freeze it.
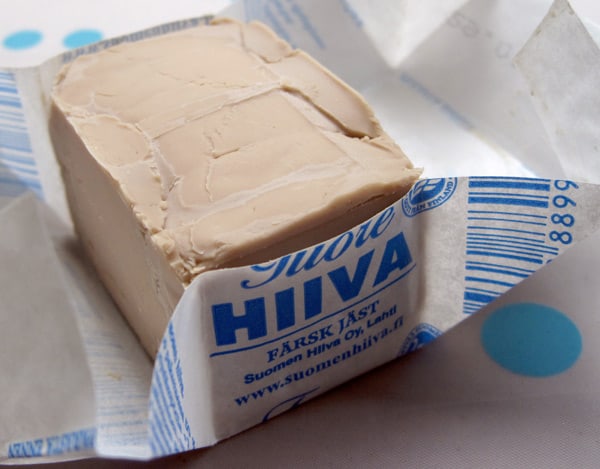
In general, an easy recipe conversion is to multiply the dried yeast required by 3 to get the required fresh yeast.
Most authentic Italian pizzas are typically topped with some form of cheese. The most common cheese is Mozzarella, closely followed by Parmesan. In fact, the two are often used together.
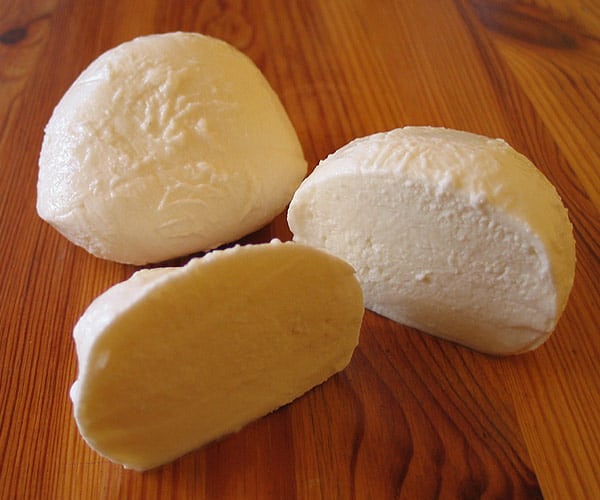
Only good quality, fresh cheese is used, which is typically much more tasty and nutritious when compared to the cheese used on American style takeaway pizzas.
Fortunately, delicious mozzarella is fairly readily available these days. It may not be available from Amazon, but you should be able to get some from a supermarket.
Mozzarella often comes in a bag with a brine solution to keep it fresh. The only downside is that you need to remove the moisture from the mozzarella to avoid a soggy pizza. The quickest way is by using kitchen paper.
However, you can also buy dried (low moisture) mozzarella which has an ideal moisture content for pizza. This is defeinitely the easiest way to go, although it’s not strictly speaking traditional. This type of mozzarella is more commonly used on New York style pizza.
Click here to check out my recipe for New York pizza.
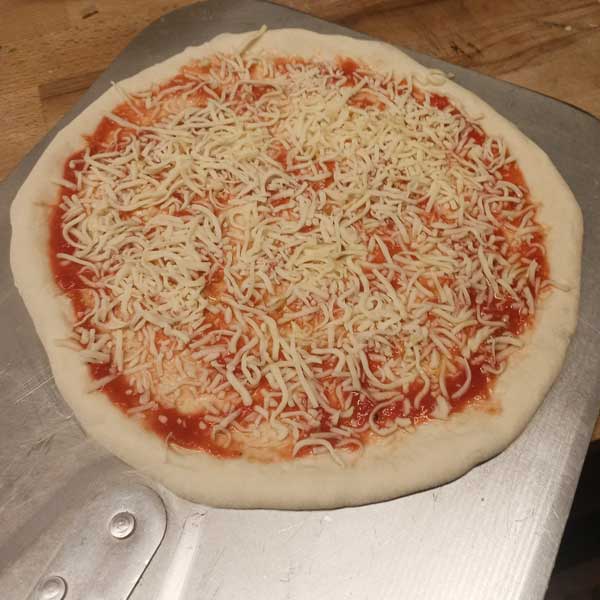
Dried, or low moisture, mozzarella is great for beginners since it prevents soggy pizza. It’s usually available on Amazon too, which is handy.
Parmesan is also fairly readily available. Parmesan or Parmigiano Reggiano, to give it it’s real name, usually comes in a little packet in the shape of a wedge. Click here to check if it’s avalable on Amazon.
You can add parmesan before or after cooking, or both! Simply grate it up and sprinkle it on.

Where mozzarella provides great texture, parmesan is all about the flavour. For me, it adds a lot of richness to a pizza and I rarely leave it out.
Whilst Neapolitan pizza is not necessarily a healthy meal, in comparison to a takeaway pizza, it is typically considered a much more nutritious meal. Check out my article here about this to find out how healthy Neapolitan pizza really is.
For instance, unlike the American style pizza, Neapolitan pizza dough does not contain sugar or oil. In an American style pizza, the sugar and oil is used to encourage browning on the crust, since the pizza is cooked at a much lower temperature.
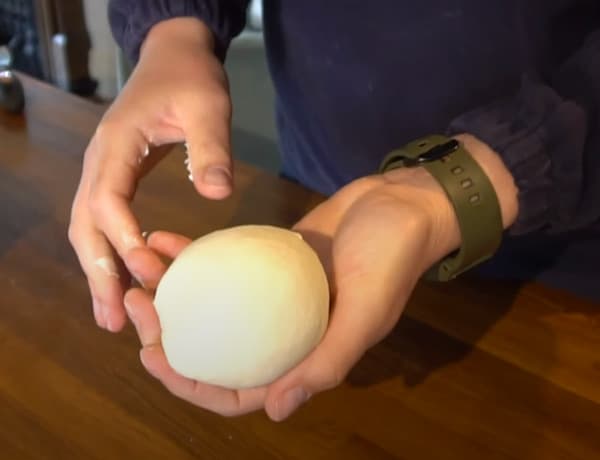
An authentic Neapolitan pizza dough, on the other hand, is made with just 4 ingredients! Flour, water, salt, and yeast.
What’s more, the simple yet perfect Neapolitan pizza sauce doesn’t contain any added sugar. It contains just tomatoes, salt, and pepper. Whilst this may not sound that exciting, only the best tomatoes are used to produce a wonderfully bright and fresh sauce.
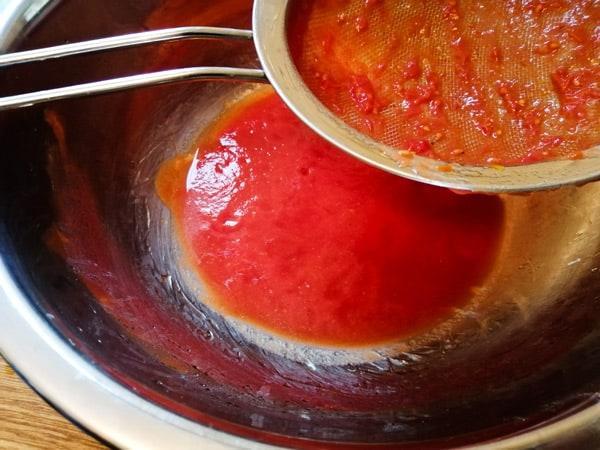
Also, a Neapolitan pizza has much less toppings on. One of the reasons why an American style pizza is thicker is so that it can support the extra weight of the toppings.
Since the base is so thin on a Neapolitan pizza, a much more modest amount of toppings are required. In addition, the quality of the dough in a Neapolitan pizza is allowed to shine. Ensuring that the toppings do not overpower the taste of the dough is a key part of the perfect Neapolitan pizza.
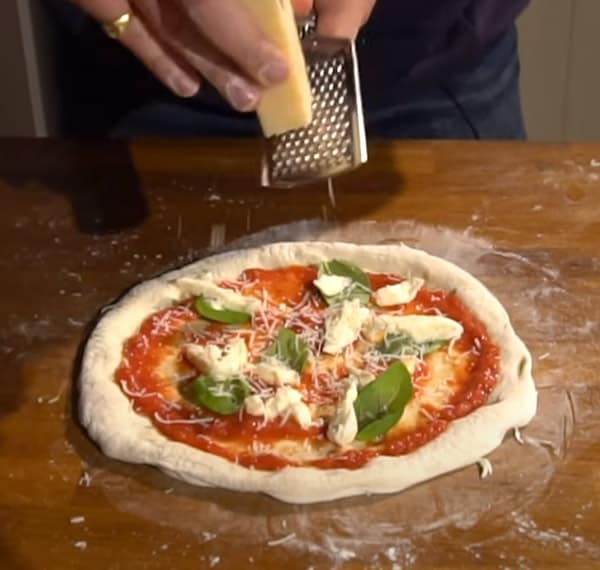
For some great healthy topping ideas, check out my article on authentic Neapolitan pizza toppings here.
For more information on the healthiness of Neapolitan pizza, and a breakdown of the calories, check out my in-depth article here.
For the perfect authentic Neapolitan pizza, which is cooked in a wood fired oven, the cooking takes just 90 seconds! This is due to the extreme temperatures inside a wood fired oven, which reach up to 500 degrees Celsius (900 degrees Fahrenheit)!

For true Neapolitan pizza, you need to use a pizza oven. You simply cannot replicate the extreme heat and open flames in a regular oven. I can highly recommend the Ooni pizza ovens – this is what I use and the pizza they produce is incredible.
Ooni offer a range of affordable pizza ovens including solid fuel and gas. They can all replicate true Neapolitan pizza, cooking the pizza in as little as 60 seconds!
For more information, check out my article on whether pizza ovens are worth it here.
However, there’s nothing stopping you cooking Neapolitan style pizza in a home oven. It won’t cook quite the same but you can still make delicious pizza. It is important to get the oven and baking tray/baking stone as hot as possible before loading the pizza.
One recommendation I have is getting a quality pizza stone. These retain heat better than a baking tray and should provide you with a better cook in a regular oven.
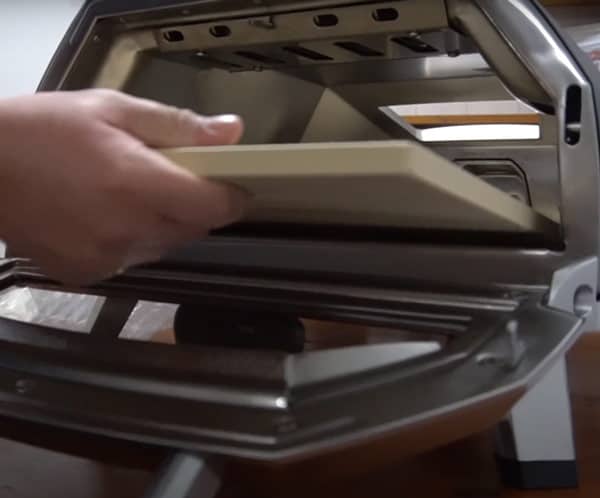
A pizza steel (basically a steel stone – if that makes sense?!) can be a good option for your home oven too. The good thing about a pizza steel is that it’s virtually unbreakable. Stones can break unfortunately, especially when you’re taking it in and out of the oven regularly.
In a home oven, a Neapolitan style pizza will probably take around 6 – 9 minutes.
For more information on cooking in a normal domestic oven, check out my article here.

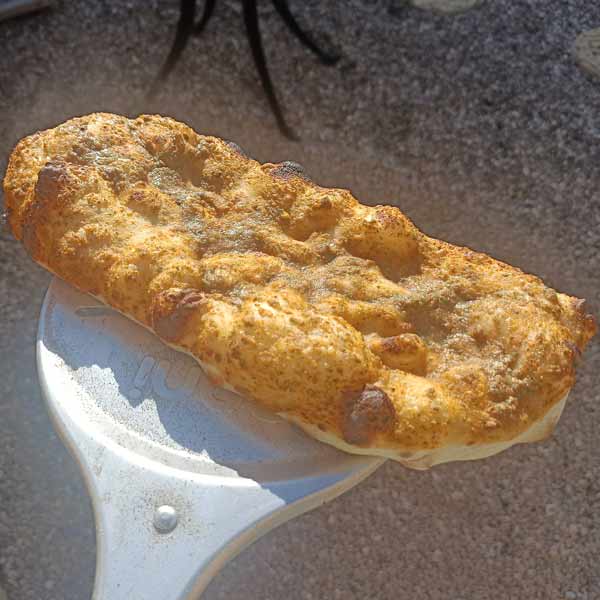
On the pizza above, I added some Prosciutto, which is Italian cured ham. This is a nice option for those meat lovers out there. I’d still recommend trying a Margherita first though, it’s the classic for a reason!
Note: For authentic Neapolitan topping ideas, check out my article here.
Should an Authentic Neapolitan pizza be eaten with a knife and fork or by hand? This is a maybe pointless (excuse the pun) debate, but it is hotly (do not excuse the pun this time) contested.

In truth, this will largely depend on the particular setting. But for the most part, you can eat your pizza with your hands without worrying. And this is definitely my favourite way of eating pizza! This is also the way it is traditionally eaten in Naples, the birthplace of pizza!
In many pizzerias and restaurants, the pizza is served unsliced, with a knife and fork. In which case you can always cut the pizza into slices yourself and then eat it with your hands.
This is partly done to save time slicing the pizza. But also, the pizza slices better when it has cooled a little.
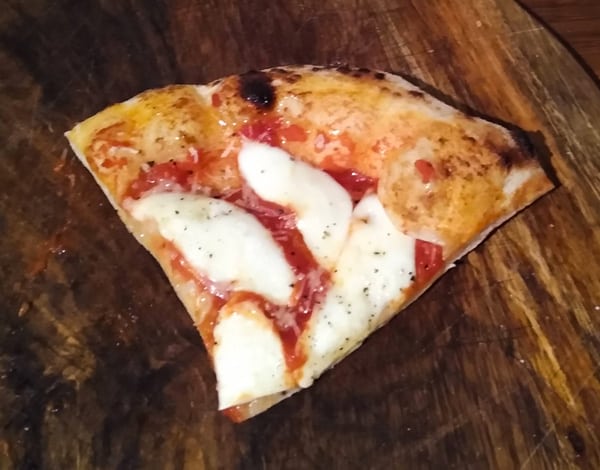
If the pizza is served with a pizza slicer then I think it’s definitely safe to assume that the pizza is expected to be eaten with the hands.
Some Italians prefer to eat pizza, when it is served as a meal, with a knife and fork. However, many italians also prefer cutting it into slices and then eating it.

I would just do whatever you feel comfortable with. If you are in a very posh restaurant you may want to eat it with the knife and fork (or you may just not care).
You could always ask the waiter to slice your pizza for you when you order it and gauge the reaction. Many restaurants are happy to slice the pizza before serving it if requested.
Personally, I’ll always slice it and eat it with my hands!
This is another controversial question for many people! Should a pizza slice be folded or not?! In truth, it is a widely accepted and popular way of eating Neapolitan pizza.
Because authentic Neapolitan pizza is very thin and a bit floppy, it folds very easily. Often, if it isn’t folded, the toppings will slide off and it could be a messy experience!
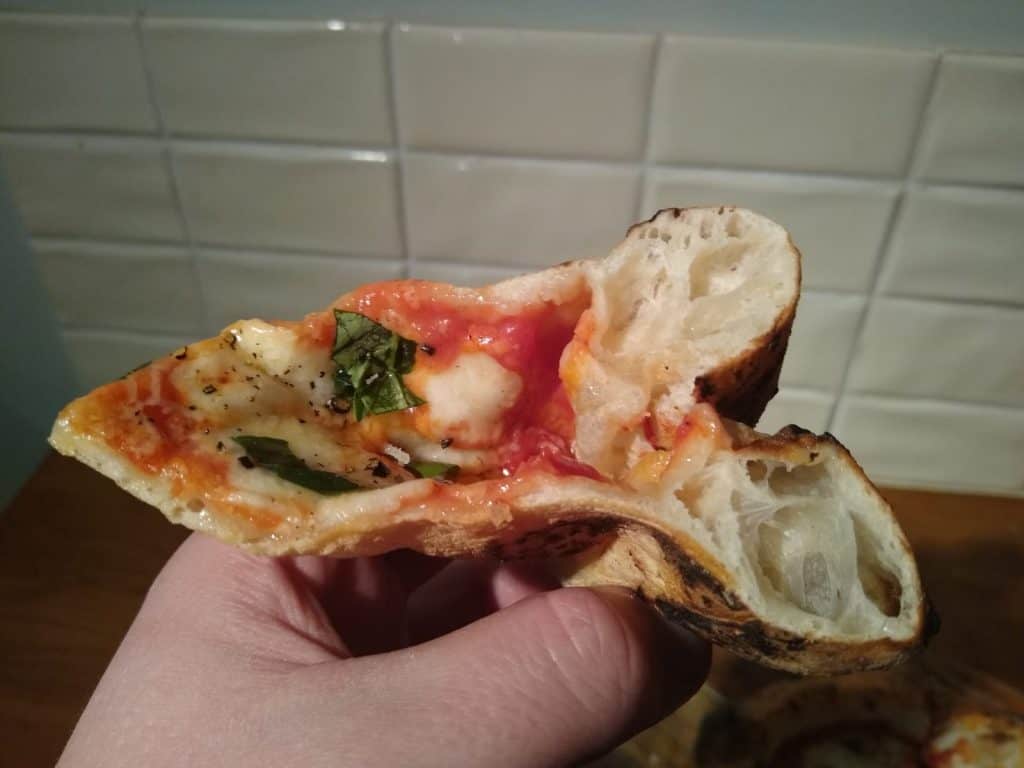
Folding it is my favourite way of eating Neapolitan pizza. I highly recommend you give it a go! After trying out this recipe below of course!
With that said, let’s get into the recipe.
How To Make The Perfect Neapolitan Pizza

Makes 4 x 10 inch pizzas.
With 00 flour (recommended):
Note: Caputo 00 pizza flour is an excellent option, especially for Neapolitan style pizza. It is one of the more widely available “professional” pizza flours. I have provided a link to it on Amazon below (a large chef’s bag). Aside from this flour, most 00 flours should work fine.
With Strong white bread flour (decent substitute for 00 flour):
Note: Any high protein white bread flour should be a decent substitute for 00 flour. Ideally you want a protein content of around 12% – 14% (sometimes shown as 12g – 14g per 100g). I’ve provided a link to a strong white flour on Amazon below (a large chef’s bag).
Not all the following utensils are required but these are what I use and they tend to make the process much easier.
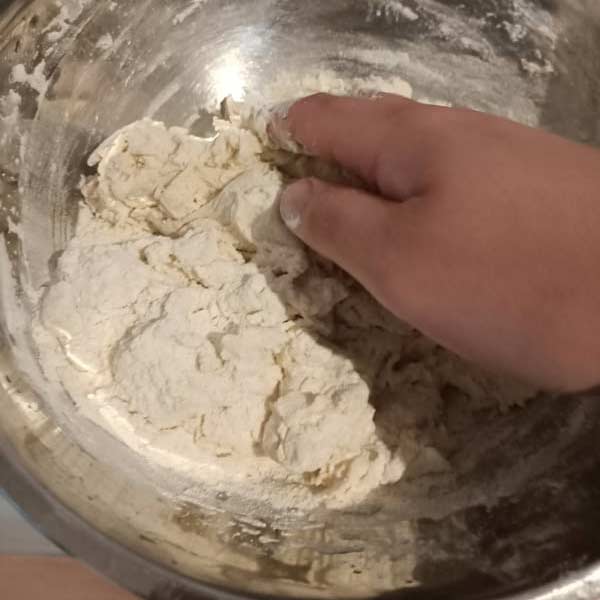
Any large bowl could be used for mixing the dough but I like using the metal ones since they’re lightweight, stackable, and easy to clean.
Click here to check out metal mixing bowls like the ones I have on Amazon.
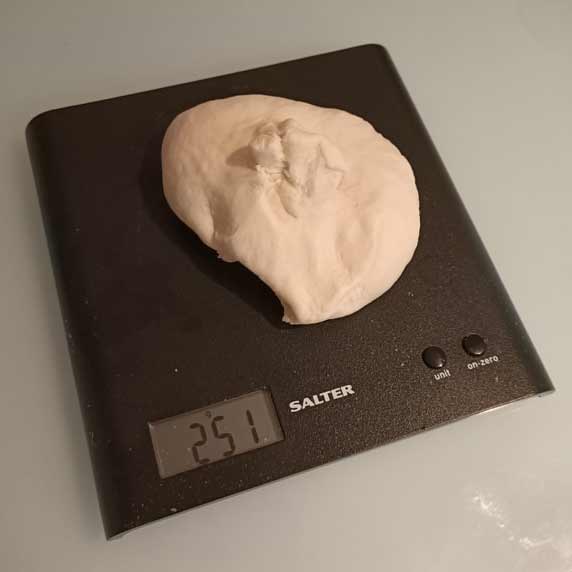
These are affordable, easy to use, and precise (accurate to 1g). I don't recommend using cups as measurements as they are inprecise.
Click here to take a look at the type of digital scales I use on Amazon.
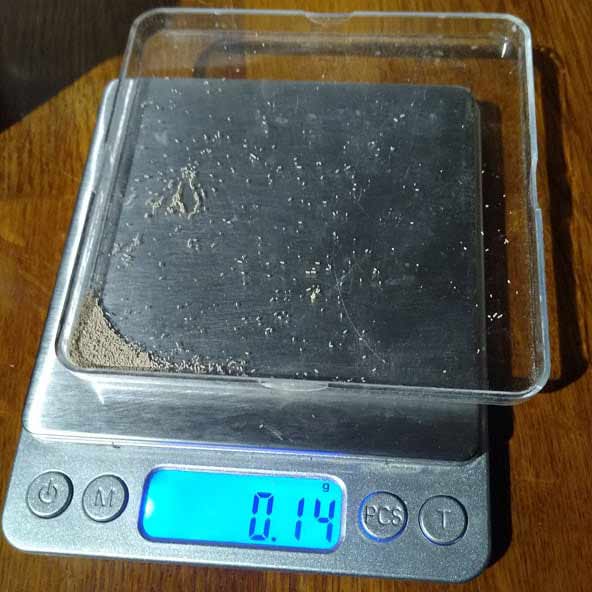
These kitchen scales are accurate to 0.01g and are perfect for measuring the tiny amounts of yeast needed for long proves.
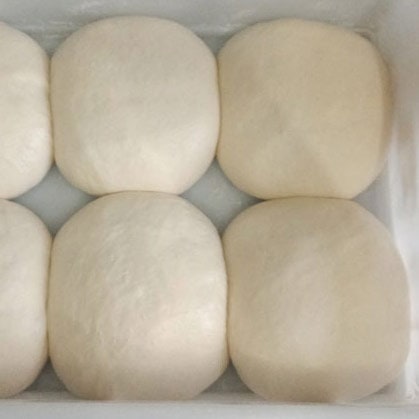
Pizza proofing boxes are an excellent investment. They are airtight and they make taking the dough out for shaping very easy.
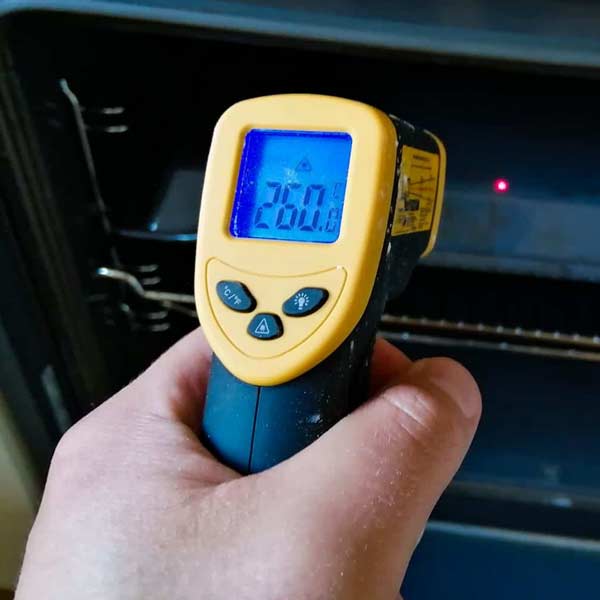
An infrared thermometer allows you to instantly check the temperature of the stone, ensuring it is within the ideal range.
Click here to check out a pizza peel similar to the one I use on Amazon.
A 12 inch peel is ideal for Neapolitan pizza and makes loading and removing your pizza from the oven really easy.
Click here to check out a pizza peel similar to the one I use on Amazon.
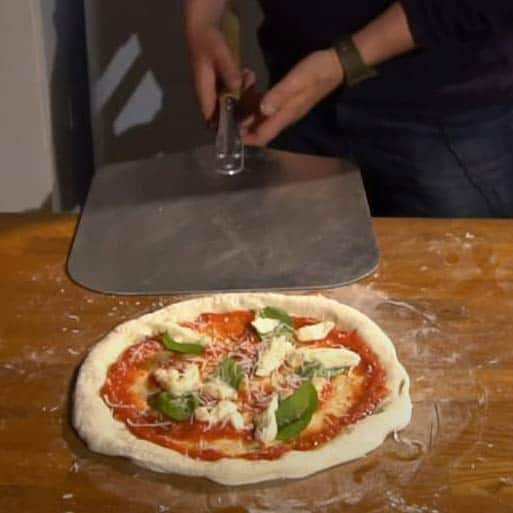
A turning peel is designed for rotating the pizza during cooking. If you're using a pizza oven it should lead to a superior and more even cook.
Click here to check out a pizza peel similar to the one I use on Amazon.
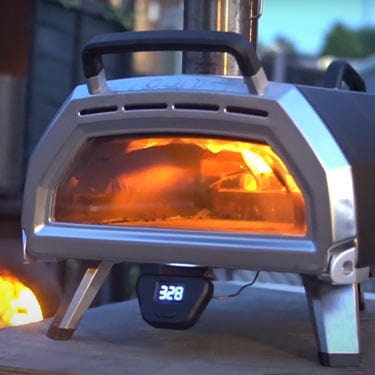
A pizza oven is guarenteed to take your pizzas to the next level. I have an Ooni Karu 16 which reaches 500C/930F and cooks pizza in as little as 60 seconds! A regular oven simply cannot match the cook of a pizza oven. I love my Ooni!
Tips:
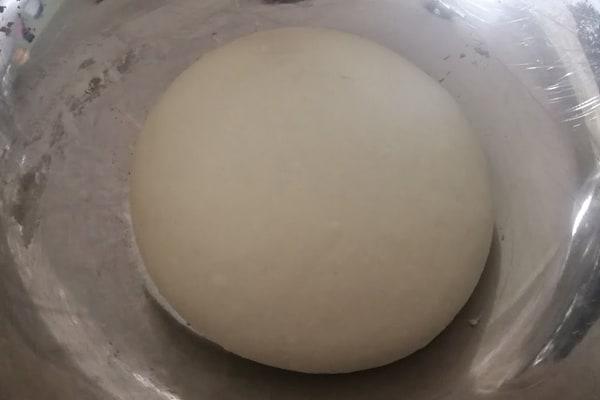
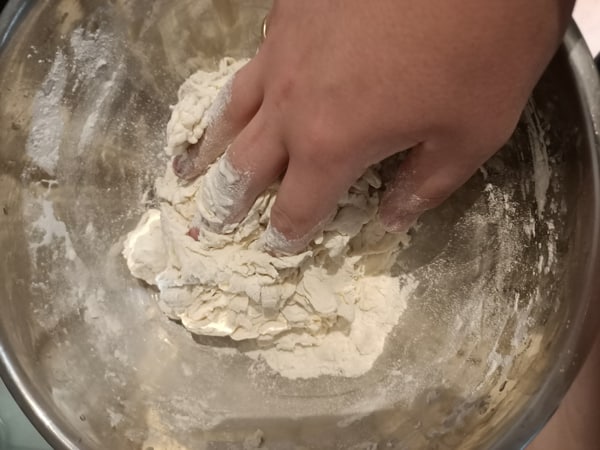
You can check out my article (with a video) on mixing pizza dough by hand here.
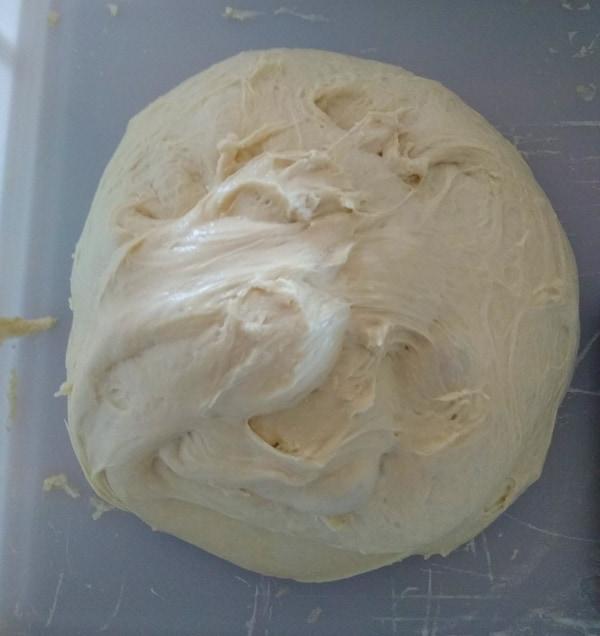
Or you can use a pizza proofing box if you have one
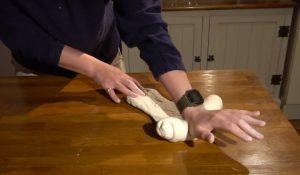
Feel free to check out my article (with a video) on kneading here, it’s easy!
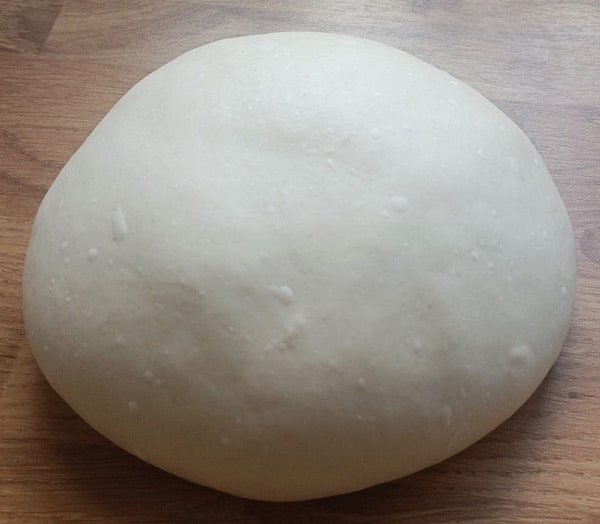
You can round the dough off for proofing if you like but it’s not too important.
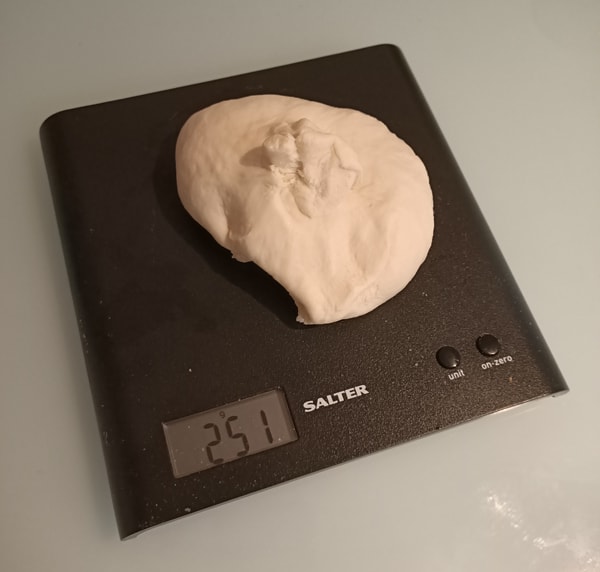
Use some digital scales to weight out your dough balls
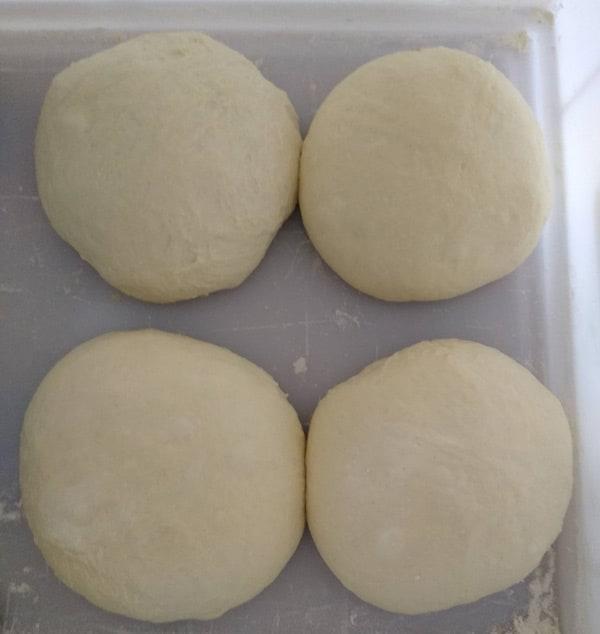
This is where a pizza proofing box comes in really handy if you have one
Tips:

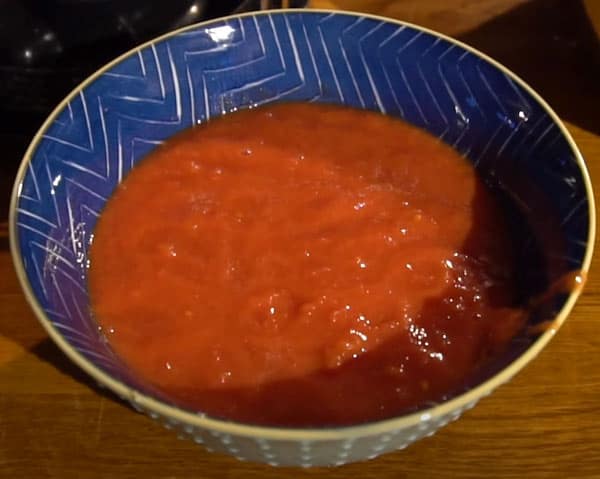
Blending the tomatoes is all you need to do, cooking is optional.
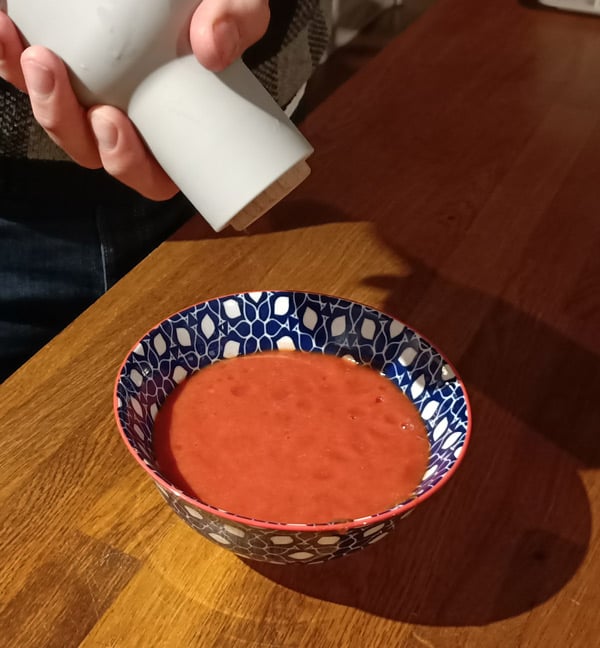
Don’t forget to generously season your sauce to taste.
Tips:
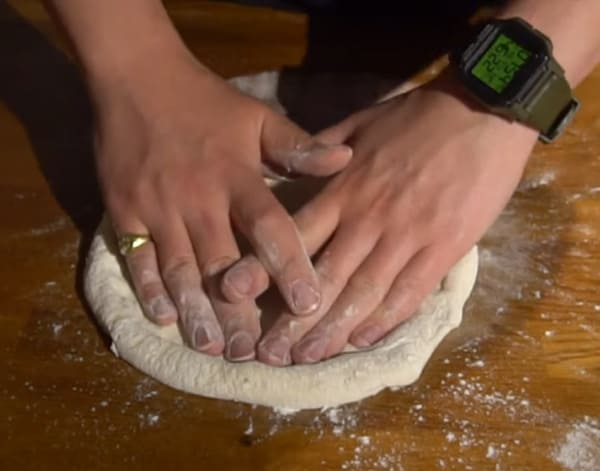
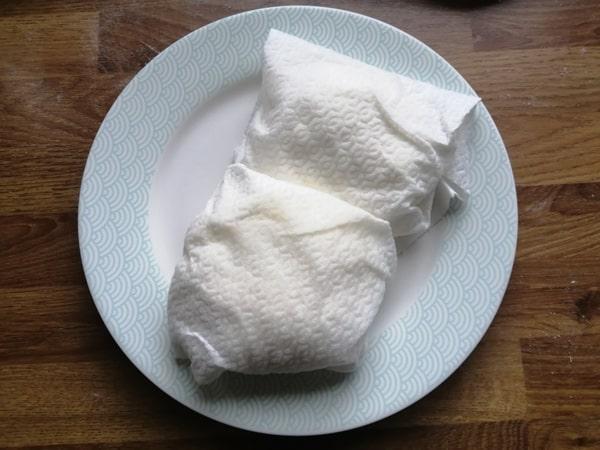
Removing some of the moisture from mozzarella prevents soggy pizza.
Directions for shaping/cooking:
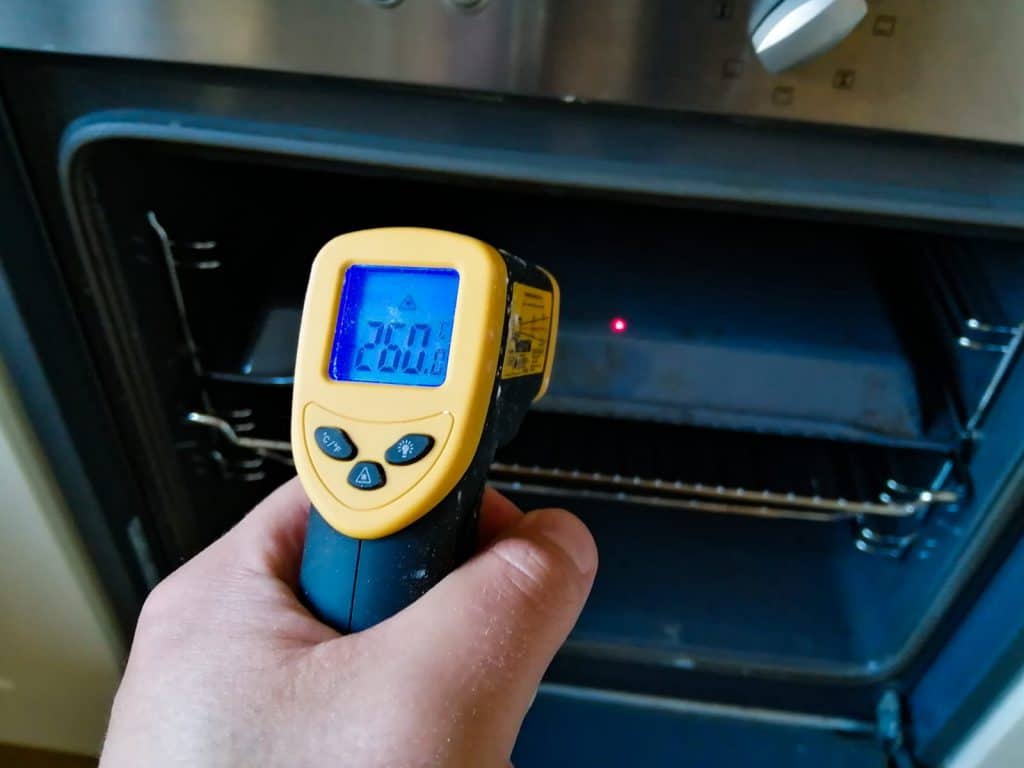
With a regular home oven, it’s probably a good idea to turn the oven to full temperature

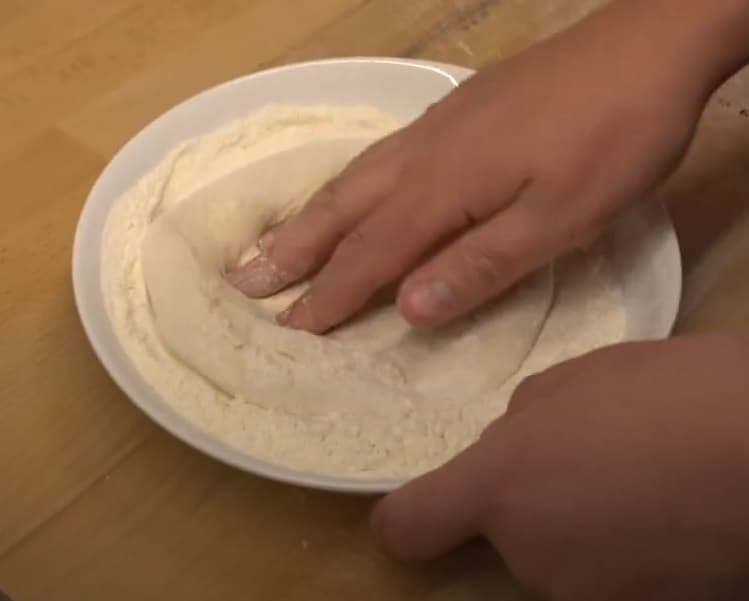
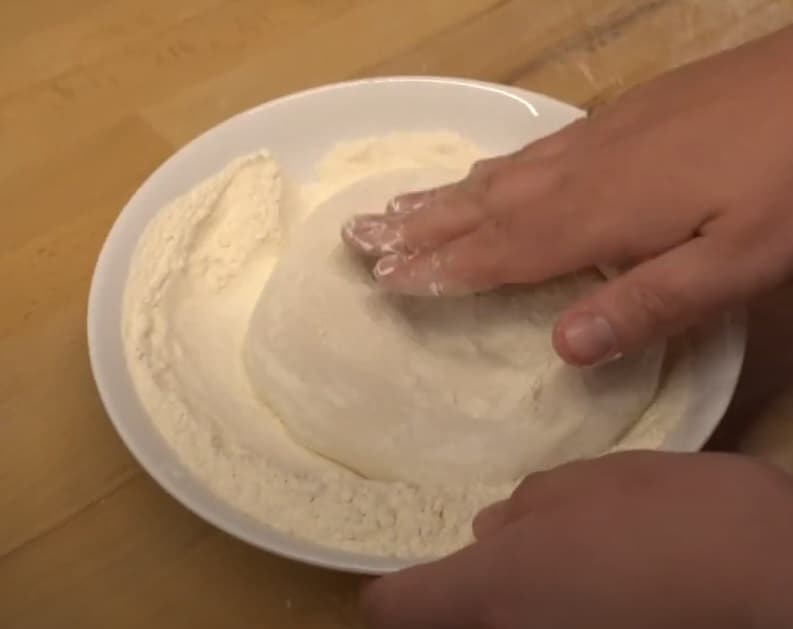

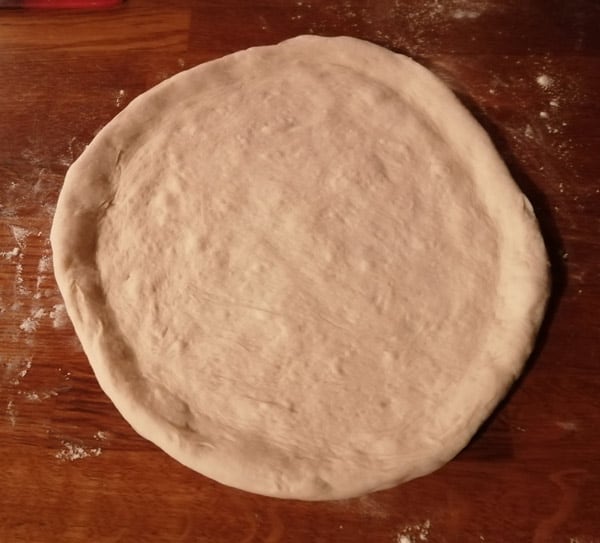
Try to get a nice round shape but don’t worry if it’s not perfect.


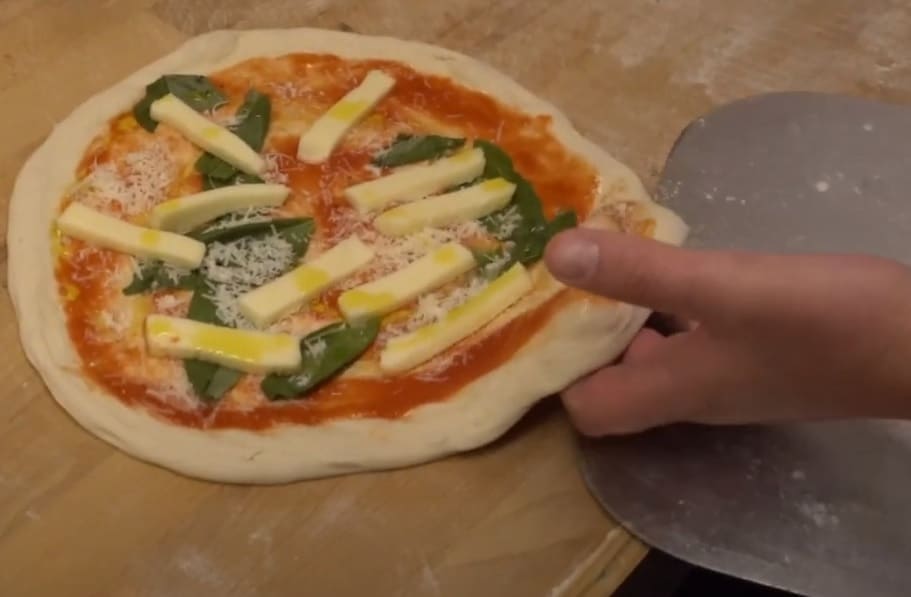
A pizza peel is a massive help for transferring the pizza to the oven.
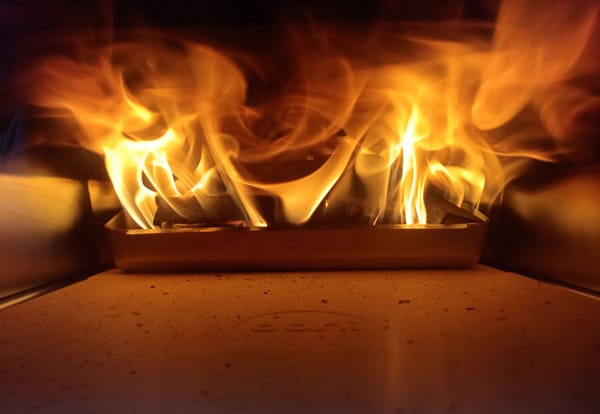
My Ooni pizza oven cooks pizza in just 60 – 90 seconds! I’ve provided the link to my specific pizza oven below – The Ooni Karu 16 Multi-Fuel Pizza Oven.

Look at that! Delicious!
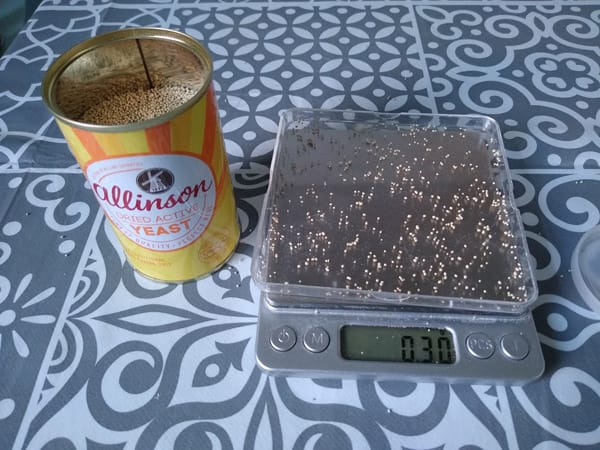
You can pick up some scales like these cheap online
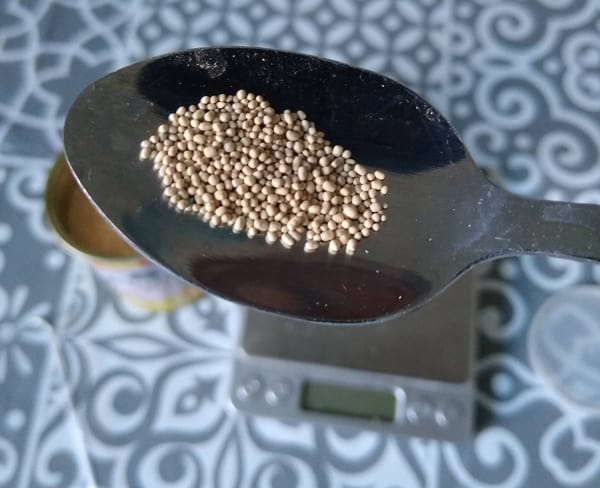
This is what 0.3g of yeast looks like on a teaspoon
Keep reading for more detailed explanations of the techniques used in this recipe.

Making delicious authentic Neapolitan pizza is not easy! However, it is an incredible taste and texture experience. What’s more the whole process is really fun so just enjoy the journey!

I’m Tom Rothwell and I’m super passionate about all kinds of homemade pizza! In the last few years I've been on a quest to find the perfect pizza. Now I'm sharing what I've found out with the world!

If you're interested in hiring me for your event in the UK, feel free to check out my website with the link below.
Pizza Catering
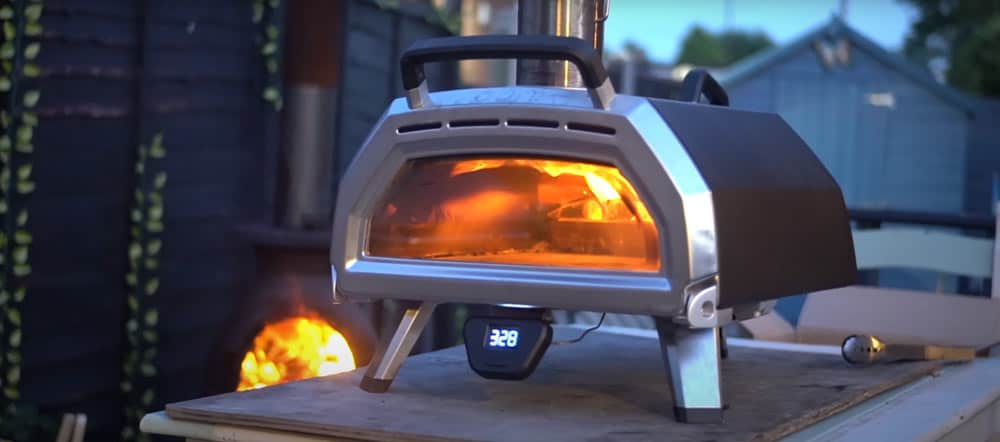
I often get asked what type of oven I use for my pizzas. Well, I use a pizza oven made by a company called Ooni.
The range of pizza ovens that Ooni offers is just brilliant. They cover all bases, and all price points. There's affordable and portable models such as the Fyra 12 Pizza Oven and then there's state-of-the-art models such as the Karu 16 Pizza Oven pictured below.
In all honesty, I would say that the oven makes a huge difference. If you're looking to make authentic Italian pizza, a pizza oven is a must.
By clicking the link below and purchasing from Ooni, you would be supporting this website. I've been using their ovens for a long time now and I wouldn't recommend them if I didn't believe in their products.
Time to make some amazing pizza!

I’m Tom Rothwell and I’m super passionate about all kinds of homemade pizza! In the last few years I've been on a quest to find the perfect pizza. Now I'm sharing what I've found out with the world!

If you're interested in hiring me for your event in the UK, feel free to check out my website with the link below.
Pizza Catering
Should the dough be left to prove in the fridge or at room temperature? (20 hours at room temperature sounds…risky)
Thanks for the question Dean and yep, 20 hours at room temperature is correct (we are only using 0.3g dried yeast). You can prove in the fridge if you prefer but you’ll need almost 10 times the amount of yeast, so about 3g or just less.
I’m going to write an article soon about a pizza app that I use for adjusting yeast. I have mentioned the app and explained it a little at the bottom of my no knead dough recipe here.
Why do you use bread flour in the linked recipe instead of 00 flour?
Isn’t 00 always better?
Hi Elie, I included Strong White Bread Flour as a decent substitute to 00 flour. It’s easier to get hold of so I know everyone can make the recipe.
But yes you are right, 00 flour is generally better for Neapolitan style pizza. Because it is more finely milled, a better texture can usually be achieved. But the protein content of both flours is very similar, which is why Strong White Bread Flour makes a decent substitute.
It is also worth mentioning that even the same types of flour vary massively. It’s possible you could get a 00 flour that makes poor pizza and a bread flour that makes great pizza.
Where possible, I recommend getting a good quality Italian 00 pizza flour. It may be a little more expensive but it will offer more potential. By sticking with the same flour you will then be able to perfect your pizzas much easier.
When bread flour is used I recommend a slightly higher hydration, which is why the recipe I have included for it is slightly different.
Hope this answers your question!
Fantastic article thanks.
No worries David, thank you for the appreciation!
Tom,
Thanks for all the details. Would you use warmer water when working with shorter proving times? I’ve seen other recipes where instant dry yeast is mixed with warm water prior to adding in with salt flour mixture. I’ve also been warned that salt can have adverse effects on yeast if it is not fully activated when mixing. Any thoughts?
Hi Tyler, thanks for the questions. You can use room temperature water but I wouldn’t recommend using warm water. If the water is too warm it can kill the yeast.
Also, if you have active dried yeast then yes, it will need to be activated first. Simply stir it into some room temperature water and leave it for 5-10 minutes.
If you have instant dried yeast then you can add that straight to your flour without the need to activate first. And I wouldn’t worry about the salt. As long as you don’t mix it directly with the yeast, you will be fine. Cheers
Hi.. I tried cooking on 500F in conventional oven onw lower rack, top was nicely done in 7 mins but bottom was not completely done.
Next one I broiled for 3 mins on top rack and top was very nicely done but same with bottom, not fully cooked even after cooking further on 500F on lower rack for 2 mins. Any suggestions?
Hi Neha, it sounds like your baking tray wasn’t hot enough. Make sure to preheat your tray for at least 30 minutes. Also, consider using a baking stone as this will help with the cooking of the bottom of the pizza. But again, be sure to preheat your stone for at least 30 minutes. Good luck!
I usually cook my pizza’s in a hot frying pan first and then slap it under the grill/broiler to finish it off.
Giving this dough recipe a whirl tonight, looking lovely already though.
Am I able to freeze the two spare balls I have?
Hi Samuel, I haven’t actually freezed any dough myself as I enjoy making it fresh. If I have any leftover dough I usually ball it up again and put it in the fridge to use the next day.
Feel free to experiment with freezing though, I hear some people have had decent results with it.
Oh fair, I’ll let you know how I get on with the frozen batch. The two that didn’t go in the freezer turned out ace though, best recipe I’ve found so far!
Awesome! I’m glad they turned out well!
Hi Tom , how much yeast do I need to make more pizzas (like 12-16 )?
Hi Roberto. You can simply multiply all the ingredients by 4 to make 16 pizzas. So you will need 1.2g of yeast. I’m planning an article on doing pizza parties as they’re not easy! Good luck!
Hi Tom, greetings from India! I made the pizza using your recipe and it turned out much better than all the others that I tried BUT with one issue. The crown is harder than I would like it to be. Can I add a little oil while making the dough? I’m planning to make another batch today and would appreciate a quick response. Thanks in advance, Mrs Swapna Thomas
Hi Swapna, I got back to you as quick as I could. If you find your dough is drying out when you are proving then you can try spreading a little oil over the dough. Although the issue may be that your container is not airtight. But by all means try a little oil. Thanks for the question. Tom
Hey Tom,
Thanks for all your info. Unfortunately I don’t have a pizza oven, so I was wondering: after preheating the stone at the highest bake setting (500f) for 30 min or more, would you ever recommend switching to BROIL on high at any point?
Hi Tyler. I have not experimented with the broil (I think this is what we call grill in the UK) setting actually. But I did make a lot of pizzas in the oven before buying a pizza oven. I had excellent results just using the oven and never using broil.
I had both top and bottom elements turned on as well as the fan. I also placed the baking stone on the top shelf so it was close to the top element. This ensures excellent heat distribution and retention and is closer to the way bread would be baked. Being close to the top of the oven provides some direct heat from the top element (and gets a better cook on top). It also allows the pizza to cook in the steam that builds at the top of the oven to help with the rise of the crust. I think that since we are cooking at lower temperatures, it makes more sense to cook the pizza like you would bread.
Of course, all ovens are different and you may find yours makes excellent pizzas on broil. It may be worth experimenting with broil if your oven allows the use of this setting with the door shut, I know some don’t. Broiling with the door open would probably not be good as the stone/tray would lose heat quickly.
Personally, I would just work on getting your pizzas as good as possible on oven setting at highest heat, preheated, with fan on, and with stone near top of oven. Once you have this down then it may be worth experimenting with broil.
Good luck!
Hi Tom,
As you advised proofing at room temperature for 24 hrs, would it be the same given the weather in India..Won’t the dough get spoiled ?
Hi Khushi, I assumed a room temperature of around 20C/70F. If your room temperature is much higher than this then you will need to use less yeast, and vice versa. There is a mobile app I like to use called PizzApp+ which helps with yeast quantities for different room temperatures, amongst other things. I plan to write an article on this soon but I did write a small section on it at the bottom of my Easy No Knead recipe which you can check out here.
Thanks for the question and good luck! It’s cold at the moment here in the UK!
Hi Tom,
Thanks for the pizzapp, I have questions on it. I am trying Neoplitan pizza, I have been unsuccessful twice. I live in India current room temperature is like 26 Celsius. Fridge temp is coming to 12 degree Celsius. I am trying Poolish.
1) How much should 1 ball weigh for 10″ pizza with thick crust?
2) If I wish to do Cold Fermentation for 16 hours, should I use CT Leavening of poolish at 16 hours and CT at 12C?
3) As it is Poolish, should I choose Poolish leavening as same 16 hours?
4) Is Final water temp referring to water section in “Main dough doses”?
5) Do we mix yeast a second time as suggested in “Main dough doses” section?
Thanks.
Regards,
Balaji S
Hi Balaji, I didn’t actually make that app, though I have used it so I’ll try to answer your questions as best as I can:
1) 250g-270g should be good for 10″ with large crusts.
2) As far as I’m aware, all poolish fermentation is at room temperature. Personally, I would stick to this and adjust the RT to 26 degrees (and no CT).
3) In general, I aim for around 10-12 hours poolish leavening but you can do 16 hours if you prefer.
4) With a long prove, water temp doesn’t matter much, I tend to use cold or ideally room temperature water.
5) Personally, I don’t add any additional yeast when mixing the main dough but if you want to speed up the prove you can do.
Finally, have you checked out my recipe for poolish here? If you follow this recipe, I would adjust the yeast to 0.3g in the poolish, instead of 0.6g, to acocunt for your warm 26C room temp. Everything else you can follow along with.
Hope this helps. Thanks for the questions and good luck!
Hi Tom, I just wanted to say thank you for the great step by step instructions, including the very useful photos of the amount of yeast to be used when you don’t have the appropriate kitchen scales and clarifying that the 20-hour prove is done at room temperature and not in the fridge. The dough turned out perfectly, stretched nicely and had a well-risen and fluffy crust after cooking in my pizza oven! I will definitely be using your recipe and methodology from now on. Thank you.
Hi Nadine, thanks a lot for the encouraging comments! It’s great to know that people are finding my advice useful. Keep up with the lovely pizzas and stay tuned for more content!
Hi Tom,
I’ve tried you pizza last week and honestly it’s was very good
I just didn’t leave it to rest enough but this week I’m making it again and made sure it rest 20h+
Just 1 question when coked I noticed the crust was good cooked but the base was still a bit uncooked despite making it thin
Any suggestions?
Thank you for the help!!!
Hi Amel, I’m glad it worked out well for you! It sounds like your oven isn’t hot enough. If you have a pizza oven try to get the centre of the stone up to around 450C/850F. If you are using a normal oven, be sure to preheat your pizza stone/baking tray for at least 30 minutes with the oven on full heat (and fan turned on if it has one).
Good luck!
Hi Tom. Excellent article. I have just purchased an ooni koda gas pizza oven. Would you suggest any adjustments of your ingredient ratios, water temp, or prove time above for the ooni? I plan to try your suggestions as is for now.
Thanks,
Tim
Hi Tim, thank you for the positive feedback.
This recipe is perfect for the Ooni, that’s what I use! They are excellent little pizza ovens.
Also, be sure to check out my pizza school series here. I go through every stage of the pizza making process, with videos too. The first part is on mixing, then I go into kneading and I’ll be bringing out the part on shaping soon.
Good luck!
Wow! I’ve just had my first go making pizza with this recipe. It was delicious!
As I don’t have a pizza stone I used my cast iron tawa and got it as hot as I could on the gas stove before sliding the dough into it, topping it then putting it as close to the grill as possible for a few minutes.
This is a great website – thanks for all your hard work!
Hi James, I’m glad you’re finding the information useful. I have to say those pizzas are an excellent first attempt!
Keep up the great pizzas! Cheers
Hi Tom!
This is a great website and I am going to make this dough tonight. However, if other plans come up tomorrow night, can I refrigerate the dough after the 20 hour prove and then take out the second day, and let prove for the final 4 hours the second day? Also, have you froze your dough? I would assume I would take out of freezer, put in fridge to defrost, then do another 4 hours at room temperature.
Thanks,
Joe
Hi Joe, thanks for the kind words. Yes you can refrigerate your dough but it will still prove in the fridge, albeit much slower. In general, I would recommend proving the dough in the fridge first before removing say 12 hours before cooking and allowing the rest of the proving to take place out of the fridge.
I can highly recommend an app called PizzApp+ which will help you with cold prove times. To be honest, I have never tried freezing dough but I’m sure it can be done. I quite like making the dough fresh everytime but if you try freezing it let me know how you get on.
Good luck! Cheers
Hey! Great recipe. One question though! I was using a normal oven and do not own a pizza stone so just preheated baking tray. My pizza dough got a bit too hard and more crispy than I’d like for neapolitan pizza… the middle did not bother me as I used quite watery mozarella so it kind of balanced out but the crown was hard to cut… still delicious! But maybe you’d have any tips for fixing that?
Hi Weronika, I’m glad you like the recipe. Unfortunately, true Neapolitan pizza isn’t possible in a normal oven. The oven doesn’t get hot enough and means the pizza takes longer to cook. The result will alsways be a pizza with a crispier base than is traditional for a Neapolitan pizza. But, you can still make amazing pizzas in a normal oven!
It sounds like your pizza may have been left in the oven a little too long. I would recommend removing all the moisture from the mozzarella (using paper towels) before cooking. Watery mozzarella will leaad to soggy pizza dough on top. This means that you are forced to cook the pizza for longer, which makes the base overly crispy.
Be sure to preheat your oven to it’s highest temperature, dry the mozzarella, and stretch the pizza as thin as possible. This should enable to you to cook the pizza fairly quickly (about 6 minutes) which should lead to a softer pizza.
Good luck!
Hello Tom,
This is my first time making napolitana pizza.
Unfortunately my scale doesn’t read 0.3 for the active yeast. So I will be proofing in the fridge at 3g of active dry yeast.
Can you let me know the steps after proofing in the fridge for 20 hours? As the dough usually hardens. Or shall I just measure and proof the 4 hours?
Thanks!
Hi Jules, thanks for the question. You can use 3g of yeast and prove in the fridge for around 20 hours, that should be fine. I would then recommend resting the dough out of the fridge for a couple of hours to get to room temperature. Then ball the dough and prove for 4-6 hours as normal, before making the pizzas.
Feel free to check out my latest Neapolitan pizza school series, which has videos. The most important parts for you are probably kneading the dough, balling the dough, preparing the toppings, and stretching the pizza. But I go over every stage in detail.
Good luck!
Tom this is one of the most helpful guides I’ve found, thank you so much. I also use PizzApp.
Hydration: Is it correct you are using only 56% hydration? For Neapolitan VPN Pizza I usually see everyone doing 60-65% hydration…
ADY Autolyse: What is the process when using activated dry yeast, because I have to hydrate it first. I can’t just mix everything together like the recipe says with IDY.
Do I let the flour/water autolyse without ADY, and then add the hydrated ADY after 1 hour? Or, add hydrated ADY in the beginning? I will hydrate my ADY with a small amount of heated water (5x the weight of the ADY) at 38C for 10 minutes.
Hi Carlos, yes 56% hydration is correct for this recipe. True Neapolitan pizza with Neapolitan 00 flour is generally at around 60%.
I think many people try to run before they can walk. They often make a high hydration dough which is difficult to knead and difficult to shape. Then they end up with a weak and sticky dough that they struggle to stretch out. The resulting pizza is then thick and doughy, and probably undercooked. I have found this out through my own experience too!
In my opinion it is better to start out with a dry dough that is easy to work with. You will end up with a much better dough that is easy to stretch. Getting the strecthing right can be very difficult. But with a strong dough, beginners should be able to learn how to shape a nice pizza in a relatively short amount of time.
I wouldn’t start experimenting with higher hydration until you can shape a lower hydration pizza perfectly. But even then, I think the hydration makes much less difference than people think. A properly proved dough is more important than a higher hydration.
For the active dry yeast you can just add it to the water at the start and let it rest for 10-15 minutes. Room temperature water is fine. I wouldn’t recommend heating the water since if it’s too hot it can kill the yeast.
Thanks for the questions and good luck!
Dear Tom,
Thank you for your wonderful website. It is by far the best pizza teaching site on the internet ! I have just bought an Ooni koda 16 and have now tried seven different dough recipes. Your recipe has been by far the best. I would be really grateful if you could answer a few questions for me ?
1. The six previous recipes I tried all had oil in them. Your recipe is true Neapolitan and omitted oil. I understand that with these portable ovens there is the constant risk of burnt crusts and undercooked bases because the pizza sits so close to the flames. Though your dough recipe was the tastiest we have tried I did find that the edges would burn more easily than the others. My conclusion was that the thin skin of the extra air bubbles in the crust would burn very quickly. I have learnt to get the Ooni hot on high for forty mins then turn to low for the cook and regularly rotate but how can I reduce the burn ? Shall I knock more air out of the edges, make a smaller pizza…..?
2. Nostalgia aside, the best pizza I have eaten was in Florence in the nineties. Thin crust with massive crisp bubbles and a chewy texture. Short of ringing the joint up conclude that it was made in a large wood fired oven and was made with a sourdough as the pizzas crusts were very brown in colour. Have you done a sourdough comparison ?
Thank you,
David
Hi David, thank you so much for the kind words! I’m more than happy to answer your questions.
1. How often are you turning the pizza? I wouldn’t advise turning the oven down unless the stone is getting above 470C/875F. I can highly recommend a turning peel, they make the turning easier and quicker. I would suggest timing the pizza as soon as it is loaded. Try turning after 20 seconds and then every 15 seconds. Hopefully, this should avoid the crusts from burning. With experience you should be able to figure out how often you need to turn for your oven/pizza and how long it will take. Obviously monitoring the pizza visually is the main indication.
There shouldn’t be any reason why it’s burning more since as you mentioned it doesn’t have oil. It could just be, as you suggested, that the dough has been properly proofed and the expansion is what is making it more likely to burn. You can experiment with thinner crusts if you like. Don’t try to remove any air from the crusts, simply make them thinner. What you are actually doing is trying to stretch the pizza larger, this means the crusts have to be smaller. Have you seen my video on shaping? You can check it out here if you missed it.
2. I have made sourdough pizza and it is delicious! I’m planning on doing a series on it at some point. It does take quite a lot of work though and I think beginners are definitely better off with normal dough or poolish pizza. If you stick to this recipe and just keep perfecting it, you will eventually end up with incredible pizza. Possibly even as good or better than the one in Florence! I have also had an incredible pizza in Florence actually! It is a beautiful place.
Thanks for the questions and good luck!
Hi Tom,
Many thanks for taking the time to reply. Well done for a great website and for inspiring a new tradition in our family!
I made the dough with 2% fresh yeast and did it within a few hours since I wanted something right away (In a bread baker’s mind, a few hours is right away). This came out fantastic. The dough was fluffier and softer than it would have been had it risen in the fridge, but that’s a sacrifice I was willing to make.
One thing I would request is that you add the amounts of yeast for fresh/ADY/instant so that we can use the same calculations as you would recommend. I usually use 2% fresh if I want it right away but I wouldn’t know how much to put in for an overnight rise.
Hi Elie, I’m glad the dough worked out well for you!
I just use instant and active dry yeast quantities interchangeably, their prove times are very similar.
For fresh yeast I just double the quantity, which works out well. So for this recipe I’d use 0.6g fresh yeast.
Hopefully that helped. Good luck!
Thanks Tom, very helpful and actually reasonably forgiving recipe, I over yeasted and under prooved but was still a great first result in an ooni.
Well done Jessica. Keep going and you’ll keep getting better!
I am going to try the Neapolitan dough tonight. When it proofs for 24 hours is it done in the fridge? Can you cut the dough into balls and let it proof for 24 hours or so and then use it immediately? Do you need to cut it 4-6 hours before you use it into the balls? I was using 2 teaspoons of yeast in my prior recipe for 500 grams of 00 flour with a one hour proof period. this is a huge reduction 🙂
Hi Aaron, the dough should be proofed out of the fridge, at room temperature.
This is a huge reduction in yeast compared to a fast prove but you should notice a nicer dough with more flavour. The dough should also be much more forgiving to work with.
You do need to bulk prove first though before balling. You need to leave the balling until the last 4-6 hours. If you ball too early the dough balls will lose their strength and won’t stretch out well.
Once balled, the dough will lose some air which is why it will need to prove again for 4-6 hours.
Hope this answers your questions. Good luck!
Tom,
I made the pizzas and they were excellent. The way you explain on your videos really helped me and they came out amazing. I have been experimenting different recipes with my new ooni and this is by far the best.
I have a few questions.
The recipe is for 10” dough. If I wanted to make 14” dough would I double the recipe? I have used 1kg of flour for (4) 14” pizzas in the past.
Is there a way to get around the shaping the dough balls 4 hours before since it is hard to be able to do it during the day sometimes.
The only issue that I have is that I need to always plan ahead. If I decided I wanted to make pizza spontaneously would I be able to tweak the yeast ratio to make it work?
Thank you very much.
Aaron.
Hi Aaron, I’m glad your pizzas turned out well. And thanks for the good questions.
You are right in thinking that you should double the recipe for 14 inch pizzas, since they are about twice the size.
If you decide to make the pizzas spontaneously, you could increase the yeast to go for a shorter prove. You will lose some flavour though on a shorter prove, but of course it may be more practical.
Should you decide to go for a shorter prove, I would use about 10 times as much yeast and go for a 4-6 hour prove. With this short a prove you can skip the bulk prove, and go straight to balling the dough after kneading.
You will then need to watch the dough closely to try and judge when it will be ready to shape. The other problem is that because the dough is proving quickly, you will need to make the pizzas very quickly. If you take too long once the dough is proved, the last pizza will be over proved when you come to shaping it.
This is one of the other advantages of a longer prove, the dough is more forgiving.
One of the best apps I’ve found is called PizzApp+ which should help you with your timings.
Good luck!
Hi Tom,
I understand that the bakers percentage rule concerning the yeast must only apply for a quick day prove? So how do you calculate how much dry yeast to use for a 24hour prove using varying flour amounts?
Hi Flavia, the baker’s percentage rule applies to any length of prove, including 24 hour proves and more.
I use an app called PizzApp+ which is really handy. You can input your dough quantities with hydration and salt percentage. Then select the prove time and proving temperature.
The app will then tell you how much yeast to use (you can even select different types of yeast) along with all your other ingredients too.
It really is a great app.
But as a rule of thumb, for a 24 hour prove at room temperature, using instant yeast, I use 0.05% which equates to around 0.3g for 4 pizzas.
If you wanted to make 8 pizzas, you could just double all the ingredients, including the yeast. So you’d need 0.6g yeast.
For 6 pizzas, you’d need 0.45g yeast.
Hope this helps and good luck!
Hi Tom,
Thanks for your reply and for your great website. The pizzas turned out great!
Hi Flavia, no problem! I’m pleased the pizzas turned out so well. Keep going!
The dough recipe is working perfectly for me in my Ooni 16.
Might have missed this but can I store the dough at any point for a longer period of time so when we want pizza we don’t have to plan for it 24 hours in advance?
Hi Tim, I’m glad you’re finding the recipe is working well for you. I love the Ooni pizza ovens too!
You could store the dough in the fridge and it should be fine for the next day but I wouldn’t leave it any longer than this.
In general, it’s always better to make fresh dough 24 hours in advance. But you can still make nice dough with a 6-12 hour prove, though 24 hours is usually better.
Thanks for the question!
I’ve made this dough a few times and it has saved me from the sticky peel problem.
Is there an adjustment I can make to allow the dough to be stored for longer? I’d love to freeze the individual portions or at least store for a couple of extra days so I make a large batch or if we change our minds (lol) about having pizza the next day we can use the the day after.
Working great in my Ooni 16. Going to try dividing into thirds for larger pies.
Hi Tim, I haven’t experimented with freezing dough so I can’t really help with that. People have told me that they have frozen the proved dough with decent results so by all means give it a go.
You can refrigerate 24 hour dough in the fridge for 1-2 more days. But I would advise putting the dough in the fridge before it’s finished proving so that it doesn’t overprove.
The dough will become more sour the longer it is left but some people like this flavour. Experiment and see what works for you!
Good luck!
Hi, your Neoplitan pizza dough recipe is amazing. Works every time. Can you advise if you have a gluten free recipe for pizza dough or where I can find one you would recommend.
Many thanks.
Hi Paul, glad you like the recipe. I haven’t actually got a recipe for gluten free pizza although I have made it before. I’ll look into writing up a recipe in the future, thanks for the suggestion!
I made it using a gluten free pizza flour called Fioreglut by a company called Caputo. They make excellent flour specifically for Neapolitan pizza. I can highly recommend their gluten free flour (as well as their others).
I made the pizza in pretty much the same way I normally make pizza and I have to say I was surprised how well it turned out. It’s not cheap flour but it is high quality and worth the price, in my opinion.
If you can get hold of the flour give it a go! Good luck!
Hi Tom,
Since I have neither a peel nor a pizza stone and would be too afraid of the pizza sticking on the peel when wanting to drop it in the oven, I wanted to ask what you think of using a backing paper sheet to transport the pizza onto the pre-heated tray in the oven. Thank you so much for your helpful tutorial!
Hi Taym, that should work fine. Just use the paper until you get more confident.
Then you can go to using a peel or just a chopping board instead, you don’t have to use a pizza peel (though they are helpful).
Good luck!
Hi Tom !
Thanks for the whole article, that will definitely help with my first experience crafting Neapolitan pizza.
What about preparation timing ? Like if your guests are ready to dinner later than final 6 hours prove ? Can we let it sit room temperature or we should put it in fridge ?
What about leftover dough ? Can we preserve it some time like for next meal/day pizza time ?
Cheer
Martin
Hi Martin, thanks for the question.
In general, I would recommend making the pizza so that it is ready at least an hour after your guests arrive. That way you can be sure the dough will be perfect.
But if you have to, you can always re-ball the dough balls. This will remove some air from them and slow the prove down. The de-gassed dough balls will then prove again.
This is known as “knocking back” and I’m planning an article on this soon. You can knock back aggressively (remove all the air) and the dough balls will take another 4-6 hours to prove. Or, you can knock back gently so they’ll only take 1-2 hours (or even less).
For leftover dough, I would combine it all into one large dough and knock it back (remove all the air). Then leave it in the fridge overnight. The next day you can remove it about 8 hours before you want to make pizza. Allow 2 hours or so to come to room temperature and then shape into dough balls and prove as usual.
Hope this helps and good luck!
I’m new to Neapolitan pizza making and found this recipe gave me amazing results! This is my new go to recipe. I made the pizza on a baking steel in my home oven at 550 F with convection setting turned on. The crust rose beautifully, was crispy on the outside and soft on the inside. Thank you so much for sharing your recipe and tips!
That sounds delicious Rachel, well done on making amazing pizza! Keep going because they keep getting even better the more you make!
Enjoy!
How much of a teaspoon is .3g of yeast? My scale doesn’t do tenths of a gram.
Hi Rick, I have a picture which shows what 0.2g of yeast looks like in my article here.
In the long run, I recommend getting a scale which can measure 0.1g. They are very reasonably priced online. I use the accurate ones just for the yeast and use normal ones for the rest of the ingredients.
Hope this helps. Good luck!
Hi,
Could you please let me know what kind/ brand of water are you using for your pizza dough?
Thank you!
Hi Alina, I’m lucky to have quite good water here in Yorkshire, England. So I just use tap water.
I think most tap water will be fine. If you have very hard water or water that’s high in chlorine then you can use bottled water. I think any spring water or distilled water (you could even distill tap water yourself) should be fine.
Having said that, the water in Naples is moderately high so I wouldn’t worry too much about the hardness.
Hope this makes sense. Thanks for the question!
Hi,
Is possible/have you tried using wholemeal flour to make the base? Having previously seen recipes for wholemeal pizza I’ve just assumed and used it but I’m having second thoughts as it’s proving!
Thanks
Hi Sarah, I haven’t actually tried wholemeal flour for pizza, though I have used it for bread.
It should work fine but you will likely need to increase the hydration a little to achieve a nice texture. If you haven’t already, you can check out my article on hydration here.
Thank you for the question, I’ll consider working on a recipe for wholemeal pizza.
Hope it turns out OK!
Used this recipe and had to freeze the dough, today was the day and they were outstanding on a roccbox,! This is my go to dough recipe , thank you…
Awesome Stephen, glad it works out well for you!
Hi, If I want to make two of the four pizzas tomorrow and the other two on Sunday. Can I do this? When I divide the dough tomorrow into 4 balls, I plan to do as directed and leave two in sealed bowls for 4-6 hours, but I want to place the other two in sealed bowls in the fridge until Sunday afternoon, then take them out to prove for 4-6 hours, bringing them to room temp before molding them into pizzas and cooking. Thanks.
Hi Tom, this should work fine. Bear in mind that the dough prove somewhat in the fridge though it will be very slow. It will probably prove about 1/10th as much as it would at room temperature.
The best thing to do is to try it and see what happens. Then you adjust your method for next time if required. But it sounds like your plan should work fine to me.
Good luck!
Thank you so much for your efforts Tom – I have tried a large number of different recipes for Neapolitan base and this one really works! (Been to Naples a few times and they are the best). I followed other recipes very closely but they all failed at some stage along the way. Your videos are very precise and simple to follow.
I also downloaded the PizzApp which also helps with the ingredient amounts. One question I have is what ball size should I aim at to get a larger base? I used the suggested 250g and it came out around 10 inches – like to get to about 14 inches
Regards from Mossy Point, NSW Australia
Hi Grant, generally you need to use about double the dough weight for a 14 inch pizza. So I would go for 500g, assuming the same thickness of base. Maybe go for 450g initially to be safe. Good luck!
Hi Tom– just wanted to say thank you! We got an Ooni pizza oven earlier this month and I’ve been struggling to convert my pizza skills to this new contraption. Your dough (and shaping technique) worked beautifully. I very much appreciate all the time and effort you’ve put into these instructions. They were exactly what I was looking for.
Hi Christine, thank you so much for the kind words.
I tried to create the most comprehensive instructions that I could. I know how frustrating it was when I started making pizza. I couldn’t find a resource that answered all the questions I had.
Hopefully MyPizzaCorner is getting there now. I have more planned for the near future too! Also, check out my latest article on knocking back here. That’s a very useful technique that I never hear mentioned in other resources.
Good luck!
Hi Tom. Your photos of your pizzas look amazing, they look just like the real deal and i really look forward to trying out your recipe and following your tips on my ooni. Many thanks for creating such a comprehensive website…
Just 1 question before i give it a go… how important is the salt quantity? I am quite conscious on trying to minimise the amount of salt simply because I think we all over eat on salt and its not healthy.
Will reducing the amount affect the proving and gluten structure? What would be the minimum you would suggest compared with the 14g you recommend for 4 pizzas. Many thanks
Hi Ken, thanks for the question. I wouldn’t go any lower than 2% salt as baker’s percentage (compared to flour weight).
At 2% you should have enough salt for seasoning and gluten development. For this particular recipe, that equates to around 13g (3.25g per pizza).
Hope your pizza turns out well!
Hi Tom,
I gonna try your method (prove the dough at the room temperature, instead of cold fermenting it) any time soon. However, I usually make two balls with about 240g each and leave one of them to be used the next day.
So, (if I understood it correctly) I must prove the dough for 24 hours as you have suggested and put the leftover in the fridge. Then, the next day, I’d have to remove it out of the fridge about 8 hours before I want to make pizza. Is that correct?
Thanks for the amazing tips!
Hi Alipio, thanks for the question. Yes, what you say is correct but you need to make sure that your dough doesn’t overprove in the fridge. Although dough proves very slowly in the fridge, it still proves.
I would recommend knocking back your dough before refrigerating. Feel free to check out my article on knocking back here.
And yes, you want to remove the dough from the fridge for a few hours before shaping. How long will depend on how proved your dough is (but if it’s overproving you can knock it back). At the very least, you should allow enough time for the dough to come to rrom temperature.
In general, I would recommend removing for the fridge for 2-3 hours before balling and then proving for 4-6 hours. Hope this helps, good luck!
Hi Tom, thank you for this great recipe.
I have a question, I want to try using live active sourdough yeast culture that I use for sourdough bread for this pizza recipe.
Do you think that would work? How much live of the live yeast would you recommend for your recipe?
Hi Minh, you certainly can use a sourdough culture but there are a lot of variables involved. Unfortunately, I can’t answer your question easily.
However, I am working on a sourdough series here so stay tuned for the recipes which will be coming out in the near future. Thanks for the question.
Tom,
I just got my Ooni Fyra 12 and my dough has about 3 more hours to proof out of the 20. I made more dough than I need and wanted to ask at what stage in the process I can store the dough. I wasn’t sure if I divide the dough after the 20 hour proof and store it immediately or divide after the 20 hour proof, let proof again (4-6 hours) and then store it.
Thanks for the excellent tips!
Hi Sabbi, thanks for the question. It’s best to refrigerate the dough before it is fully proved as it will continue to prove (although very slowly) in the fridge. If you store fully proved dough it will almost certainly over proof.
Ideally, I would recommend storing it as one large mass of dough, as opposed to many dough balls. When you want to use the dough, remove it and allow it to get to room temperature. Then you can ball the dough and allow it to prove before cooking.
This should help to produce perfectly proved and formed dough balls. Good luck!
Made this pizza dough for the first time. Best one we have had.
Awesome Kelly! I’m glad the recipe helped you to make beautiful dough. Keep practicing and I’m sure you’re dough will keep getting better.
Hi Tom, Thank you for all your tips and info! Made the dough step by step with your videos, it turned out almost fantastic. I used too much salt (because of my enthousiasm), could this be the reason why the dough wasn’t ‘stretchy’ enough? Or is it Just a lack of kneading experience?
Thank you, it’s a delight to learn from you!
Hi Karen, I’m glad you’re enjoying the process!
With regards to your question, I don’t think the salt would make too much difference to be honest. I would think the main issues could be under kneading (as you mentioned) or underproving/overproving.
Feel free to check out my article (with a video) on the windowpane test, this can help you to tell when your dough is kneaded. Also, take a look at my article on knocking back dough, this should help you with the proofing.
Finally, the flour used can make quite a big difference. The best flours for pizza are typically 00 flour and 0 flour. These flours generally produce a dough with more elasticity (strechiness) as they are designed specifically for pizza. Caputo Pizzeria, for example, is an excellent 00 pizza flour.
Hope this helps. Good luck!
Thanks! On my second attempt, they turned out amazing!
Awesome! Well done Karen, glad you figured it out!
Hi Tom,
Thank you for your recipe. Can your recipe be double or triple to yield more dough?
Hi Sharon, yes you can easily scale the recipe to suit your requirements. Thanks
Fantastic recipe! Just starting making Neapolitan pizza in my outdoor pizza oven and this has made all the difference!
Quick question: Do you think there would be any difference if I mixed the dough in a stand mixer?
Thanks!
Hi Michael, I’m glad the recipe helped! With regards to the stand mixer, you should be fine. Just mix on a low setting and keep checking the dough.
You can always try the windowpane test to make sure you have enough strength in the dough. Good luck!
The best pizza dough recipe we’ve found after trying quite a few! We had family for tea and I made 1 batch of dough too many. Will the dough freeze OK? I don’t want to waste it.
Thanks Claire, I’m so pleased the recipe has worked out well for you! And yes, you can freeze the dough.
It’s probably best to reball any left over dough before freezing. This way it can prove again once it is defrosted.
Good luck!
SOS! I made this dough last night for a pizza party I’m having tonight but I refrigerated it (later read the comment about how it’s a low yeast amount and shouldn’t be refrigerated.) Will it rise in time for tonight or do I need to make a new dough??
Sorry I couldn’t get back to you sooner but I can give you a couple of tips for next time. But you are right, this is for a room temperature proof so generally I would avoid the fridge.
If you’re ever in a rush I’d recommend balling your dough immediately (and skipping bulk proofing). This should ensure your dough is ready as soon as possible.
One option you have for speeding up the proof is placing your dough in a warm place. For example, near a heater or radiator. We don’t want the dough to get hot though as this could overproof the dough or even kill the yeast.
A trick some people do is to place the dough in the oven, not switched on, but with the light on inside if you have one. This should provide a nice warm environment for the yeast, without damaging it. Around 30C/90F should be a good temperature to speed up the proof.
Hope these tips help for next time. Good luck!
Hi, Tom.
Can this dough be frozen after 24 hrs proofing?
How long it be kept in the fridge after 24 hrs proofing?
Hi Dani, you can freeze the dough but I would do this just after balling, this way it won’t overproof. When you remove the dough from the freezer it can then proof again once it has defrosted.
You can keep the dough in the fridge for probably another 24 hours. This depends on the particular flour you are using but in general most doughs start to lose too much strength after a further 24 hours.
Again, I would refrigerate the dough just after balling so that it doesn’t overproof in the fridge.
Hope this helps! Good luck!
I am on my third attempt of just making the dough and it is not light and stretchy, it is heavy and a little hard?
Not sure where I have gone wrong? It is airtight, but even after first 20 min wait it’s not like yours.
Hi Lucy, what type of flour are you using? I can highly recommend some 00 pizza flour if possible. The flour can make a big difference. Thanks
Hi Tom
Yes I am using 00 flour. I have bought some new yeast and will see if that makes a difference! Thanks
Hope it worked out well Lucy. If needs be you can try increasing the hydration of the dough a litte, this could help.
You can check out my article on pizza dough hydration here if you haven’t seen it already.
Good luck!
I don’t understand how to calculate the yeast. I went to try your own yeast calculator for active dry yeast and it says 0.8g for ONE pizza.
But your pizza dough recipe makes for 4 pizzas so do I need to multiply by 4 which will give me 3.2g of active yeast for the whole recipe?
Hi Lizakim, yep that’s right. You can select the number of pizzas on the calculator too. It may not sound like very little yeast but that’s because it’s for a long proof (8-24 hours).
Hope this helps. Good luck!
Hello,
Can you give me your Neapolitan pizza recipe in STANDARD amounts please? I don’t have luck when I try to Google grams, ml’s, etc. and I don’t have a scale. If I can get it in cups, and teaspoon amounts so I can try your recipe I’d appreciate it. Looks wonderful!
Hello Linda. Where I’m from, in Europe, grammes are the standard. In fact, using cups and teaspoons doesn’t weigh the ingredients, it measures their volume. This is one of the reasons that I recommend using grammes.
The other reason is that cups and teaspoons vary in size so even getting the correct volume of ingredients is very difficult.
Making pizza dough is not like most cooking, it requires a lot of precision. A difference of just 2% can have a large impact on the dough.
Therefore, I highly recommend getting some digital scales. They are typically inexpensive and they will ensure consistency in your pizza making.
Achieving consistency with your dough is one of the biggest keys to success in my view. Hope this helps and good luck!
Hi Tom,
Do you know how I would have to adjust this recipe to make it at high-altitude in Denver, CO?
Thank you!
Friederike
Hi Friederike, this will just take some trial and error on your part I think. But I would start by reducing the yeast by about 25% to see how that works out.
If the dough is still overproving after that, you could reduce it some more.
Thank you for the question and good luck!
What is the difference between a poolish Napoletana pizza and this recipe? Do they taste different?
Hi Patrizia, it’s a good question. There isn’t a huge difference but in my opinion, you get a slightly more complex flavour (sweet and sour) from the poolish.
I also find that the poolish dough tends to be softer and easier/quicker to shape. However, the dough can be stickier so I wouldn’t recommend using the poolish method until you are comfortable with the regular method.
Thanks for the question!
Best pizza yet in my home pizza oven!
In my journey to learn pizza making, I am making progress and have been using Caputo “OO Blue” pizza flour (from Amazon). I’ve found the dough too limp to slide off the peel easily without fail, even with plenty of semolina (and failures are a DISASTER).
I decided to go 50/50 with the Caputo “OO Blue” and King Arthur Organic all purpose flour for my first go with your recipe.
Again, my best yet! The pizza slid right off the peel because the dough was stronger. The dough cooked nicely on the bottom.
Mastering the pizza oven is a journey, and starting with great dough is going to make it much more pleasant.
I will do a half recipe next time, since I cook for two people and don’t need 4 pizzas. I will increase the percentage of the “OO” flour bit by bit to see what blend works best for me – maybe 100%!
This recipe is spot-on for the sauce, keep it simple! I use lightly crushed Rega San Marzano DOP tomatoes (from Amazon) with their sauce, fresh basil, and salt, no cook.
Thanks!
Hi Andrew, thanks for the comment, I’m glad your dough is improving! I’ll try to give you a few tips which may help.
Firstly, Caputo 00 flour is a very high strength flour, so you shouldn’t need to mix it with any other flour. However, because it is so fine, it requires a lower hydration to achieve a similar dough consistency to that of a regular flour such as King Arthur.
This is why I generally recommend people to start at 56% hydration with 00 flour. Your dough will be stronger and less sticky. Once you become comfortable at this level, you can start increasing the hydration towards around 60%.
Check out my pizza dough calculator here if you haven’t seen it yet. That should help you to dial in your hydration.
Also, I would recommend keeping the pizza on the peel for the shortest amount of time possible, this should prevent it from sticking. No baking paper or anything is required, and with practice, you can even load onto the peel without any flour at all. This generally achieves the best cook on the base of the pizza (since excess flour can lead to burning).
My method is to top the pizza as quickly as possible while it is still on the worktop. I then quickly load it onto a lightly floured peel and then launch it straight into the oven. This technique prevents sticking and it also allows the pizza to stretch again as it’s loaded onto the peel. This is the traditional Neapolitan way.
As a side note, I prefer to use 00 flour rather than semolina for shaping and launching. 00 flour works perfectly well and I’m not keen on the texture and flavour that semolina provides. But of course, this comes down to personal preference.
In terms of halving the recipe, I would recommend making 4 pizzas each time if possible. The more practice you can get with the shaping, the better you will become. Also, if you have a disaster, you have backup dough to try again! 🙂
Additionally, any leftover dough can be reballed and saved for the next day (in the fridge ideally)!
Hope this has helped and good luck!
Hi Tom, I had a go at your recipe and I’m currently proofing in a box for 20hrs.
It’s been about 10 hours so far and I had a little peek. I think I must have done something wrong as it doesn’t look like your dough. It’s sort of porous like Areo chocolate. 😂
I wonder, will I be able to use this dough and it will improve by tomorrow?…
Hi Aggy, I hope your dough turned out OK in the end! It’s hard to say what went wrong (if anything) without more information.
Bubbles show that fermentation is happening so that’s a good thing. However, you usually only see a few bubbles in the dough, unless you’re making poolish (you can check out my poolish recipe here).
If the dough was very runny, perhaps you added too much water or not enough flour? This would explain all the bubbles as you would have effectively made a poolish.
It’s also possible that your dough was massively overproofing, this would likely produce a lot of bubbles! I’d check how much yeast you’re using, remember the recipe only calls for just half a gram (0.2g – 0.5g) of yeast or less!
Hope this helps you out!
Hi Tom – Thanks for the extensive info! I’m always so grateful to people like you who put in all this time and energy helping others make delicious food!
My question is: if you had a choice between a 21hr proof and a 28hr proof, which would you choose? Does the dough develop more flavor as it proofs longer (within the range)?
My husband is away for business and I would like to have fresh-hot-right-out-of-the-oven pizza for him when he arrives, but his flight lands at 1 in the morning! So 2 in the morning is the time I need to toss the first pizza in the oven. So I can start around 10pm the previous evening, or 6am on the morning of.
I am trying to decide… any info would be appreciated. Thank you!
Hi there, thank you for the appreciation, I’m so glad you like the content. Sorry I couldn’t reply to you any sooner.
In my view, there will be very little difference between 21 hours and 28 hours so I would just do whichever is easiest for you.
Thank you for the question!
What about activating the yeast and the temperature of the water? Does this matter with a long proof?
To be honest, the difference will likely be negligeable over such a long prove. However, if you want to be as precise as possible then I would recommend using room temperature water.
Also, the yeast doesn’t need to be activated unless you’re using “Active” dried yeast. Even then, I’ve used it plenty of times without activating and haven’t had any issues.
Of course, if you’re doing a short prove, these factors become more important. Thanks for the questions.
Hey!
I’m a super-passionate cook and make pizza at least once a week with a basic dough that keeps my son and his friends happy. I worked in a pizzeria for years in my youth and can still toss a mean crust.
Yesterday was my husband’s birthday and he had asked for a Nepalese style pizza. That sounded incredibly odd to me, but after a bit of digging, it was established that Neopolitan was what he meant. 😀
I found your fantastic post and thought “how different can this really be from the pizzas I make so the time?”. Well, let me tell you! All of us were making “OMG!” noises throughout the munching and I’ve been told that I need to make pizza this way EVERY TIME from now on.
I made one Margherita, one with pepperoni and nduja, and one without tomato sauce, with ricotta, mushrooms, garlic, and good olive oil.
I didn’t have a pizza oven OR a pizza stone, so I just whacked the oven up high and preheated the baking sheets. The result was still fantastic and I’m SO glad I found your post. I’m seriously considering buying one of those pizza ovens now.
Great job, thank you so much!
Hi Emily, I really appreciate the positive feedback, it’s very kind of you!
I have to say that a pizza oven does make quite a big difference if you’re going for the authentic Neapolitan style. Being able to cook at around 450C/850F with open flames allows you to get a soft base with a crispy crust. It also gives you some nice charring, which adds more depth of flavour in my opinion.
The downside to a pizza oven is that it does take more work heating the oven up and keeping it at the right temperature. However, I enjoy that part of it and maybe the family can help you?!
As a bonus, a pizza oven will cook a pizza in around 90 seconds or less! This is especially great for making lots of pizzas and doing pizza parties!
Keep up the great pizzas!
Step 6 Leave the dough to prove
Do we leave the dough at room temperature for 20h or in the fridge?
Hi, the dough is to be left for 20 hours at room temperature. I have since added this to step 6 to avoid any confusion.
Thanks for pointing it out. Tom
Any chance this could work in my outdoor gas grill? It can get pretty hot but I tried another recipe the other day and noticed no dark spots would form on the top sadly. I used a pizza stone and allowed lots of time to heat up.
Hi Pam, to be honest I don’t think you would be able to achieve good results in an outdoor gas grill. I would recommend either a pizza oven or just a regular oven.
Although the stone has to be hot, so too does the air temperature inside the oven, otherwise the base will cook faster than the top. This can lead to a soggy pizza on top with a tough crust below.
In a regular oven you would be able to achieve some dark spots due to high air temperature (get your oven as hot as possible). Also, you can try cooking the pizza close to the top element to help with this.
But in a pizza oven, the open flames are very close to the pizza (and above the pizza) which is what creates the charring. No other way of cooking can truly compare to a pizza oven.
Hope this helps and thanks for the question!
I just made a pizza with Caputo 00 flour, not your recipe. I put it on a Kamado Joe grill at 600F. The crust did not brown until 20 minute and was very dry and edges did not rise. Help!
Hi Linda, unfortunately, a grill is unlikely to cook a pizza properly. Pizza requires a high air temperature as well as a high stone temperature.
Without a high enough air temperature, the pizza will overcook on the base and undercook on the top, which sounds like your issue.
A purpose-built pizza oven is the best option, such as an Ooni one here.
Alternatively, you can use a regular oven. Just get your oven as hot as possible, and use a pizza stone for best results (an upside down baking tray also works).
Good luck!
Excited to try!
Hope you enjoy it, good luck!
Arrggh. I’ve just made a quadruple batch of this for a party tomorrow and I mixed up the “strong flour” ingredients list with the “00 flour” ingredients. I used 00 flour with the strong flour amounts. Is my dough ruined? Is there anything I can do to correct it? I’m at the autolyse stage.
Hi Peter, I hope your dough turned out OK. In general you should be fine, you may just have found that your dough was a little sticky.
Typically, I recommend using a drier dough for 00 flour, especially for beginners, as it can be a little trickier to shape.
Thanks for the question!