This recipe is for a delicious Neapolitan pizza dough that is made using a poolish. It’s a slightly more advanced recipe for those that are looking to take their pizza game to the next level.
It’s not too difficult though. I’ve made it as easy to understand as possible and the timings are easy to fit into your daily routine.
Check out the video I’ve made below and keep reading to the bottom of the page for the recipe.

If you like, you can click here to jump to the recipe. Otherwise, keep reading to find out everything you need to know about poolish pizza!
Poolish is a simple technique that can make some of the best pizza possible and it’s actually really easy! In this article I’ll go over everything you need to know to make amazing poolish pizza!
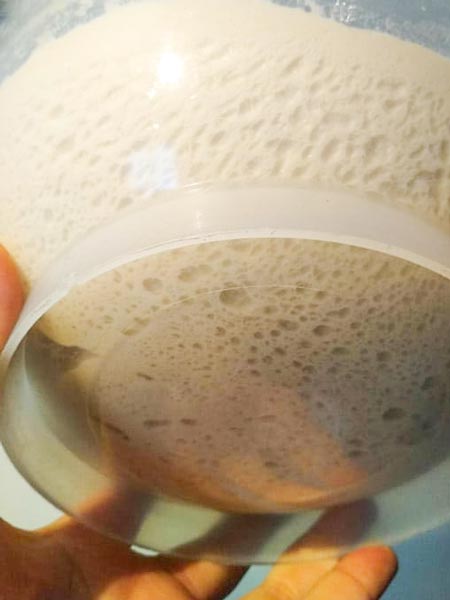
Poolish can sound complicated but it really isn’t. The best way to learn is to get stuck in and try it! You will learn from experience!
Hopefully this article will help you to understand what poolish is and encourage you to try it because it really does make great pizza! If you want to get stuck in, feel free to skip to the step by step recipe at the end of this page.

Poolish is a type of preferment (or starter) which is used in many different doughs. It is traditionally used for making baguettes. However, it can also be used to make great pizza dough.

A preferment is simply when water, flour, and yeast are mixed together and left to prove BEFORE being added to the main dough. After about 8-12 hours when the preferment has proved, the rest of the ingredients are added to form the final dough.
However, the dough doesn’t need any more yeast adding, as the preferment acts like a sourdough starter, and proves the dough. Any preferments can be called a starter as well, but this usually refers specifically to a sourdough starter.
Preferments have different ratios of water and flour but Poolish is perhaps the simplest. Poolish has a ratio of 1:1 water and flour. In other words, it has equal amounts of water and flour. We also call this 100% hydration.
Feel free to check out my article on pizza dough hydration here if you want ot learn more about this.
This means poolish is really easy to make, and it also means your recipe is easy to work out. A 100% hydrated dough also creates an excellent environment for the yeast to work its magic.
NOTE: You may also hear the use of preferment referred to as the indirect method as the yeast is not added straight to the dough itself. In this context, a dough that is conventionally proved by yeast is known as the direct method.
Many pizzerias in Naples use poolish for their pizzas in order to achieve a more flavourful dough. And this can be replicated in your dough at home to help take it to the next level.
However, to make true Neapolitan poolish pizza you would need to use a pizza oven. But whether or not you have a pizza oven you can still use this exact recipe. You can still make great pizza without one. But, if you want to find out why pizza ovens are so good, check out my article on here.

I always recommend pizza ovens from a company called Ooni. I have used these pizza ovens for a long time and they offer excellent value. They are also lightweight, portable, and easy to use. Pizza ovens are much more accessible these days, you don’t have to build a huge brick oven for Neapolitan pizza.
Click here to check out how reasonably priced Ooni pizza ovens are.
But don’t worry, you can still make excellent pizza in a regular domestic oven. I just recommend cooking at the highest setting on your oven with the fan turned on (if your oven has one). For the best tips, check out my article on cooking in a regular oven here.
Poolish works in a very similar way to sourdough but it in fact poolish ISN’T a sourdough. Sourdough uses wild yeast which is harvested from the flour itself. With a poolish, we add yeast to it.
For Neapolitan pizza, poolish would generally be the preferred option over sourdough. Sourdough is not traditional in pizza as it creates a strong and somewhat sour flavour which can overpower the toppings.
For beginners, I would highly recommend trying poolish. You may also find that you prefer it to sourdough!
Poolish generally produces a sweeter dough with only a hint of sourness, which tends to work very well with pizza. Poolish was actually initially invented to replicate sourdough. So whilst the two do have similarities, they are also very different.
The most popular theory suggests that poolish was a technique used by Polish bakers in the 19th century. When the technique found its way to France, it was known as poolish.
Poolish became a very popular technique amongst French bakers. It allowed them to produce sourdough-like bread with more consistency and without as much sourness. In fact, it was widely adopted for the making of baguettes.
To this day, many artisan bakers use poolish for their breads, particularly baguettes. The technique has also become widely adopted in artisan pizza making, with many pizzerias in Naples adopting the method.

Poolish can make exceptional Neapolitan pizza when used properly. It is also very versatile and works with practically every type of flour you want to use for your pizza dough.
The purpose of poolish in pizza is to improve the flavour and texture of the dough. The 100% hydration (1:1 ratio of water to flour/equal amounts) of the poolish creates an ideal environment for the yeast. This allows the yeast to become very active, producing many subtle but complex flavours in the dough.
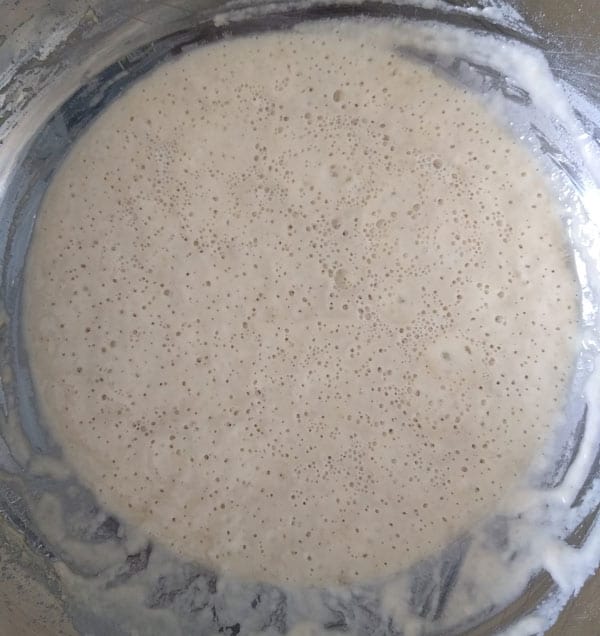
As soon as you uncover an active poolish the fragrance hits you! It’s an incredible smell that’s a delicious combination of sweet, sour, beery, and yeasty!
Once added to the final dough, the poolish also helps to produce a wonderfully light and airy dough, thanks to the development of the yeast.
A poolish helps to develop the characteristics of a longer proved dough in a shorter time. In general, the longer the prove, the better the flavour and texture of the pizza dough. This is because over time, the yeast is allowed to produce an increasing number of flavours and aromas in the dough.
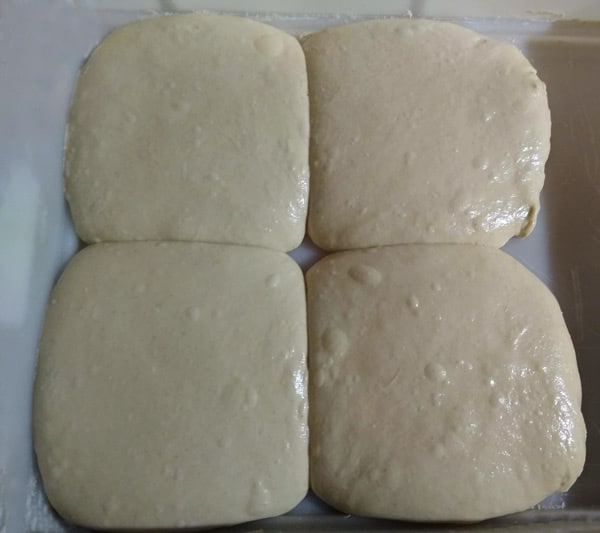
Surprisingly, a poolish dough that has proved for 24 hours can achieve a similar texture and flavour to a normal dough that has taken 48-72 hours to prove.
The first advantage to this is time and convenience. In a shorter amount of time, we can achieve a very similar quality of dough just by using a poolish. What’s more, a poolish is really quick and easy to make!
The other advantage to poolish relates to the qualities of the flour we use. Most 00 flours are not strong enough to withstand proves of 48-72 hours. Once they start reaching these times, the dough loses its strength and the quality of the pizza reduces.
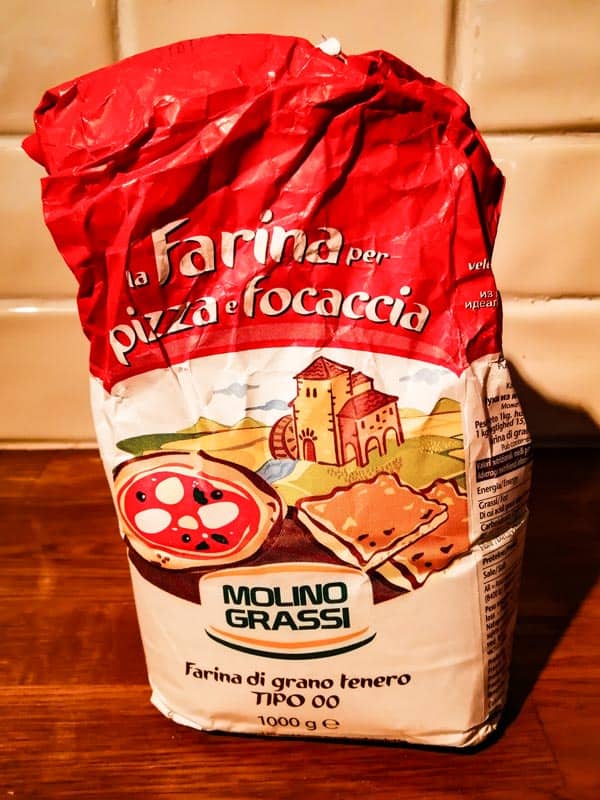
However, the majority of 00 flours can withstand proves of up to 24 hours. By using a poolish, we can make a 24 hour dough that tastes just as good as 48-72 hour dough without losing any of the doughs other qualities! Particularly the pizza dough’s strength and stretchiness.
It’s like magic! It also smells incredible!
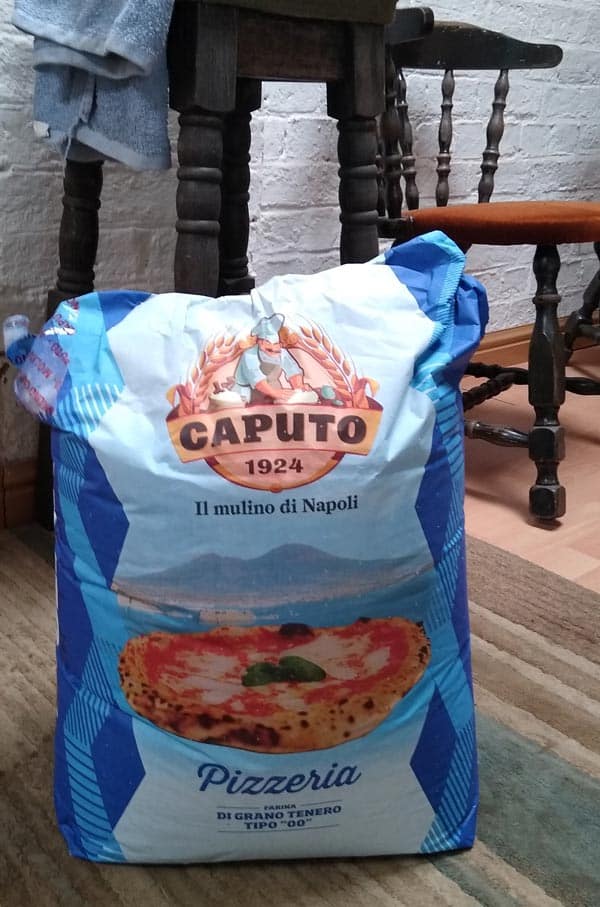
In general, most 00 pizza flours should work well for poolish pizza dough. However, I would still recommend using a 00 flour designed for long proves if possible. For example, Caputo Pizzeria is an excellent “professional” pizza flour that can be used for long proves.
Some 00 flours are only really meant to used for short proves of around 6 hours. With these flours, you may experience some loss of strength in the dough when making poolish. After all, we will be proofing for 24 hours.
The flour that I tend to use for poolish pizza dough is called Caputo Pizzeria. Caputo is an Italian flour producer that specialises in 00 flour, mostly for pizza. This flour has high strength and stretchiness which makes it excellent for poolish pizza dough, and all pizza dough for that matter.
I have provided a link to Caputo Pizzeria flour on Amazon below if you want to check it out.
As with sourdough, varying the amount of poolish you use in your pizza dough recipe will vary the prove time (length of fermentation).
However, unlike sourdough, you can also adjust the amount of yeast in your poolish to adjust the prove time. Also, poolish doesn’t need feeding like sourdough does. We simply make the poolish, leave it to prove, and add the other ingredients.
For this reason, poolish is very convenient and reliable when compared to sourdough. It is also much easier to make and poolish requires no feeding or management at all! And if that isn’t a bonus then I don’t know what is!
When it comes to poolish pizza yeast, instant yeast works great. Fresh yeast may be considered superior by many people but instant yeast still produces excellent results. The best part is that it’s cheap, readily available, and stores well (usually months).
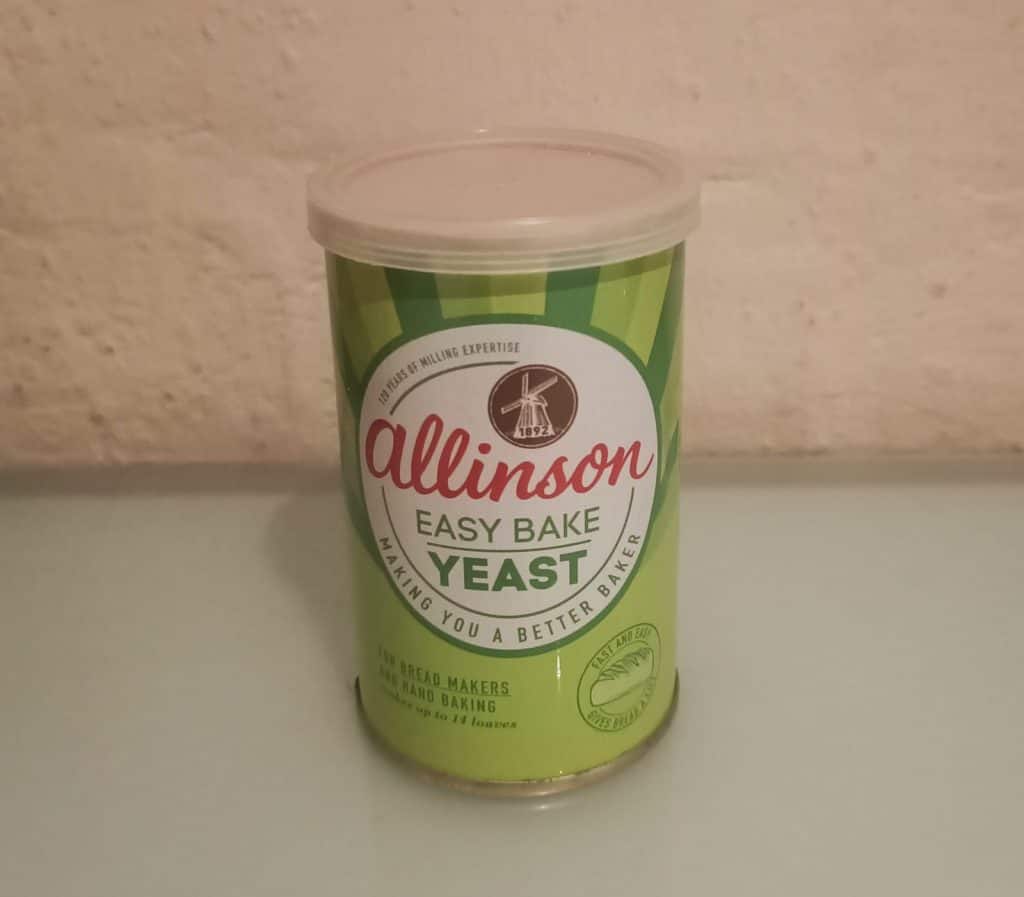
Even if you chose to use fresh yeast it’s still a good idea to have some dried yeast as a backup. I tend to store mine in the fridge where it lasts a long time.
Below I’ve provided an Amazon link to some dried yeast that you take a look at if you’re interested.
You should only need 1 small tub of dried yeast since we use such a small amount each time.
Most of the time with poolish, we try to replicate sourdough starter as much as possible. In general, sourdough starter takes around 10 hours to reach it’s peak (when it’s ready to use). So a good idea is to add enough yeast to allow our poolish to prove in around 10 hours.
As a rule of thumb, at room temperature, 0.2% yeast as baker’s percentage (of the poolish flour), should produce around a 10 hour proof. Don’t worry too much about this, you don’t need to understand this to follow along with the recipe. I also go into this in more detail at the end of this article for those that want to dive deeper.
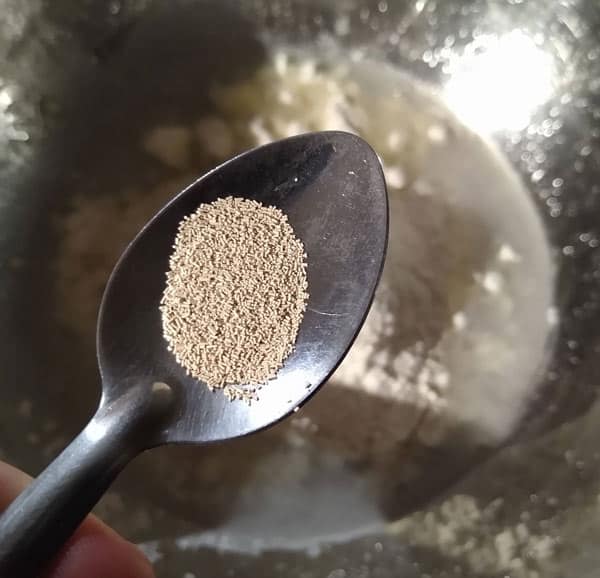
Basically, for 4 pizzas, this equates to around 0.6g of instant dried yeast. This is a very small amount but we don’t need much since we’re proofing for so long. The poolish itself will probably take at least 10 hours and then the dough itself will take about the same amount of time again.
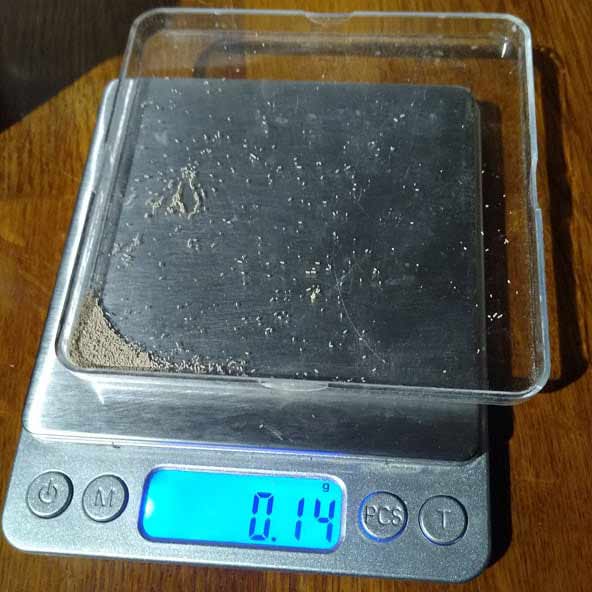
For weighing out this small amount of yeast, I recommend some digital scales that are accurate to 0.01g (shown below).
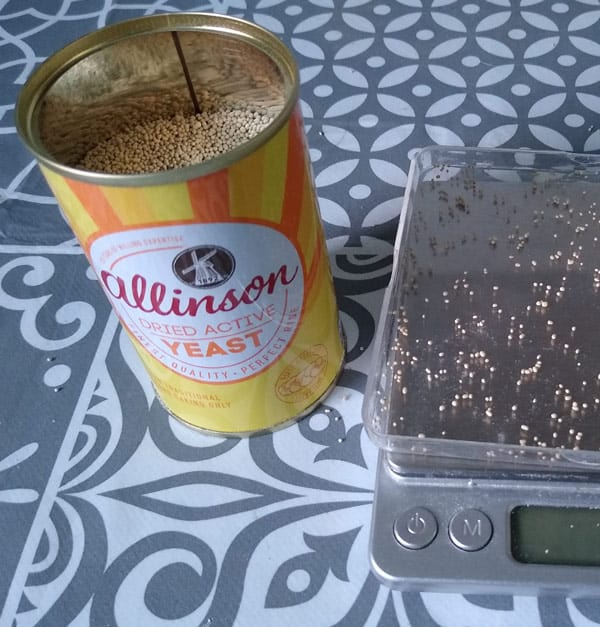
Below I’ve provided a link to the accurate digital scales that I use on Amazon. They’re inexpensive and incredibly useful for measuring out tiny amounts of yeast for long proves.
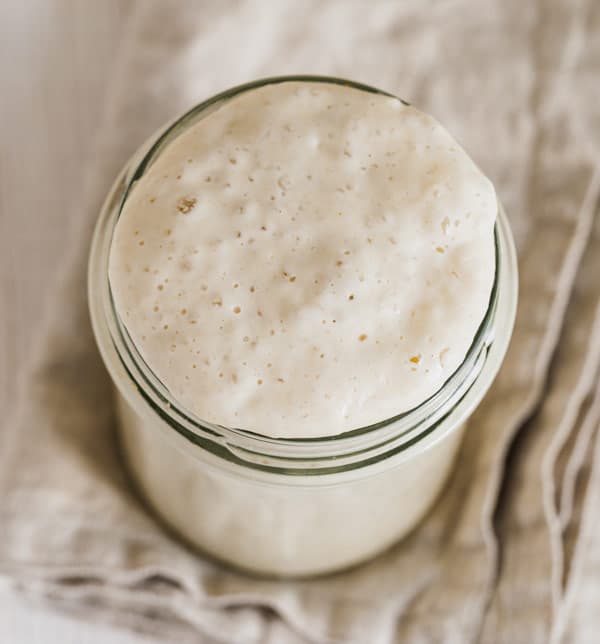
The poolish will be ready to use when it has about doubled in size, just like a regular dough. It will also be completely covered in small bubbles and is very lively. You will get to know when it’s ready through experience.
However, there is a great tip you can try when you’re starting out:
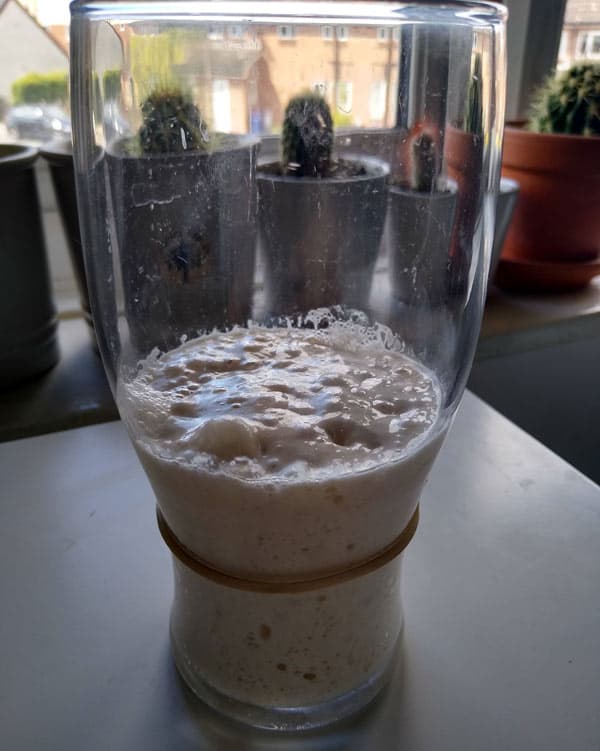
Rather than making your poolish in a bowl, you can make it in a large glass. Once in the glass, place a rubber band or similar around the level on the glass. This will allow you to see how much the poolish grows (see below).
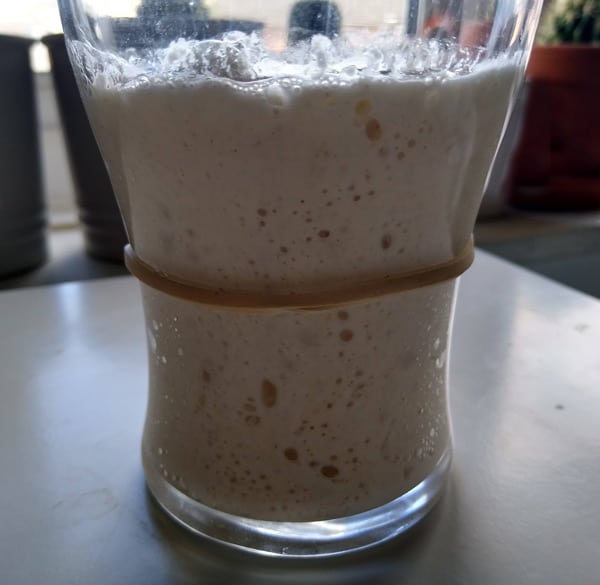
You can see from the image above just how much the poolish has grown, about double. The highest point that the poolish reaches is known as the peak. Ideally you want to use the poolish just before its peak.
In the image above we can tell the poolish has just passed its peak if we look at the edges of the surface, where it is starting to fall back down slightly. Ideally we should’ve used the poolish an hour or so ago but it is still perfectly fine to use.
We can make a note of how long it took to peak and then we will know when it’s ready next time we make one.
In this section, I will go into a little more depth on how we can control our poolish.
There are 2 main variables that you can control with your poolish. These are:
Note:
Both quantity of yeast and quantity of poolish will control prove times. But they will also have an affect on the flavour and texture of the final dough. Experimenting with these variables is something that I recommend you do to figure out what makes the best pizza for you.
However, there are some rules of thumb which will help you initially:
Bonus Tip: In my experience, using a 50% poolish recipe (50% of total flour coming from poolish) will ensure that your pizza dough will take roughly the same amount of time to prove as the poolish did itself. E.g. if your poolish takes 10 hours to prove, your pizza dough will then also take about 10 hours. This is really handy to know and makes timings a lot easier.
This may all sound a little complicated, but don’t worry I’ve got an easy to follow step by step recipe below.

Incredible Poolish Pizza
How to easily make authentic Neapolitan pizza using the poolish method.
Makes: 4 pizzas
Difficulty: Medium
Price: Low
The great thing about this recipe is that I have designed it to fit around a normal daily routine.
00 Flour – 300g
Water (room temperature) – 300g
Yeast (instant yeast – double for fresh yeast) – 0.6g
Note: Caputo 00 pizza flour is an excellent option, especially for Neapolitan style pizza and it’s what I tend to use. It is one of the more widely available “professional” pizza flours. I have provided a link to it on Amazon below (a large chef’s bag). Aside from this flour, most 00 flours should work fine.
00 Flour – 330g
Water (room temperature) – 70g
Salt – 14g
Note: I have assumed a room temperature of around 20C/70F. If your room is quite a bit colder than this, swap the amount of yeast for 0.9g. If your room is quite a bit warmer than this, swap the amount of yeast for 0.3g. For fresh yeast, multiply by 3 (eg 0.6g becomes 1.8g).
Not all the following utensils are required but these are what I use and they tend to make the process much easier.
Any large bowl could be used for mixing the dough but I like using the metal ones since they’re lightweight, stackable, and easy to clean.
Click here to check out metal mixing bowls like the ones I have on Amazon.
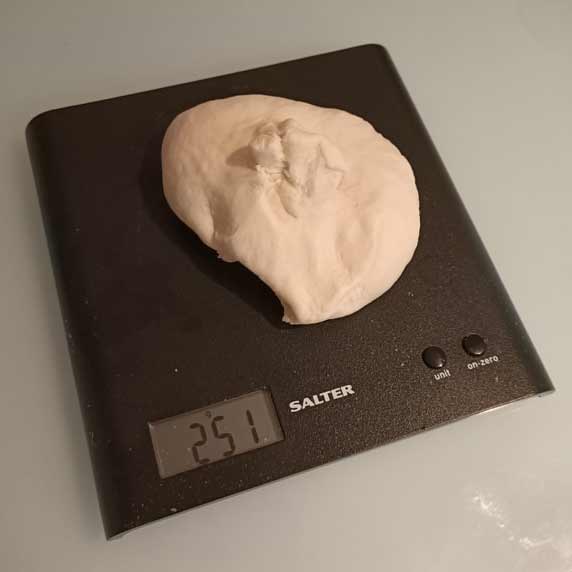
These are affordable, easy to use, and precise (accurate to 1g). I don't recommend using cups as measurements as they are inprecise.
Click here to take a look at the type of digital scales I use on Amazon.
These kitchen scales are accurate to 0.01g and are perfect for measuring the tiny amounts of yeast needed for long proves.
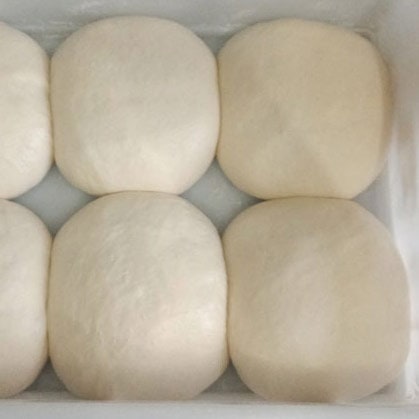
Pizza proofing boxes are an excellent investment. They are airtight and they make taking the dough out for shaping very easy.
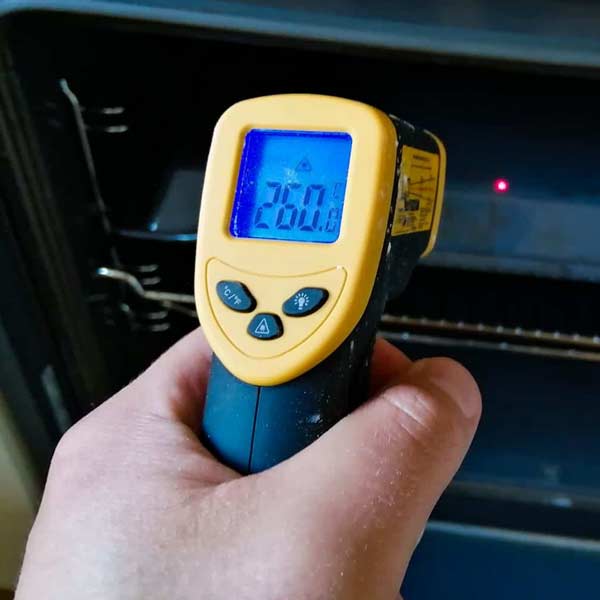
An infrared thermometer allows you to instantly check the temperature of the stone, ensuring it is within the ideal range.
Click here to check out a pizza peel similar to the one I use on Amazon.
A 12 inch peel is ideal for Neapolitan pizza and makes loading and removing your pizza from the oven really easy.
Click here to check out a pizza peel similar to the one I use on Amazon.
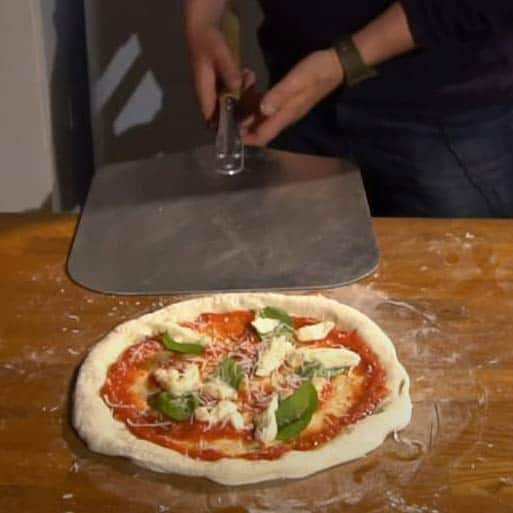
A turning peel is designed for rotating the pizza during cooking. If you're using a pizza oven it should lead to a superior and more even cook.
Click here to check out a pizza peel similar to the one I use on Amazon.
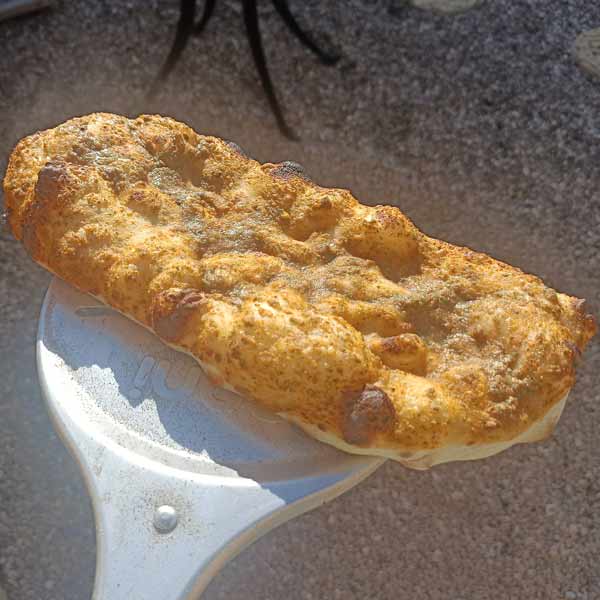
A pizza oven is guarenteed to take your pizzas to the next level. I have an Ooni Karu 16 which reaches 500C/930F and cooks pizza in as little as 60 seconds! A regular oven simply cannot match the cook of a pizza oven. I love my Ooni!


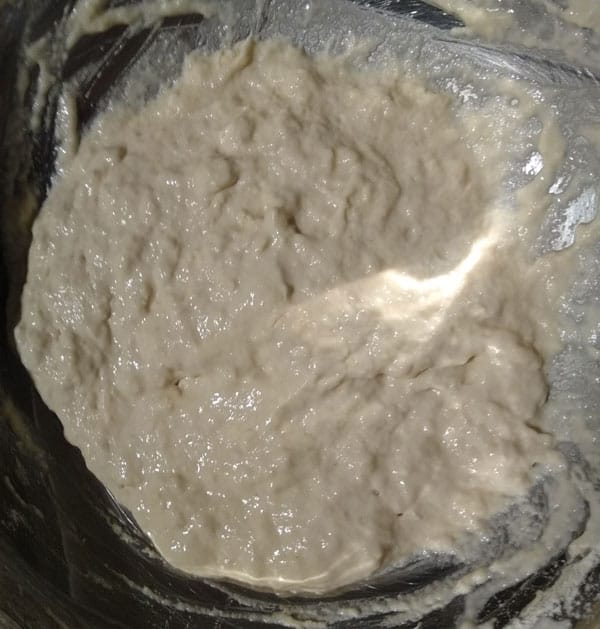
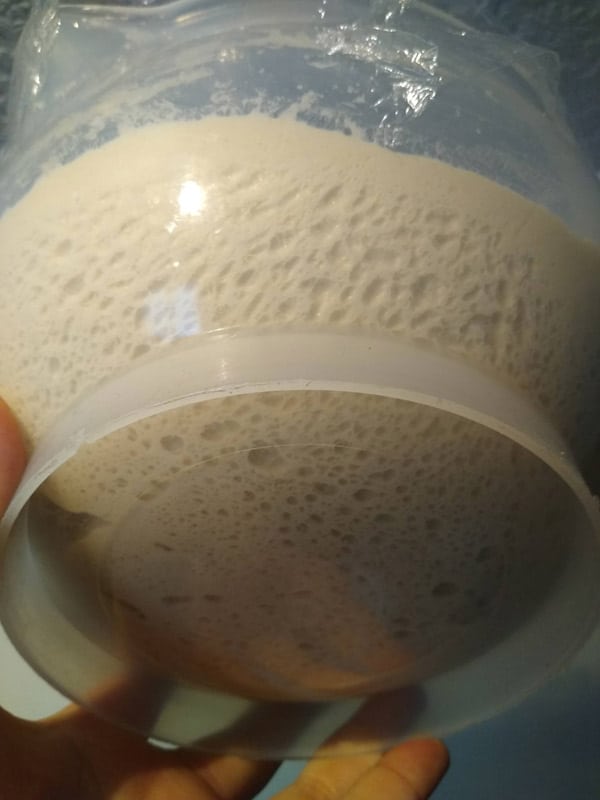
This is how the poolish should look after mixing – it doesn’t have to look “perfect”.

This is how the “ripe” poolish should look after around 10 hours.
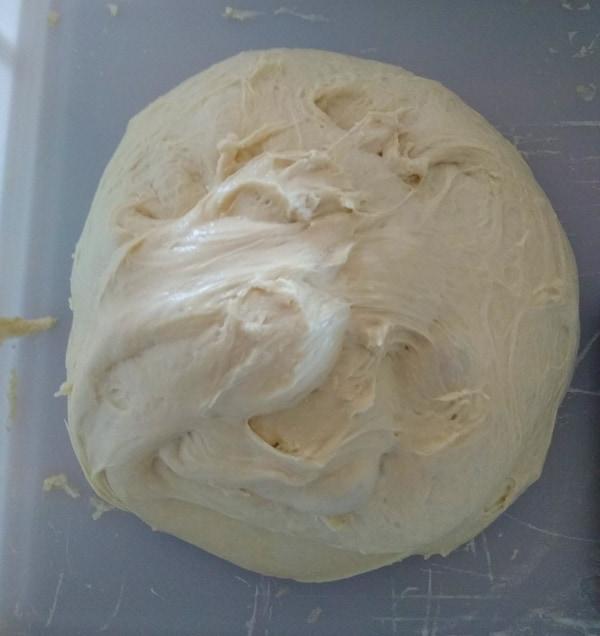
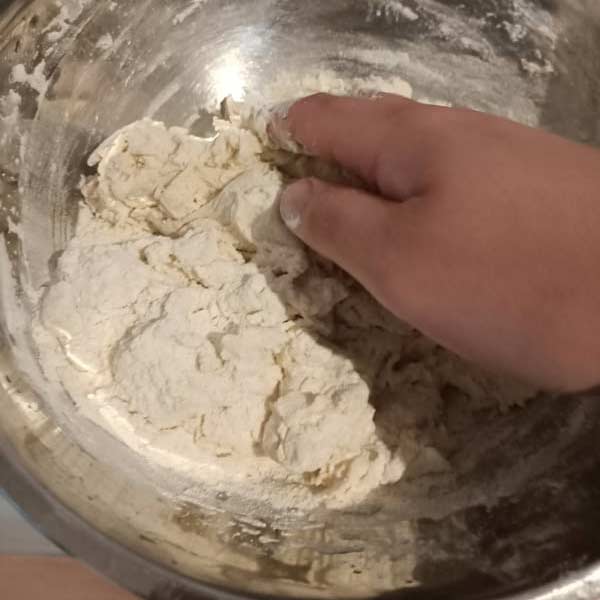
Don’t worry too much about shaping the dough at this stage.
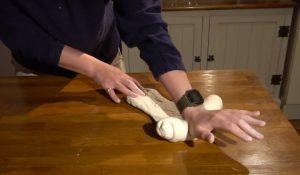
Check out my article (with a video) on kneading here it’s easy to follow!
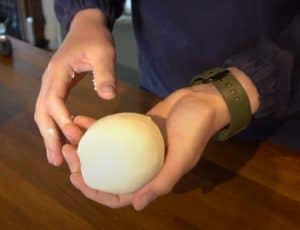
Take a look at my article (with a video) on balling pizza here.

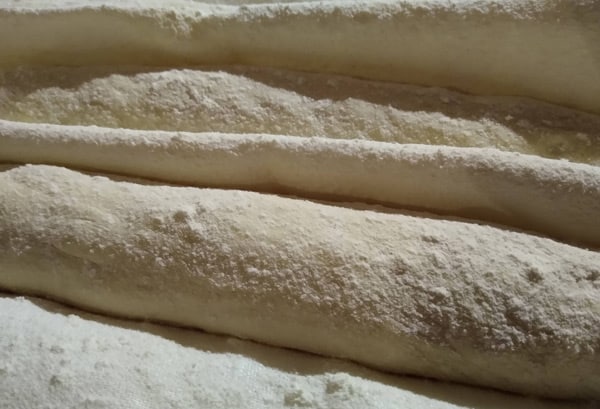
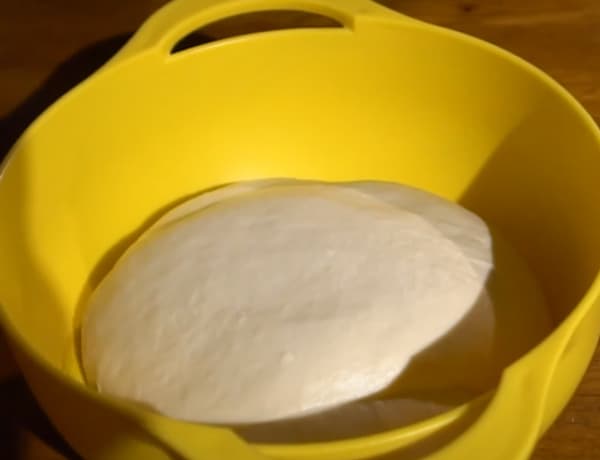
Your proofed poolish pizza dough should look something like this when it’s ready.
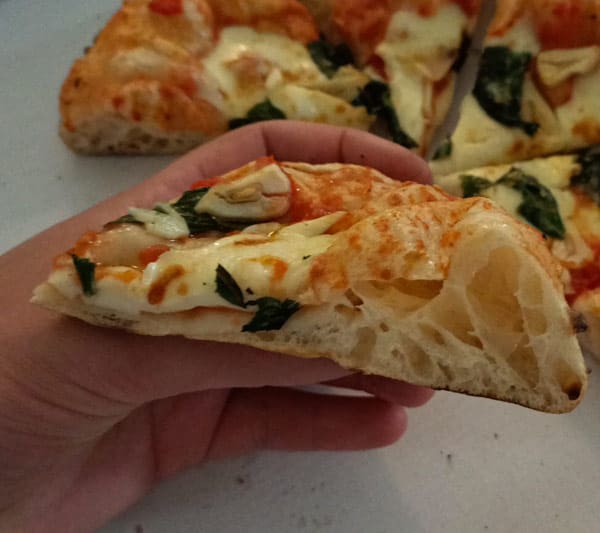
Enjoy your amazing poolish pizza!
Thank you for checking out this recipe. Keep on reading for my final thoughts and feel free to leave a comment below. Also, if you liked this recipe, you can click here to sign up to my newsletter.

Using poolish in your pizza dough recipe is quite an easy technique and I would recommend it to anyone that’s comfortable with a standard pizza dough (direct dough). It makes incredible Neapolitan pizza dough. Once you have normal pizza dough down to a tee, I would highly recommend at least giving this a go.

Here’s one I made earlier – poolish pizza, Neapolitan style!
Also, for those people looking for Sourdough recipes, I would recommend trying poolish first. Not only is it easier than sourdough, but in my opinion the flavour works better for pizza.
So have fun making poolish, and lets get mixing!

I’m Tom Rothwell and I’m super passionate about all kinds of homemade pizza! In the last few years I've been on a quest to find the perfect pizza. Now I'm sharing what I've found out with the world!

If you're interested in hiring me for your event in the UK, feel free to check out my website with the link below.
Pizza Catering
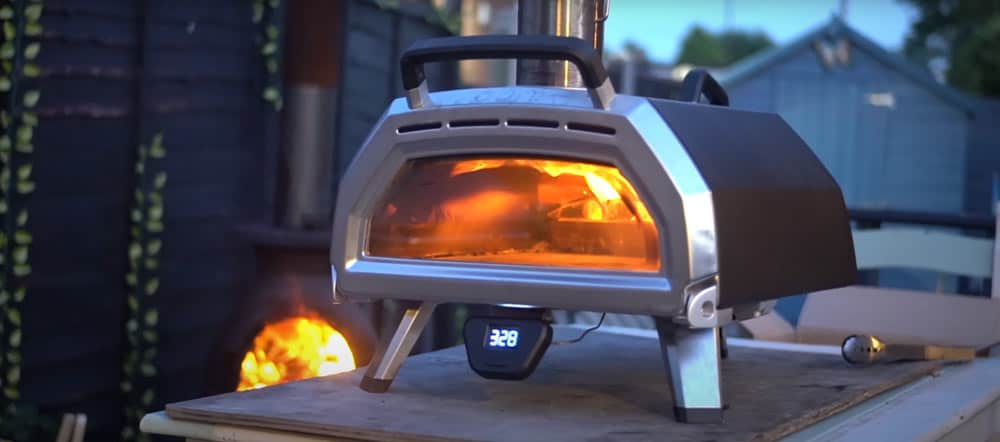
I often get asked what type of oven I use for my pizzas. Well, I use a pizza oven made by a company called Ooni.
The range of pizza ovens that Ooni offers is just brilliant. They cover all bases, and all price points. There's affordable and portable models such as the Fyra 12 Pizza Oven and then there's state-of-the-art models such as the Karu 16 Pizza Oven pictured below.
In all honesty, I would say that the oven makes a huge difference. If you're looking to make authentic Italian pizza, a pizza oven is a must.
By clicking the link below and purchasing from Ooni, you would be supporting this website. I've been using their ovens for a long time now and I wouldn't recommend them if I didn't believe in their products.
Time to make some amazing pizza!

I’m Tom Rothwell and I’m super passionate about all kinds of homemade pizza! In the last few years I've been on a quest to find the perfect pizza. Now I'm sharing what I've found out with the world!

If you're interested in hiring me for your event in the UK, feel free to check out my website with the link below.
Pizza Catering
Wow this is a lot of helpful information, thanks. I’m going to give poolish a go so wish me luck!
Thanks for the positive comment Hannah. And I’m sure you’ll be fine, it really isn’t too difficult. But good luck anyway!
Hi Tom,
Ive used another recipe from a pretty famous pizza maker. His poolish has 5 grams yeast and honey, 300 grams water and flour. Proofed for 16 hours. How can this and your recipe work yet be so different? I’ll try both and let you know the results.
I don’t judge it till I try it, I just made a pizza dough recipe with 6.9% sugar, it was fantastic, who’d of thought it.
Thanks for the post.
Hi Justin, I can only think that the 5g is a typo. With 5g of yeast, the poolish should prove in around 2-3 hours! Also, the addition of honey will likely speed the prove up since the yeast will feed off the sugar. In my view, the only way it could work is if you refrigerated the poolish to slow the prove down.
Sugar is not traditional in Neapolitan pizza since it can lead to burning when cooked at high temperatures in a wood fired oven. However, it can help pizzas cooked at lower temperatures to achieve some more browning and crispiness.
Thanks for the comment and good luck!
This is Vitos recipe from YouTube. He also proves it 1 hour at RT, but then does 16-24 hours inside the fridge. So the colder temps slow the fermentation down.
Hi Connor, I have recently seen his recipe and I must admit it surprised me. Adding sugar is not Neapolitan but it can still make excellent dough.
The amount of yeast he uses and the addition of honey are intended to speed the fermentation up as much as possible. In my view, a longer fermentation is more desirable but his technique has it’s advantages for convenience.
A big advantage to doing a slow room temperature prove is that the dough is more forgiving, especially when it comes to making several pizzas.
For example, if you are doing a pizza party, a fast proving dough will likely be overproved by the time you get to the end of your batch. This is because the dough will start proving very quickly once it has reached room temperature due to the amount of yeast in it. (You’ll want it at room temperature for shaping and cooking.)
In contrast, a slow proving room temperature dough will have a much wider window of time in which it is properly proved.
Of course, if you’re only making a couple of pizzas this doesn’t really matter.
At the end of the day there isn’t a perfect way of making dough, I would just advise experimenting and seeing what works for you.
Thanks for the comment!
Vito was using fresh yeast in all of the recipes I saw. That may be part of the difference along with the refrigeration retardation. My search for a dry yeast ration led me to this site.
Hi Tom, with fresh yeast you only need to use around 2-3 times as much as dried yeast. As you say, the main difference is the fact that the dough is refrigerated. Yeast at fridge temperatures work at about 1/10th the rate as at room temperature. Therefore, you need to use around 10 times more yeast to compensate.
Feel free to check out my pizza dough calculator here. That should give you a decent starting point for yeast quantities. Bear in mind that it’s not perfectly accurate and you’ll still need to watch the dough.
Once you have an amount of yeast and proof time that works for you then you can more accurately replicate it. But the room temperature makes a huge difference.
In general, I recommend using slightly more yeast than required since you can knock back overproofing dough but you can’t do much with underproofing dough. If you haven’t heard of this technique, you can check out my article on knocking back overproofing dough here.
Thanks for the comment!
Hi. I’ve been going through all the Vito YouTubes and a couple points gathered from going back a ways. He adds honey to add in the browning in a typical home oven. Tony Gemignani also adds molasses to his dough for lower temp home ovens to get color on the cooked pizza.
There is also some confusion as Vito says in an earlier video from last year to use 5 grams fresh and ~2 grams dry. But he does cool ferment in yhe fridge for 16-24 hours.
Looking forward to trying your approach.
Thoughts on double ferment? First the poolish then the dough for another 16-24 (cold) and then the ball and bake.
Thanks for this great site!
Hi Ed, you could experiment with adding honey or other sugar if cooking at lower temps. This should help you to get some browning if you’re struggling. Having said that, I’ve achieved some nice browning in a regular oven without adding sugar so it’s definitely not neccesary. It’s very important to pre-heat your oven for a long time (at the highest temperature) and to place the pizza near the top element (if you have one).
You can cold ferment if you like or you can do room temperature fermentation. Each method has it’s pros and cons. Personally, I prefer room temperature fermentation but feel free to experiment and see what works for you. You just need to adjust the yeast accordingly, PizzApp+ is a great mobile app to help with this.
In terms of poolish, I think it does produce a better dough but you can still make great pizza without it.
Thanks for the questions and good luck!
I’m 67 years old, and a retired cook, of about 1/2 a century. Since retiring I decided to look into breads (now-a-days). I was actually a bakers’ assistant before I began cooking proteins and vegetables.
Living alone, I decided to try pizza (dough). My initial recipe, I got from “Sally’s Baking Addiction”, which is surperb for beginners, myself included. This was about 18 months ago, and I’ve been experimenting with dough, since. (Malt, flours, ect.)
I happened upon your dough recipe and decided to try it. I made the Poolish as you described, but let it sit for 2 days, covered by a kitchen towel. When I checked on it, it had DEFINITELY passed its prime, with a crust on top. I removed the crust, doubled the water (due to evaporation) with 5 grams of FRESH yeast ( available from FABCO, online ) and the 300 grams of flour (I’m using King Arthur sir Lancelot 14% protein).
DAMN. This dough was wet and light. Let it rest for two hours, covered, folded several times and let it rest again. The pizza came out crazy good with a Neapolitan style outer crust (airy, which HUGE bubbles in the crumb), a cracker (no kidding) bottom with an above the crust consistency of thin focaccia So happy!!! I’ve been cooking and feeding folks in my apartment, and city workers outside this pizza. ITS A HIT
Thanks for providing VALUABLE insight!!!
Thank you so much for the kind words Dom! It makes me happy that people are enjoying my recipes and it encourages me to keep working at it.
I started out just by learning for myself how to make great pizza. Over time I developed a method that was authentic but also as easy as possible and resulted in excellent results every time.
So I thought I have to share what I’ve found out. I think many people think that making great pizza from scratch is just too difficult. But it doesn’t have to be. Like most things in life, it just takes practice (and some love too).
I’m glad it’s working out well for you and I hope it helps everyone else too! Thanks
Hi tom would you suggest using PIZZA APP for playing around with? It has a poolish setting and I was wondering which % should I put it at when wanting to bake I only do around 5 pizzas at a time and I like 64/65% hydration. Best to leave poolish at RT then mix it into the other ingredients and bulk ferment for 1 hour then id stick it in fridge and take out and shape to balls for 6 hours. Does this sound ok
Hi Bobby, yes I like using PizzApp+. Although I haven’t used it for poolish to be honest.
Somewhere close to 50% or just below is a good number. And yes, you need to allow poolish to prove at room temperature before adding in your other ingredients. If you are doing a cold prove, then I would recommend making it a long one (at least 24 hours) since yeast doesn’t work as well when it’s cold. You’ll need to do a very long prove in the fridge in order to build up the same amount of flavour as a room temperature prove.
Also, be sure to allow the refrigerated dough to come to room temperature (maybe 2 hours or so) before balling. Then as you say, allow the dough balls to prove for around 4-6 hours before cooking. Hope this helps! Good luck!
Thanks a bunch! I made pizza with this recipe and it turned out amazing. I have never had results like this at home before. You rock!
Awesome, well done Nichole! Keep making great pizza!
Hi Tom,
I’ve made the poolish 9h ago but I need the pizza dough for tomorrow. Can Ieave the dough in the fridge over night and take it out 2h before using it?
And if so what do you suggest; bulk in fridge or make the balls and put them in an container in the fridge?
Regards Bjørn
Hi Bjørn, I hope your pizzas turned out well.
In general, I wouldn’t recommend refrigerating dough unless you want to save left over dough. Adding dough to the fridge will slow the fermentation right down so really the dough would have to be almost fully proved before being refrigerated.
For the flavour to develop in the dough, you need a nice active fermentation. This is one the reasons poolish produces such great flavours and it cannot really be achieved in the fridge.
In my opinion, the best option is to add less yeast to your poolish. This way, you can slow your fermentation down to a level that works for you, without comprimise. Bear in mind this will require some trial and error, as with most baking and pizza making!
If you still want to experiment with cold proving then I would recommend bulk proving in the fridge. Then removing the dough the next day, allowing it to get to room temperature, and then balling and proving for 6 hours or so.
Of course, you could try cold proving the dough balls too. Just experiment and see what works for you! Good luck!
Hi, I would like to try this as I currently use sourdough. If I want to make a larger quantity, do I just double all the ingredients? Many thanks in advance.
Hi Vix, thanks for the question. You can indeed simply double the ingredients. Hope you enjoy the poolish dough!
Much thanks Tom,
Searched long and hard from something that fitted well with a simple schedule, this works really well. Poolish brewing for my second attempt tomorrow. Have you ever tried with sourdough starter?
Thanks Paul, I’m glad you’ve found it helpful.
I have tried with sourdough before and it can work very well. It is a lot of work though and personally, I actually prefer poolish pizza.
But I will probably be doing a series on sourdough at some point as I know it is something a lot of people are interested in trying. So watch this space!
Since true Pizza Napolitana uses 00flour, can you substitute 00 in your recipe?
Hi Carolyn, you can substitute 00 flour for strong white bread flour. But for the most authentic results, 00 flour is the best option.
If you choose to substitute for strong white bread flour, you will likely need to increase the hydration a little to achieve a similar dough.
My poolish recipe makes a 59% hydration which may work well but if your dough feels a little dry, you can try adding water in 10g incrememnts to increase the hydration by 1% each time. You will probably only need to increase the hydration by 2% – 5%.
I hope this helps. Also, my article on baker’s percentages may help with the calculations.
Good luck!
Thanks for posting this recipe – I love how you’ve broken down the timing!
I want to substitute 00 flour for 50% All-purpose and 50% 00, as 00 is expensive and really hard to come by here. Would you recommend putting half of each in the poolish, or all of one kind in the poolish and the other in the dough? Also, how much extra water would you then recommend to increase hydration as above?
Hi Jason, glad you like the recipe. I don’t think it would make much difference to be honest which way you used the flour.
In terms of the hydration, it’s difficult to say how much to change it since every flour is different. But personally, I’d probably go for around 58-60% and see how you get on. Thanks for the questions and good look!
When I added my poolish to the rest of my dough, the dough didn’t rise or double in size when I covered it to let it rise for 3 hours. Is that normal..?
Hi Jim, this is perfectly normal. The dough will need around 8-10 hours to fully ferment (double in size). If your room is cold, this could take a little longer.
I hope that answers your question. Thanks
Thanks for this incredibly detailed recipe! I’m planning to make only 2 pizzas at a time. To do this, do I just divide the recipe in half?
Hi Mandy, thanks for the positive feedback! And yes, you can simply half all the ingredients. Good luck and let me know how it goes. If you have any more questions feel free to ask.
Hi Tom,
Thank you for this recipe. What if I want to use 1 kg of flour in total?
Hi Simon. You will need to have a solid grasp of baker’s percentages to calculate poolish recipes. Feel free to check out my article on Baker’s percent here.
But I’ll try my best to explain:
We want 50% of the total flour in our poolish and then we want 0.2% of that as yeast. So our poolish will be:
500g flour (50% of 1kg)
500g water (100% of 500g)
1g yeast (0.2% of 500g)
To calculate the quantity of ingredients we need to add to this, we will need to calculate all the quantities required and then subtract the quantities used in the poolish:
(I have assumed 60% hydration dough – check out article on hydration here if required.
So for 1kg flour:
600g water (60% of 1kg)
22g salt (2.2% of 1kg)
So once our poolish is ready, we will need to add:
500g flour (1kg – 500g)
100g water (600g – 500g)
22g salt
I hope this makes sense, it can be quite difficult to calculate!
Good luck!
Hi Tom
Can you clarify the calculations for Salt above please?
There are two values 20g and 22g not sure how these have been calculated.
Where has 2g gone 🙂
Hi Cam, well spotted I made a mistake! I’ve changed it to 22g. Either would’ve been fine though. I generally recommend between 2% – 2.5% salt.
Hi Tom, its a great recipe thanks. Just to understand the 60% hydration. Why havent you included the 500g of water in the poolish for this calculation (like you include the 500g of flour)
Thanks from Switzerland!
Hi Colby, I’m glad you like the recipe. To clarify, the water in the poolish is taken into consideration:
– There is 300g flour in the poolish + 330g flour extra. This totals 630g flour.
– 59% (hydration) of 630g (total flour) is 370g (total water).
– 300g water in the poolish + 70g water extra = 370g (total water).
– Hence the water in the poolish is included.
I hope this makes sense. Poolish can be a little complicated but it gets easier the more you make it!
Good luck!
Hey, can this recipe be doubled? I intend to make about 7 12 inch pizzas from a single kilo bag of caputo blue pizzeria dough? What do you recommend for that as far as ingredients weights etc?
Paul
Hi Paul, yep the recipe can be scaled to any amount. It would probably be best for you to check out my pizza dough calculator here. That should help you to get the correct amount of ingredients for any number of pizzas. Good luck!
It’s take too long to prove. But I will try to make it
You can double the amount of yeast if you prefer and the dough will prove in half the time. You will be rewarded with a longer prove though, you can achieve a better flavour and texture. Good luck!
Tom
Clear simple directions. Easy to follow. Thank you. I have made pizza many times before at home. I am using this method for the first time. Fingers crossed
Thank you for the kind words Sudhan. Any questions just give me a shout. Good luck!
Tom
Thanks for the reply. The pizzas turned out to be excellent. Today I am making normal dough.
One question. I recently bought an ooni karu and have been very pleased with the results using gas. I used charcoal yesterday for a test pizza. Turned out great but was not able to get to 400+ C. Any tips?
Hello again Sudhan! I’ve never used a Karu but I do have a friend that owns one. He tells me it’s difficult to get the oven above 420C so I think this may be a typical issue.
Have you tried using dried wood instead? I suspect you may be able to get the oven hotter this way. I guess you could also buy the pellet hopper to attach as it’s the same attachment as the gas? I have an Ooni 3 with pellets and it gets incredibly hot. It can easily get to 500C if you want it to (although I prefer around 470C).
Let me know if you find anything out! Good luck!
Once through the final proof, how long can I keep a dough ball in the fridge before using?
Hi Lindsay, thanks for the question. The dough is supposed to be used straight away. If you have some dough left over after making pizzas you can knock it back (remove all the air from it) and then refrigerate it. You will have to check the dough the next day to see if it needs knocking back again (if it is overproving).
Also, before you make pizza with the refrigerated dough, you will need to bring it out to allow it to get to room temperature first. This will take at least a couple of hours.
I’m planning an writing an article on knocking back shortly so stay tuned for that. Good luck!
Really good instructions. Passed on to a few people now. I’ve done both this and a sourdough. Whilst I prefer the taste of the sourdough I think this is much easier to work with and has a better structure.
Fast becoming my go to dough recipe.
Thanks for the great article!!
Thanks for that Bobby! And yes poolish is much easier than sourdough. You can also reduce the amount of yeast in the poolish to prolong the fermentation. This will result in more subtle flavours in the dough (more of the sour flavours too). If you extend the prove to around 48 hours you should see a noticeable difference. Cheers
I halved the ingredients and it worked perfectly using good hard flour. Next time I’ll use 00 but i was very happy with my first results. The only glitch was that the dough got VERY sticky during the second proofing. I don’t have any real pizza tools but prebaked for 5 minutes @250C on the back of the oven pan on the middle rack. Great tasting crust without any sugar or honey!
Hi Steve, glad it worked out well for you. If you find the dough is too sticky you can just reduce the hydration of the dough next time. Check out my article on hydration here if you haven’t already.
The easiest way to reduce the hydration (to make a dough that isn’t sticky) is to add more flour as you are kneading the dough, just a small handful at a time. Once the dough won’t take anymore flour, you’re good to go! Good luck!
Can this dough be frozen? If so, what do you recommend for thawing and final prep?
Does this dough stretch easily without sticking to prep surface?
Hi Kathy, I have never frozen dough to be honest. I would recommend making it fresh every time if possible.
And yes, the dough shouldn’t stick to the side if you’ve kneaded the dough well and the hydration is correct for the flour you are using. The shaping is quite tricky though. I’m bringing out an article with a video on this soon so stay tuned. Cheers
I made a batch of this dough last weekend and it is very good. As I usually make my dough in batches and freeze some for later yo save time, I thought I woul give it a try with this dough.
I defrosted the frozen dough in the fridge over night and then let it sit at room temperature for 4-5 hours before baking. It turned out really well and seemed easier to stretch. Everyone in my family thought it was even better than the fresh dough (although maybe we were just more hungry 🙂 ).
Thanks for the great recipe Tom
No problem Dave, thanks for letting me know how it turned out. And keep going with the pizza it sounds like you’re doing a great job!
Hi.
Did you freeze after balling?
Poolish pizza for normal oven at 500f-550f would you had sugar or honey in the recipe for browning agent?
Hi Vincent, thanks for the question. You could add a little sugar for browning but I wouldn’t recommend honey as we don’t want to make the dough too sweet (unless that’s what you want).
Personally though, I wouldn’t add any sugar. At those temperatures you should be able to get some nice browning and crisp in the crusts. I would recommend trying to get your pizza as good as possible without sugar before deciding whether to add it.
I used to make a lot of pizzas in my regular oven and they used to turn out great without sugar. I was cooking at around 260C/500F for about 6-7 minutes with the oven fan turned on.
Good luck!
Would this work for bread flour, to make more of a New York thin crust crispy pizza?
Hi Dean, this will work great for NY style pizza as well. I would just increase the hydration of the pizza dough to around 60%. To do this you can just add 80g water to the proved poolish instead of 70g.
Hope this helps. Cheers
Tom, I made the poolish yesterday morning at 6:00 am. Then mixed it with the final dough at 8:00 last night. It is now in the fridge in 3 balls and I will cook it tonight in my Alfa 4 Pizze oven. I know its a bit different than your schedule, but this is going to work wonderful for me. If there is somehow to send you photos after tonight I would love to share my results. I am on instagram @williamsembers Thanks for the recipe!!
Hi Dean. I hope it works out well for you, poolish pizza is absolutely delicious!
I’ve had a look at your Instagram and wow, those pizza ovens look amazing!
Thanks for the comment, good luck.
Absolute the BEST dough I have made ever!!
60% hydration cooked at 650 degrees
Thank YOU Tom for the insight!!!
Awesome! I’m glad the dough worked out so well for you Dean. Got to love poolish!
Keep up the good work!
Thank you so much for this article. I am just learning everything and have seen a lot of people post about Poolish dough and I’ve never heard of it. Your article really helped me to understand everything. I made a dough last week using pizza yeast but we all found it to be a bit to chewy. I’ll definitely try playing around with poolish dough. After all, I was born in Poland! 😂 Thanks again 😊
Haha thanks Joanna! Hope the poolish dough turns out well for you!
Good luck
Hello Tom, great explanations, you really explain very easy! I have a question if I want to make the dough with 2 Kilos Total of flour so I can make let’s say 10 dough balls, is this recipe right?
For the poolish
1000gr flour
1000gr of water
2gr of frest yeast (not dry yeast)
For the Dough I will add
1000 gr flower
200 gr water
44 gr of salt
I will cook the Neapolitan pizzas in a brick oven at 450 Celcius
Is this right?
Many thanks!
Hi Christian, thanks for the question. Yep, that recipe should get you around 12-13 250g (10 inch) pizzas. Everything is spot on, well done with the calculations! And 450 Celcius/850 Fahrenheit is perfect.
Good luck with them!
Tom can I ask what dough ball weight you recommend for 12 inch Neapolitians?
Hi Derek, I would recommend around 325g-350g depending on shaping and crust size. Good luck!
Excellent Tom!!
You are very kind! I really learned a lot with your teachings! You are very clear when you explain and it is very easy to understand for a beginner like me.
I will post the results of the poolish dough and will comment after cooking these amazing Neapolitan pizzas!!
Hi Christian. I’m looking forward to hearing how you get on. Have fun!
Super easy recipe! Thank you very much! The pizzas were amazing and very easy to make. I am very happy that I found your blog. My kids already made Tuesday – pizza day. They only like simple Margherita Pizza. I am using 0.4g yeast for the poolish for the presented quantities.
That’s great Elian! I’m so glad you’re enjoying the content and finding it useful. And I bet the kids are loving the pizzas!
Stay tuned because I have a lot more planned. Cheers
What are your thoughts on biga vs polish?
Will there be a recipe?
Hi Simon, good question. I will do an article on biga when I get round to it. There are advantages and disadvantages to both but poolish is much easier to work with which is why I am so quick to recommend it.
But feel free to give biga a try and let us know how you get on!
Hi Tom, I tried 30% Biga with 48 hours RT/cold mix fermentation and in the beginning I used 0.5% IDY, which was too much. I noticed that the crust is crispier and had more holes than my 30% Poolish with 24 hours RT/cold fermentation. So I think that Biga is my winner so far. I imagine that the biga dough tasted more like pizza.
Hi Simon, good experimentation, thanks for the input. I’ll be sure to do an article on this in the future.
Hi Tom
I’m trying to get my head around timings, hopefully you can help and explain?
Your poolish ferments for 10ish hours, which I’m fine with.
But your second prove (after balling up) is an additional 10 hours.
I would like to reduce this to about 6 hours so I can start cooking around lunchtime.
What would I need to change to do this?
Thanks very much
Cam
Hi Campbell, I would experiment with adding a little bit of yeast after the first prove. This will speed up the second prove. I would try around 0.1% to start with. So if you’re using 1kg flour, that would be 1g yeast. Check out my article on bakers percentage here, if you haven’t already.
So the process would be like this:
– Prove poolish for around 10 hours
– Mix remaining ingredients, including additional yeast
– Shape the dough into dough balls
– Prove for around 6 hours
This is probably the easiest option for you. The other way would be to use 0.1% yeast or less in the poolish from the start. You would then get a 24 hour poolish which you could work around your schedule.
Good question and good luck with it!
Thanks Tom
Your help is very much appreciated.
Hi Tom, thank you for such an amazing recipe!
Can you please tell me if the following might result in a flavorful and airy pizza.
10 hrs poolish, 24 hours bulk cold ferment and then 4 hours room temp ferment after balling.
If yes, how much yeast should I add? Pizza app suggests 0.2% IDY for poolish and adding 0.38% IDY again while making the bulk dough. Wont it be too much ?
Hi Kunal, no problem! I would say that sounds about right. The cold temperature will slow the prove down a lot so you will need to add more yeast to prove in that time.
My only concern would be that 4 hours is not long enough for the final prove since you will be knocking the dough back when balling up. You may need up to 8 hours prove after balling.
I’ve always found PizzApp+ to give pretty good estimates so see you how get on. Good luck!
Hi Tom, can I do a 10 hr room temp proof then ball it up and put in the fridge for 24 hrs?
Hi Brian, you could do but it will need quite a long prove when it comes out of the fridge still. The best thing to do is to keep checking on the dough
As a general rule of thumb, putting dough in the fridge will slow the prove by around 4-5 times. So a 10 hour prove at room temperature becomes 40-50 hours.
Hope this helps. Good luck!
Hi there! Congrats for all you do here.
On poolish: would you use fresh yeast instead of dry? I do it for baguettes and it works alright, but I was wondering what you think about it.
If yes, would you just triple from 0.6 to 1.8?
Thanks! And happy New Year.
e
Hi Ernesto, thanks for the positivity!
And yes definitely feel free to use fresh yeast! I personally prefer the flavour although dried yeast works well too.
I would double the quantity rather than tripple, assuming that your yeast is very fresh.
Hope that helps. Thanks, and Happy New Year to you too!
A question. For that final proving time of 8-10 hours… is that at room temperature? I didn’t think you were supposed to leave dough out that long without refrigerating it. Thanks!
Hi Steve, yes that’s at room temperature. Dough can be left to prove at room temperature for easily up to 48 hours (if the correct amount of yeast is used).
In fact, sourdough starter can be left at room temperature indefinitely (as long as it is fed regularly).
Proving dough in the fridge seems to be becoming very fashionable but it’s technically not the best way. The optimal temperature for yeast is around 27C-32C (80F-90F).
The only benefit to proving in the fridge is that the fridge remains at a constant temperature. However, you would need to use up to 10 times as much yeast to allow for the inefficiency of cold proving.
Additionally, refrigerated pizza dough cannot be shaped properly so the dough has to be removed well in advance so that it can get to room temperature.
For these reasons, I generally recommend proving at room temperature which is close to the optimal temperature for fermentation.
Good luck!
Hi Tom, I can’t explain enough what ur article did. Since the pandemic Iv been reading thousands of websites to try to understand basics of a grt pizza and baguettes. Ur clarity in explanation has summed up 1 full year of research.
I have a question. I’m trying ur recipe but I substituted 1/8 of whole-wheat flour (Bob’s Red Mill). Again been glued to try to understand how much water to add extra as whole-wheat requires more hydration.
So for let’s say ur recipe (instead of going for 100% white, I went for 87.5% 00 white pizza flour and 12.5% whole-wheat. I ended up increasing water by 0.5%. So ur recipe is about a 58% hydration. I made it 58.5%. And because there are no photos I could not be sure I was ok.
Is there any formula one can use for substitution. As I add whole wheat for reason that a little of it can give a nice flavor. Plus the health aspect.
Thanks so much.
Hi Mais, I’m glad you’ve found the site useful! And good question!
There isn’t really an exact way to calculate it to be honest. So much will depend on the particular flours you are using.
It definitely makes sense to increase the hydration a little but how much, I can’t say. 58.5% hydration sounds about right to me to be honest. How did it turn out?
You could always change the hydration next time round depending on how it turned out. I have found that a lot of pizza making is down to trial and error!
Good luck!
Hey Tom. Thanks so much for ur response.
I had so many variables that I’m not sure how it turned out. It did not puff up as much in the oven (I’m using a domestic oven with pizza stone with convection). It was a little hard. I don’t know where I managed to find this equation. I already forgot. But I think pizza is much nicer with zero zero flour.
Plus I read somewhere that 00 flour is actually “white whole wheat” flour. So it’s got some of the healthy fibers. I’m trying ur recipe tonight. But making it a 75% hydration using stretch and fold method for baguettes. Wish me luck (: again can’t thank you enough.
And I love how u take the time to help us out. Ur a real cool baker 👨🍳
Hi Mais. No problem at all, thank you for posting a question. I think it’s great to have a community feel to the website where we can help each other out.
I agree, pizza does usually turn out better with 00 flour, though you can still make great pizza with other flours.
It can be difficult controlling all the variables. My advice would be to try to change just one variable each time. That way you know what you’re controlling and you can dial them in gradually.
If you change too many things at once it’ll be almost impossible to determine how a change has impacted the end result.
The other thing I would say is to not worry too much. Great pizza can be made many different ways and you will work out what works for you in time.
Good luck!
Sorry to take from ur time again Tom. I have another question.
How come some poolish recipes (especially baguette) add an extra amount of yeast (instant) in the final flour/salt mix (after poolish is ready). Even though ur recipe does not call for that? (Uv mentioned that this poolish recipe works also for making baguette)
No worries Mais. I also don’t understand the point of adding additional yeast. The only benefit is that it will speed up the proving.
But to me this is counter-productive. The point of poolish is to give it time, so that it can develop more flavour and a better texture.
So to me, I would always allow the poolish to prove itself rather than trying to speed it up, unless you’re short on time and have no option.
And the same process does work well for baguettes. But for baguettes I would up the hydration to 70% – 80% whereas for pizza I would shoot for 56% – 60%.
Hope this helps!
Hi Tom,
Tried the recipe but ended up leaving the poolish for around 15 hours. When it came to making the final dough, it’d hardly risen even after 1-2 hours. Likewise when I balled them up, they stayed very flat.
I thought it might be an issue with my yeast but the poolish appeared to be really bubbly so don’t think that’s the case. Do you think I left the poolish for too long and this caused the lack of rise in the final dough and balls?
Hi Ollie, after mixing the final dough you still need to leave it for 8-10 hours to rise. With this recipe, it takes roughly as long as the poolish took to prove again (or a little less) once adding the remaining ingredients.
It sounds like you did everything fine to me. You may have left the poolish a little too long but since it was really bubbly, it should’ve worked well.
I think you just didn’t leave the dough long enough after mixing (following proofing of poolish). I typically just leave the dough for 1-2 hours before balling as it makes the dough balls easier to shape.
But once shaped, the balls will still probably need at least 8 hours to prove. There is no exact timing here, you just have to be patient. Wait until the dough balls have roughly doubled in size and are nice and bubbly. Then you’re good to go!
Hope this helps Ollie. Good luck! Let me know if you get stuck again but it sounds to me like you’re close already!
Hi Tom, I have a question about the dough balls. I have followed your exact recipe and I’m using ‘Le 5 Stagioni’. What I noticed that they don’t stay in shape, but they are flatten out after a while (not like water, but they don’t stay up the way I shaped them). I was wondering, seeing all those beautiful shaped dough balls online, 1) is that normal 2) has it something to do with the flour brand, i.e., is it different when using Caputo 3) is it even possible to have strong dough balls with the % hydration and after the time specified in your recipe?
Hi Samall, you are right that there are a lot of variables here! Your dough will depend mainly on the following (amongst others):
– The type of flour used (brand and grade)
– Hydration of dough
– Your kneading technique (and time)
– Your type of yeast (and proofing conditions)
When you see round dough balls online (and they are very round), these are mostly before fermentation has taken place, which is why they are so round.
Typically though, you can expect your dough to flatten out (spread out). This is a good sign as it shows that your dough is soft. However, if the dough is too difficult to shape, then it’s not a good thing.
I would recommend reducing the hydration a little (using slightly less water or more flour) initially. This will help you to get a stronger dough which should make shaping easier.
Check out my video on shaping pizza here. With those pizzas you can see that the dough has flattened and is very soft. It was very easy to stretch but it does mean you have to be somewhat careful with the dough. Drier dough is more forgiving so I generally recommend mixing a drier dough to start with.
For the flour you have, I would recommend trying a 56% hydration dough. This should give you a good balance of strength, softness, and workability (stretchiness).
But most importantly, you will have to adjust the recipe to suit your own conditions. This is mostly done through trial and error. After a while you gain a sort of sixth sense for this sort of thing, where you realise exactly what needs to be done.
It’s even possible to save dough that is too weak. Just be quick but gentle in your shaping and making good pizza with less than good dough is still possible.
If you haven’t already, check out my article on baker’s percentage here. Also, take a look at my article on hydration here as thing should help you to understand how it works. Adjusting your hydration (and understanding how it works) is probably your most useful tool as a pizza maker.
Hope this helps you out. Good luck!
Hi Tom,
Great article, I’m really struggling to get any rise in my main dough and subsequent dough balls, they just seem very flat with very little air in. I wondered if it was my yeast being no good but the poolish mixture was very lively and bubbly. The only thing I can think of is that I maybe left the poolish for too long and therefore didn’t cause the dough to rise. Any thoughts?
Thanks
Hi Ollie, I replied to your previous comment so be sure to check that out.
It could be your yeast that’s the issue, although it doesn’t sound like it is if the poolish was nice and bubbly.
I think the main thing is to give your dough more time to rise. It’s not a bad thing if your dough takes a long time to rise. The longer it takes, the more flavour develops. However, it can be inconvenient.
I would recommend using a little more yeast (and don’t be afraid to leave the dough for a while) to see if this helps. If not, then I would try getting some fresh yeast to see if that was the issue.
Also, have you seen my pizza dough calculator here? This will help you to get roughly the right amount of yeast when musing the direct dough method (not poolish). I would recommend perfecting the normal type of pizza first, before moving onto poolish.
Poolish is a little like sourdough and requires you to listen to the dough. It’s more difficult to control prove times and that is really only something that comes with practice.
If you haven’t already, I can recommend checking out my pizza school series here (with videos). I show you the easiest way to make great pizza from start to finish.
Thanks for the questions Ollie. Good luck!
Hello. I have used your recpie twice and so far I love it! I want to try to do a baguette in my wood fired oven. Do you happen to have a recipe/ ratios for bread using poolish? Thank you!
Hi Veronica, for baguettes I would recommend using strong white bread flour or french T65 flour. This should provide with some more strength in the dough which will allow you to increase the hydration to get a more airy crust.
I would recommend a hydration of 70% for baguettes (you could increase this in later bakes but may not need to). The most difficult part about baguettes is the shaping, which is very different from shaping pizzas!
There are plenty of videos on YouTube which can show different techniques for shaping. One of the most important steps is that the baguettes must be proved again after shaping. A couche can be very handy to help with this.
Also, be sure to check out my articles on baker’s percentage and dough hydration which should help if you haven’t read them already.
I hope this has helped a little. Good luck!
Hi Tom
I’m interested in trying a poolish dough, having just tried the Ooni sourdough recipe and got good results. I’ve seen other poolish recipes that add further yeast to the main dough e.g. in the PizzApp. Why would this be and what difference does it make?
Thanks in advance..
Dan
Hi Dan, thanks for the question. The only reason to add more yeast would be to speed up fermentation.
Personally, I don’t see the need to do this as longer proves result in more flavour, which is one the reasons a poolish is so good. A longer prove also leads to a dough that is more forgiving, this is especially important if you are doing a few pizzas.
If you add extra yeast and prove the dough quickly, for example, the first pizza dough may be perfectly proved but the 4th one may be overproved by the time you get to it (even more so if you’re doing 10 pizzas).
So I would only add extra yeast if you have to, because you want need the dough to be ready sooner.
Hope this helps!
I am old and do not understnd the metric measurements at all . Could you give me measurements for your poolish and pizza dough in tsps to cups only measurements i know thanks . Old granny
Hi Fran, sorry but I don’t know how to convert to cups. I’m also not a fan of using cups as they can be very inaccurate since everyone uses different size cups.
I can highly recommend picking up some cheap digital weighing scales. They make life so easy and you’ll get a perfectly accurate recipe everytime, which is very important when making dough. Tiny changes to a recipe can have a huge impact on the end result.
Good luck!
Being “old” is no excuse. I’m 77 and easily convert. Just get a metric scale.
I have a love affair with pizza! My last meal so to say?
Been making it for over 60 years! Always wanted to go into that business and share what a really good pizza is all about, not 90% of the commercial crap?
But kept it to my self.
Your explanation is the best and easiest I have seen regardless of how many awards the pizziolas have won!
Great job.
Harold
Thank you Harold, I’m glad you’ve enjoyed my explanations, I try to make them as clear as possible.
And making pizza for over 60 years is incredibly impressive!
Keep up the great work! Cheers
Great job for all the info you provide!!!
I just made the poolish to try your recipe tomorrow.
One question: I tried to replicate your dosage in the Pizza App and I get also yeast for the main dough, extra from the one you put in the poolish. Any thoughts on that? Why more yeast?
Also, when making the main dough, does the order matter? Water, poolish, stir to disolve, flour, salt?
Thanks!
Hi Marian, the only reason for adding more yeast is to speed up the second prove. I prefer to leave out the additional yeast to allow for a slower, more natural prove. This should lead to more flavour, better texture, and a more forgiving dough to work with.
And no, the order doesn’t really matter. Though I have found it helps to add the additional water to the poolish first and mix it in. Then add flour and salt as you suggested.
Thanks for the question!
Hello mate. Tried this a few times and results was amazing. This weekend was the first time I used 00 floor and it was next level! Best dough I’ve ever made!
Got a few questions though…
The one challenge I is that on the final prove (usually around 6-8 hours), the dough rises like crazy and ends up touching and sticking to the other dough balls it comes into contact with (which were quite far apart to start with), and this makes it difficult to separate and scoop up before shaping the pizza base.
Any idea why the dough is rising so much? (I’ve followed the measurements accurately, only the yeast may have been a little extra…measured 1g instead of 0.6g)
And what’s your thoughts on lightly rubbing oil around the dough balls before the final proving or lightly coating with flour, to assist with preventing the sticking? Or am I not kneading enough – How dry is the dough meant to be?
Hi Mesh, some good questions there.
Firstly, you could try using a little less yeast in the poolish to slow your prove down. If it’s proving really quickly it can be hard to control. Dough will prove quicker in warmer environments.
Also, when seperating the dough balls, don’t be afraid to use plenty of flour. Check out my video on shaping here if you haven’t seen it already. I also show how to remove the pizzas and I recommend getting a pizza proving box, they’re inexpensive and really handy.
When it comes to the final prove, I would not recommend adding anything to the dough. Flour is a definite no at this stage as it will cause the dough to dry out – a layer of skin will form as the flour soaks into the dough.
A little olive oil can help to prevent the dough from drying out. But if your dough is covered properly – in a bowl with plastic wrap or in an airtight box (not with a towel) – then it shouldn’t dry out at all.
So the dough should be quite dry after kneading but after balling it should be silky smooth, even just before shaping. If your dough is forming a skin then it is exposed to the air so you need to look at storage. A pizza proving box would be my best recommendation, or some plastic boxes or just bowls with plastic wrap.
Hope that’s helped. Good luck!
Hi,
I just tried your recipe but I think I messed up somewhere. I did like this:
12h poolish at room temp (20-22C) with Fresh yeast
1h covered after mixing the rest (water, poolish, mix, 1/2flour, salt, 1/2flour)
10-15min knead
another hour rest covered
made balls and put them in a pizza tray for 8-8 and a half hours at room temp
They more than doubled in size, looked round and puffy. Took them out very easily from the tray using some semolina and them put them on the counter.
And here is the bad part: as soon as I drop them from the spatula they deflate !!! After making the pizza the edges were not so high than the rest of the dough.
Ooni Fyra was at above 450C. From 4 pizzas only 1 had the hollow cornicione but the dough seemed a bit heavy on the taste…not as light as i hoped.
Any thoughts on where it might of gone wrong?
Thanks!!!
Hi Marian, it sounds like you did everything right and it’s good that your dough was large. That meant that the fermentation was happening nicely.
However, it sounds like they overproved a little. So next time you could try shaping the pizzas a little earlier. Also, you could try reducing the amount of yeast a little to slow the fermentation down.
The temperature of your room will affect the fermentation time. So if your room is warm, use a little less yeast. If your room is cold, use a little more yeast.
Also, be sure to handle the dough carefully when removing them for shaping. You should try to retain as much of the air in the dough as possible. This is easier said than done but isn’t too difficult with practice.
Be sure to check out my video on shaping here if you haven’t seen it. I show you my technique for removing and shaping the dough.
Hope that’s helped. Good luck!
can i use instant dry yeast? and how much!
Hi Cathy, this recipe uses instant dry yeast. The amount is 0.6g. Good luck!
I had never tried a poolish but used your recipe for a pizza I made tonight. This turned out really great. Thanks so much for all the detailed explanation which made a novice feel like he could attempt this challenge!!
No problem DJ, I’m glad you found it easy to understand, that’s my main goal! Keep going and your pizzas will only get better and better! Good luck!
Hi Tom,
Will I achieve the same results if I follow the recipe to the point of balling up the dough but after I ball up the dough I then refrigerate the dough balls and the next day I take out to come to room temperature for 8*10 hours before launch?
Hi Carolyn, that should work fine. Just be aware that dough in the fridge will still prove but very slowly (about 1/10th as fast).
Your plan sounds good to me but the best thing to do is to try it and then adjust your method accordingly on the next time.
Good luck and let me know how you get on!
Hi Tom, l was recommended by a cooking group and never heard of this before. It’s awesomely interesting and plan on experiment once I’ve had some experience. Years back my stomach reacted badly to pizza so had to stop eating it. But I’ve been naughty and have slowly started eating only the thin pizzas and want to learn ways of making pizza using gluten free flour. Would this be a different recipe? Any advice would be much appreciated!
BTW this is great detailed explanation for dummies like me.
Hi Kim, I’m glad you’re interested in my methods. I try to keep it as simple as possible.
I may bring out a gluten free recipe as I have had some people asking for it.
In the past I’ve had success with the caupto gluten free flour and I just use my normal recipe.
Thanks for the question and good luck!
Hi! Thanks for sharing your pizza knowledge. I have been making pizzas using sourdough however since I am from the tropics-The Philippines, overproofing can be a pain plus its summer heat so double the pain lol.
Should I go with poolish, can I cold ferment it say 24hrs after adding pizza dough to the poolish mixture? Then ball after cold fermentation? Thank you so much!
Hi Raffy, yes you can cold prove instead. You can also just try using less yeast until you find what works for you. But in warm temperatures, refridgeration can be very handy.
Just bear in mind that the dough will prove at about 1/10th the rate in the fridge – it almost stops proving altogether!
I would say that poolish makes the best dough but you can make great dough without too so feel free to experiment and see what works for you.
Good luck!
Home oven with stone what temperature?
Hi Hibbie, I recommend as hot as your oven will go! Check out my article on the best temperature in a home oven here. Thanks
HI, how would it work to scale down this recipe? Is there supposed to be a specific ratio water /flour in the poolish versus final dough, and what about the amount of yeast if I only want to make 2 pizzas/ Thanks in advance for your help 🙂
Hi Gail, you can simply half the recipe to scale it for 2 pizzas. I would also half the yeast to 0.3g. If your room is warm you could reduce this to 0.2g and if it’s cold you could increase this to 0.4g.
Having said that, I would generally recommend making more pizzas than you need as this will give you more practice at shaping. Also, if a pizza doesn’t turn out well, you can always make another.
In terms of the water to flour ratio, in the poolish it should always remain at 1:1 (100% hydration – the ratio is always measured as a baker’s percentage). But the final dough (once additional flour & water is added) should be in the 56% – 60% range for Neapolitan pizza dough. Check out my article on hydration here and baker’s percentage here if you haven’t already.
I hope this helps, getting your head around poolish can be tricky. In simple terms it is just a 100% hydration dough (known as a preferment) which you prove before adding additional flour (and salt) to bring the dough to the hydration you require. You then prove the dough again before baking.
But the easiest way is to simply scale this recipe depending on how many pizzas you want to make.
Good luck!
Hi Tom
Thanks for this – excited to try the poolish method for my next pizzas.
Would you say the same hydration for Neopolitan dough even if the pizzas are cooked in a domestic oven? I’m sure I’ve read somewhere that as they take longer in a domestic oven (even as hot as it will go) they lose more water so hydration should be more like 65%.
Hi Emma B, good question. Yes, I would recommend the same hydration (56%-60%) for anyone that isn’t an expert.
Going to a higher hydration makes the shaping more difficult. And in my view, the shaping is where most people make the biggest mistakes.
To make the best Neapolitan pizza, the centre of the pizza should be as thin as possible (as well as being a nice circular shape and even thickness). This is gernerally much easier to achieve at lower hydrations where it is easier to get a strong dough that isn’t too sticky and is easy to shape.
With thicker pizzas, there is a much higher risk of creating a soggy pizza with undercooked dough. It doesn’t matter how well proved your dough is and how good your toppings are, if the pizza isn’t shaped well it won’t be any good.
In terms of the dough losing water as it cooks, the difference between ovens is more to do with the oven spring (rise of the crust) they offer. With a pizza oven the extreme heat creates a lot of rise in the crust, even with a dry dough. But with a regular oven, you get a lot less oven spring.
While it is possible to increase the hydration to improve the texture at lower temperatures, I would only recommend experimenting with this once you have perfected lower hydrations.
I hope this makes sense. Thanks for the question!
Hi
Great recipe but my question is based around cooking it in an Ooni oven. The top and sides of the pizza cook beautifully but it always burns the base, could my stone be too hot or is this just normal for these ovens?
Thanks
Stewart
Hi Stewart, good question. There are a few factors that can affect the base.
Firstly, you should try to use as little flour on the base of the pizza as possible. Try not to use any flour on the pizza once it has been stretched, you will need to top the pizza quickly to avoid it sticking to the bench. Also, try to use as little flour as possible on the peel (it is actually possible to launch with none at all, but it’s not easy). Again, you will need to be quick when loading to avoid sticking to the peel.
Secondly, reducing the heat should help. If the temperature of the stone gets above 450C/850F then the base will burn easily. If possible, try to keep the temperature of the stone just under this temperature.
Thirdly, the type of flour used can make a difference. I stick to using a 00 flour for dusting since I don’t like the flavour of burnt semolina.
Finally, where you place the pizza on the stone can make a big difference. The temperature near the back will probably be higher than the temperature in the middle and the front.
Hopefully these pointers help. Good luck!
This will be my go-to dough for the Ooni going forward. I’ve been making dough for years and this is the easiest to work and best taste/texture by far. Thank you!
Thank you Linda, I’m really pleased you’re making great dough. Keep going and the pizzas will keep getting better!
Hello! Would like to know if say for example would like to create 6 pizza balls using this recipe? How can I adjust the recipe and the yeast? Thank you so much!
Hi Ralph, you can just scale the recipe depending how many pizzas you need.
So, for 6 pizzas you can multiply everything by 1.5 (50% more):
Poolish:
– 450g flour
– 450g water
– 0.9g yeast
Dough:
– 530g flour
– 112g water
– 21g salt
Good luck!
Hi there great information here thanks.
The question I have is I have seen recipes that use yeast in the final mix and also recipes that don’t use yeast in the final mix like yours can you please explain why there is a difference thanks Iain
Hi Iain, the only reason to use yeast in the final mix is to speed up the prove.
Personally, I prefer a longer prove so I don’t tend to use additional yeast. If you are short on time though, feel free to add a little extra to speed things up.
Thanks for the question!
Hi Tom,
I made this dough and after trying all sorts of at home pizza, I FINALLY had a crust with flavor!!
Im bringing the pizza dough to a friends who lives 2 hours away. It’s hot here, so I’m wondering if I should do a cold proof?
Hi Jen, glad your pizza turned out well!
I tend to just use less yeast and still do a room temperature prove if it’s warm. You could do a cold prove though if you prefer. Remember you’ll need to use around 10 times as much yeast for a cold prove! Also, be sure that your dough comes to room temperature before balling and cooking.
Good luck!
Trying this recipe for the first time. I am about 1/2 hour from shaping. I don’t have 00 flour, I am using a combo of King Arthur AP and bread flours.
Mixing the flour into the polish was very difficult. I felt like I needed to add more water but resisted the temptation. Now looking through the comments I see that I should have added more water for these flours. The dough seems to be hydrated enough now though.
What scale are you using to measure tenths of a gram? I have an Oxo kitchen scale that only measures in single gram units.
I don’t see how the timing works into a normal daily routine as you say. Mixing, resting 1 hr, kneading, resting another hour, shaping, resting 10 hours… that all comes out to about 13 hours. I’d have to get up at 4AM to get the pizzas on the table for dinner.. so I wanted to compress the timing a bit.
To do this I figured I would up the yeast to 1gr, that way I could measure with my scale. I am using a mix of Red Star (I only had a scant little bit left) and Fleischmans (freshly opened new jar) active dry yeasts. I kept adding and adding and the scale never registered 1 gram. I feel like I probably added too much, probably close to a tablespoon. But my final rise will be more like 6 hours so maybe I’ll be OK?
I’ll try to remember to comment again with my final results.
Hi Tim, thanks for the questions.
Firstly, as you mentioned you generally want to increase the hydration a little when using bread flour. But probably only 1%-3%. There’s no correct amount, you will need to experiment to see what works for you. But I advise keeping the hydration under 62%.
Secondly, I use a small digital scale which is accurate to 0.01g. If you search “accurate digital scales” you should be able to find these easily online. I only use these for yeast and then use normal digital scales for weighing everything else.
Thirdly, in terms of the timing, the resting should’ve read “10 minutes to 1 hour” – I have now corrected this. You should be able to get the pizza ready in around 8-10 hours.
Bear in mind that the timings are not exact as there are too many variables. You will need to experiment and see what works for you. Then you can adjust the yeast to suit your routine.
For example, if you find the prove is taking too long, you can use 0.3% yeast as baker’s percentage instead of 0.2%.
Finally, a tablespoon of yeast is an aweful lot! For reference, 0.6g of dried yeast is less than half a teaspoon.
Hope that’s helped. Good luck!
Hi after making you dough, if you want to keep half for next day what’s the process, refrigerate and use next day or is it to late?
Hi Tony, yes you can refrigerate the dough and use it the next day. this is what I do with left over dough.
It’s best to knock back the dough before refrigerating. Check out my article on knocking back here to find out about this awesome technique.
I would also combine all the dough balls together for refrigeration. Then, you ashould remove from the fridge at least 8 hours before you want to make pizza.
Allow at least 2 hours for the dough to reach room temperature. Then shape into dough balls and prove for 4-6 hours as normal.
Hope this helps, good luck!
I h.ave a pizza dough recipe I love calls for 6 cups of flour and I use 3 cups of bread flour and 3 cups of AP flour. How can i pull out some to make a poolish for it? Could i pull out 1 cup of the flour and 1 cup of the water. Then add it back in?
Hi Beth, I would highly recommend using digital scales. They’re extremely accurate and really quick and easy to use. What’s more, they’re very affordable these days.
Using digital scales also makes it easy to adjust recipes depending on your requirements. Feel free to check out my article on baker’s percentage here if you haven’t already.
But in general, around 50% of your flour in the poolish is a good amount. So I would pull out 3 cups of flour and 3 cups of water. Add your yeast to this and then add the rest of your ingredients once the poolish has proved.
Hope this makes sense, good luck!
I have a question
Your recipe is for 4 pizza’s, let’s say i want to make 8. Do I double eveything? Including the poolish?
IOW – poolish would be 600g and 600 g water?
Hi Tanzeus, that’s correct, the recipe scales easily! Good luck!
This is such a GREAT write up. I tried making it today and I made a mistake where my dough ball got stuck to the cling film I forgot on top of it after 7 hours so I had to knock it down and I let it prove for 2 more hours after reshaping it to a ball.
I knew the dough wasn’t ready and that it probably needed 5 more hours again (it looked nothing like it did before I punched it down) but man even baking it like it is produced a better crust than my normal cold fermented pizza dough!
I have a question, though. Since putting the dough ball in the fridge can slow down the yeast can I use it as a way to extend prove time after I shape the dough into a ball? Say we’re doing 12 hours for both.
So 12 PM day 1 I make the poolish, 12 AM I make the dough and then dough ball. 1 PM the next day the dough should be ready to be shaped and baked yes? But can I actually throw it in the fridge for 2-3 hours and take it out to have it be ready at around 5-6pm instead?
Hi Mohammed, I’m glad the pizza turned out well for you!
And yes, you can use the fridge to slow the prove down. Bear in mind that in the fridge the dough will prove very slowly indeed, maybe as much as 1/10th the speed!
So if you’re using the fridge for fairly short periods of time then you can essentially view refrigeration as “holding the dough” rather than proving it. Which as you say is handy if you just want to delay the prove a little.
Just be sure to allow the dough to come to room temperature before shaping (maybe 2 hours) so that it’s nice and easy to shape and it cooks properly.
There’s really no hard and fast rules here, feel free to experiment with timings. After a while you’ll develop a sixth sense for the dough and you’ll know when to put the dough in and out of the fridge and when to knock it back etc.
Thanks for the good question!
Hi there, would it be possible to double ferment this recipe? So after combining the poolish with flour to make the dough , let it sit in the fridge for another 24hrs.. before balling… Final proof then cook?
Also, am I right in saying the hydration for this pizza dough is about 59%? This is based on total flour = 300+330 and water = 300+70.
Hi Joe, that should be absolutely fine. Just check on your dough to make sure it isn’t overproving in the fridge, but it shouldn’t. If it does, you can knock the dough back.
Also, be sure to give the dough enough time to reach room temperature before balling. Then you can prove the dough balls as normal.
And yes, your calculations are correct. The hydration with this recipe is around 59%. I recommend anywhere between 56%-62% so this is right in the middle.
If you find your dough a little too sticky and difficult to handle you can add a little extra flour (to say 58%). If you find your dough a bit too stiff you can add a little more water (to say 60%). But in general I don’t recommend going above 60% unless you’re using bread flour instead of 00 flour.
Thanks for the comment and good luck!
This is a fantastic recipe. Quick & easy to make, brilliant results every time. I’ve abandoned my sourdough recipe and will only use this now as the pizza comes out perfectly every time. LOVE IT. Thank you! 😀
Thanks Sara, I’m so pleased the recipe is working for you. Sourdough certainly can be tricky. I’m working on a sourdough series here though, so stay tuned for the recipes which will be coming out soon! Thanks for the positive feedback!
I’ve been making my own since the 90s, but always followed the basic recipe and always in an oven. I’m glad I can across your site- the easy explanations gives me the confidence to take pizza making to the next step.
And, though, I have a pizza oven at my disposal whenever I want, I’m considering the Ooni which at first, I ignored, since I want a full size oven, but, I have yet to commit. The Ooni would be the perfect starter oven to have around.
But, back to my thanks for this series of recipes and tutorials, they are Immensely helpful. And, if I do get an Ooni, I will use your link.
Thanks Doug and good luck. I hope your pizzas turn out amazing! And yep the Oonis sure are handy.
Hello, I want to make poolish. We made the first series of dough. Does it stay in the kitchen or in the refrigerator?
Next, when we add series 2, what is the temperature of the dough?
After we have made the dough, we can cook the pizza in a few hours?
Hi Eshan, the dough is always at room temperature. And you can cook your dough about 8 hours mixing. You could always add a pinch of yeast at the second stage to speed this up. Good luck!
Great recipe thanks. Shouldn’t the yeast be 6g and not 0.6g ?
Thanks Big Jim! And no, 0.6g is correct. This is a long prove so we only need a very small amount of yeast. With 6g of yeast the dough would prove in an hour or 2.
Thank you for this recipe. For the second mix of polish with flour, can you use a mixer with a bread hook? I have some bad wrists.
Hi Evelyn, you can indeed use a mixer. Be sure to use a low setting and be patient with it. Good luck!
Hi Tom, I’m just beginning my pizza journey and your site and videos have been a huge help so thanks for that.
I’m planning on trying the poolish recipe this weekend but may run into some foul weather and may need to delay the actual cook. My current plan is to begin the poolish tonight (Friday) and then cook the pizzas tomorrow.
My question is, if the weather doesn’t co-operate, what’s the best way to keep the dough until Monday at dinner time? I don’t want to overproof it. Should I just leave the dough balls at room temp until I’m ready to cook, or should I refrigerate or freeze them? Thanks for any help!
Hi Paul, I’m pleased my site is helping you. Sorry for the delay, I got back to you as soon as I could. I hope your pizzas turned out OK!
To answer your question, it’s generally best to knock back the dough (check out my article on knocking back here) and then store it in the fridge if you intend to delay the cook by any significant amount of time. If it’s only a short time then knocking back on it’s own is fine.
Refrigerating the dough will slow down the prove due to the colder temperatures. This should help to ensure that your dough doesn’t overprove. Then before using the dough you can remove it for a couple of hours to allow it to get to room temperature. Then you can ball it and prove as normal for around 4-6 hours.
Bear in mind that since your dough has been proving for longer (although slower – in the fridge) it will probably taste a little more sour. Some people like this and some don’t.
Hope this all makes sense and helps you for next time. Thanks for the question!
Hi Tom,
Can I use this exact recipe except, put it straight in the refrigerator for 24hrs?
I know you mentioned that it might need more yeast because it is a slower process, but then you also mentioned that it would proof sooner so it is not recommended for big batches.
So if I follow your recipe but do cold ferment for the polish 24hrs, then make the pizza dough and cold ferment for another 48hrs, would the yeast have had enough time to do its thing or should I increase the yeast? I am aiming for bigger batches. Thanks in advance.
Hi Jose, you can cold prove but in general you will need around 8-10 times more yeast for the same prove time.
With regards to the cold dough proving quicker, this is only once it’s removed from the fridge. Once the dough reaches room temperature it will prove much quicker than a dough which has proved at room temperature. This is due to the amount of yeast in cold proof dough.
I would guess you would need more yeast for what you plan but having not tried it I couldn’t say. The other problem you may have is with the flour you are using. Unless you are using a flour that is designed for very long proves (48 hours or more) you may end up losing too much gluten strength to achieve good shaping. Most flours start losing strength after around 24 hours. You will also probably end up with a more sour dough, but this may be something you want.
I would recommend experimenting. May I ask why you want to do very long cold proves?
Thanks for the question.
Thanks so much for the detailed information. I’m using CAPUTO Nicola Super Tipo “0” flour. Will this recipe need a change for hydration? Also at which point can I freeze the pizza balls?
Thank you for your attention.
Hi Bonnie, I would just stick to the same hydration and see how it turns out, then you can adjust the recipe next time as needed.
I haven’t personally experimented with freezing but it may be something I look into as I’ve had a few questions about it. I would try freezing the dough balls shortly after balling. In theory, the yeast should become dormant and “wake up” again once defrosted. You will then need to leave the dough to prove before using.
Hope this helps and good luck!
0.6g dry yeast – is this correct???
So less than 1g? That seems far too little for the quantity of flour?
1 packet instant dry yeast is usually 7-10g (depending on the brand) so this would be less than a 10th of a pack? Don’t think that will do anything. I used your recipe but 6g yeast and it worked beautifully.
Hi Emma, yes 0.6g is correct, as in less than 1g.
The small packets of instant dry yeast are designed for quick proves of around 1-2 hours but I recommend a long prove of at least 10 times this, around 24 hours. In general, long proves produce much better quality dough with more flavour and improved texture.
The only way that 6g would work properly for this recipe would be if the dough were cold proved in the fridge. This can work well but for Neapolitan pizza, the dough is typically proved at room temperature where considerably less yeast is required. This is because yeast is much more efficient at room temperature, which is close to yeast’s optimal fermentation temperature.
As a general rule of thumb, many bakers use 0.2% yeast in the poolish (as baker’s percentage – compared to the weight of flour in the poolish) – this equates to 0.6g in this recipe.
To measure the yeast I use accurate digital scales that are accurate to 0.01g. I only use these scales for weighing yeast, I use regular digital scales for the rest of the ingredients.
Also, you can save the leftover yeast in those little 7g packets. If I use those, I empty the leftovers into a small resealable container and keep them in the fridge, the yeast will last months.
I assume that you cold proofed your dough when you tried using 6g?
Thanks for the question!
I have struggled finding the right dough recipe for making pizza in my Ooni oven. This recipe changed everything – I am so happy to have found your recipe – thank you. Another key was learning that its possible to get an extra low flame by turning the dial on my oven counter clockwise until it was almost off – that allowed me to start with a 900 degree stone but not an aggressive flame that burns the top of the dough.
Thanks for the comment Roger, I’m glad the recipe has helped. Keep it up!
Hi Tom!
Since this is around the 10th time or more that I do this recipe I felt the urge to come here and sincerely thank you for putting this recipe on the internet, I love the flavor that this dough’s get after a few days on the fridge and I rarely purchase delivery pizza since mine tend to be superior, always starting with the dough.
Many many thanks again!
Cesar.
Hi Cesar, thanks so much for the kind words! I’m really pleased the recipe works well for you.
Cheers
Tom
Hi!
Very interesting reading. I just wonder if you know if I can apply the same thoughts and recipe when making a poolish focaccia or do I have to change anything?
Thanks!
/Jennie
Hi Jennie, you absolutely can use the same technique for focaccia, I would just increase the hydration to around 70%. You can even go higher than this but I think 70% is a great starting point.
Be sure to check out my article on hydration here if you haven’t already. Thanks for the question and good luck!
This pizza crust is incredible!
Thank you for sharing. All my other pizza dough recipes will be tossed out! TOO GOOD FOR WORDS.
Awesome! Thanks Jan! Keep up with the incredible pizza!
This last weekend I followed your poolish recipe to the T but the dough came out very difficult to stretch/shape. It kept wanting to pull itself back together rather than stay stretched out in the shape and size I was working towards.
Also, once it was cooked it seemed very chew, not crispy on the outside and airy in the middle. What could have gone wrong and what can I do to fix these problems?
Thanks for your contributions to the hobby and your help!
Hi Brad, it sounds to me like your dough was underproofed. This normally makes the dough very difficult to stretch. How long did you proof the dough balls for?
There could also be an issue with your flour. Which flour were you using and how fresh was it?
Thanks
I proofed the dough balls for about 8 hours. They had at least doubled in size.
Hi Brad, it sounds like the flour could be the issue. Which flour were you using and how fresh was it? Dough which has doubled in size during proofing should be easy to stretch in general.
Also, which stretching technique were you using? Was it the shaping technique I’ve shown before here? Thanks
I used Anna Napoletana OO flour. To stretch I started in the middle and pushed out to the edge leaving a rim. I picked it up and did the “steering wheel” technique by holding the edges and turning the dough as gravity allowed it to stretch (although it didn’t stretch very much). I also tried just holding one side and pulling on the other.
I would try increasing the hydration by 2% – 4%. The flour you are using may be more absorbant than most so hopefully a higher hydration may help with stretchiness. Good luck!
The links to the products used aren’t working for me.
Hi Sherry, thanks for the heads up. That issue should be fixed now.
Hi Tom, amazing info, thank you!!! I would like to know if you have a preference using polish or biga and in that case why???
Hi Mariano, I haven’t actually experimented with biga yet but it’s on my to do list. Thanks for the reminder!
Thanks for the detailed site! I tried the poolish recipe and followed it exactly as listed but my dough came out very difficult to stretch/shape (it was too elastic and kept wanting to shrink back up, not hold the diameter that I had stretched it to) and it was chewing once cooked. What did I do wrong and/or what could I of done once I saw that the dough was difficult to stretch? Thanks! Really appreciate your help!
Tom, how would one adapt this current poolish recipe to one that can be proofed in the fridge so that the poolish could be made on a Wednesday night, mixed with rest of ingredients on Thursday night, dough balls formed on Saturday morning for pizzas to be made on Saturday night?
Thanks for all your help!!
Hi Brad, I would try using 0.1% dried yeast as baker’s percentage, this should proof the dough in around 24 hours at room temperature. Then I would mix, knead, and refrigerate the dough to slow the prove down (using the same ratios of ingredients as the original recipe).
You could remove the dough Friday night (this will ensure the dough is at room temperature before shaping) and then shape the dough balls on Saturday morning. They should be nicely proofed by Saturday night.
Of course, you’ll need to experiment with this to get the correct timings. When you’ve done it once it should be much easier to see what’s needed next time but hopefully this should get you in the ballpark.
Hope this helps and good luck!
It seems to me a lot more salt is needed than this calls for. Will it I interfere with anything to add more, say 1 teaspoon?
Hi Sonia, the salt in this recipe is at 2.2% (baker’s percentage). You can check out my article on baker’s percentage here if you haven’t already.
In general, I would recommend sticking between 2% – 3% salt. Personally, I find anything approaching 3% to be a bit too salty. But if you wanted to experiment with 3%, this would be around another 5g, which is roughly just less than a teaspoon.
Hope this helps. Good luck!
Thank you for posting. See the pizza chef Vito using honey in his poolish. Any thoughts on that? Caramelisation? Or lower temp oven?
To be honest I don’t really see much benefit in adding honey to the poolish. It will speed up the fermentation since there is more sugar for the yeast. But you will tend to get better texture and flavour with a longer prove, so adding the honey seems counter productive to me.
Also, if you want a faster prove you can simply add more yeast. This allows for one less variable and in general makes timings easier.
The honey will probably add some caremelisation and could be beneficial at lower temperatures. It is not strictly speaking Neapolitan though, it’s more of an NYC addition. It will probably add some sweetness to the dough.
Personally, if you want caramalisation (for lower temps), I would add up to 2% sugar as baker’s percentage (compared to total weight of flour in recipe). You could also add up to 2% olive oil for additional browning. Check out my article on baker’s percentage here if you haven’t seen it.
I would add this sugar after poolish fermentation so that it doesn’t speed it up. Also, this way, more of the sugar should end up unconverted before cooking, therefore improving caramalisation.
Of course, these are just my thoughts so feel free to experiment. Good luck!
Hi Tom,
Your poolish pizza really looks outstanding and I can’t wait to try it on my own next weekend.
However, I am a little bit confused about the recommended amount of yeast. The recipe says 0.6g dryed or fresh yeast, but later you suggest to use 1.8g instead of 0.6g in case of fresh yeast.
I have tried different makes of dryed and fresh yeast in the past for direct pizza doughs and could never understand how this ominous factor 3 came off. Even though it can be found in almost every literature, my own experience is that the factor is much smaller (~ 1.5 -1.8).
I prefer fresh yeast over dryed yeast not only because of the slightly better taste, but because of the proving speed. My impression is that the dryed yeast gives a kick-start and then shortly runs out of steam whereas the fresh yeast is more constant and tenacious.
I recently did some poolish attempts at a room temperature of 22°C. With 0.2% of fresh yeast the poolish reached its peak after 11 hours. With 0.3% fresh yeast the peak was reached after only 8 hours. As far as I know the poolish is at its best just before it reaches the peak. Thus the 1.8g = 0.6% would lead to a poolish that has long passed its peak.
This leads me to my actual question:
If I only use 0.6g = 0.2% of fresh yeast for the poolish, do I need to add any additional yeast to the main dough?
Hi Andy, the factor of 3 does seem to be universally accepted. But of course, you can use a different factor if you find that works better.
In general, fresh yeast will have a much lower proportion of live yeast cells in it, which is why more is used.
There are a lot of variables though, including the specific fresh yeast you are using and how fresh it is. The older the fresh yeast is, the fewer live cells it will contain.
I agree that fresh yeast usually produces a nicer dough, particularly flavour wise. Personally, I’ve always found a factor of 3 to work well but I would stick to whatever is working for you.
In terms of your final question, you shouldn’t need to add any additional yeast. Hope this helps and good luck!
Hi Tom,
thanks for your reply.
Maybe I just had no luck with dryed yeast so far. I tried Caputo and Paneangeli, both ordered from the same shop. Perhaps they were not stored properly, which could explain the poor poofing.
In the meantime I tried your recipe with two different flours, Caputo Pizzeria and Caputo Cuoco. The pizza made with Pizzeria flour was really good, wheres the pizza made with Couco floue was quite chewy. The proofing time of the main dough probably was just too short for such a strong flour.
In both cases I will add a small amount of extra yeast for the main dough next time, as the rim was by far not as fluffy as in your case.
Good luck with it! Bear in mind that the temperature of the oven and stone will have a large impact on the crust too (oven spring). In general, the hotter the oven the better rise you can achieve.
Morning. I want to try the poolish pizza dough, would it be possible to give the amounts for the ingredients to make 2 pizza balls?
Hi Chris, the recipe scales so you can simply half all the ingredients for 2 pizzas. Good luck!
Hi Tom, really like your poolish recipe. I baked it in a Ooni Karu 12 oven, worked really well.
Do you maybe have any tip about how to get the final dough out of the pizza dough box.
With kind regards
Rick
Hi Rick, I’m glad it turned out well for you! I just use a DIY scraper for removing the dough. Good idea for a video though, I could show exactly how I do it.
Basically, I sprinkle flour around the edges of the dough ball I want to remove and free the sides first. Then you should be able to slide the scraper under to remove the dough ball.
Hope that makes sense. Good luck!
I have an Ooni 16 and your poolish recipe is the best one I have found yet. What I have found is that I ferment poolish for 10-12 hours then the mix dough and when I make balls I pop them in fridge overnight.
Next day remove to room temp for at least 12 hours before they see the Ooni. Can I keep dough in fridge for another day (total of 2 nights) before I bring out to room Temp? I hope this finds you well.
Best
JoWin
Hi JoWin, the dough should be OK for another day in the fridge but I would check on the dough. Make sure it isn’t overproofing. If it is you can knock it back (I have an article on knocking back here).
Also, after 2 days, you may not want to remove the dough from the fridge 12 hours before. If the dough looks well proofed in the fridge, you can remove it maybe 3-4 hours before.
Bear in mind that your dough will probably lose some strength after 24 hours so it may not be ideal. If you want to do a 48 hour proof regularly, I would look at getting some flour designed specifically for long proves.
Hope this helps and good luck!
Hi Tom,
Thanks for this great article, I am going to try your recipe. I was wondering If I can extend a bit the final balls proving time to around 16-17 hours in room temperature (19-20C)?
To make it work around my schedule, I can prepare poolish at say 9PM on Wednesday. The next day after 24H hours at RT, I will then mix it with the remaining flour and make the dough. After 2 hours I will divide it and shape it into balls, which then I would like to use the next day after 16 hours proving at RT.
Can I do this way and what % of yeast should I use? I was going to give it a try with 0.1%.
Thanks
Hi Martin, good question. I think your plan may work, and I would try it with 0.1% yeast to start with, as you suggested.
Normally, I would be tempted to use less yeast in the poolish as it may ripen before 24 hours. But using less least would probably mean your dough would be underproofed in the next stage (16 hours after balling).
If 0.1% doesn’t work, one option is to add a little extra yeast in the second phase (when mixing the main dough).
For example, you may wish to use 0.1% yeast in the poolish or maybe even less. Then use a further 0.1% yeast when mixing the main dough. This may be the best solution but I think experimentation is required. 0.1% poolish with no extra yeast may work just fine.
Hope this helps and good luck!
Hi Tom,
Thanks for your reply and all the fantastic information you provide.
Just to double check – did you suggest using 0.1% of yeast or 1% ? I might have found a typo in your reply, or perhaps I just misunderstood.
I like your suggestion of adding yeast to the main dough. In fact, I experimented with this last week. I used a recipe which uses 0.1% yeast (of total flour weight), where 1/10 of this is used in poolish, and the remaining 9/10 in the main dough.
What I had noticed was that the poolish after 24H did not seem quite ready yet – it did have some bubbles, but I would not say it doubled in size. I used it anyway, and the pizza came out OK, but I would not say it was great.
For this week I will still use 0.1% yeast as you suggested, but this time I will try with split 1/5 poolish, 4/5 main dough.
Thanks
Hi Martin, sorry about that, it was indeed a typo which I’ve corrected now. Good luck with your new recipe!
Hi Tom, can I just use extra for a 1kg total flour to make 6 pizza dough balls?
Hi Roger, if you want make more pizzas, you’ll need to add more water as well as more flour. Check out my pizza dough calculator here. That should help you get the quantities you need. Good luck!
Can you knead dough in Kitchen Aid Mixer?
Yep, you can. Just be sure to use the dough attachment on a low setting. Keep stopping it to feel the dough by hand in order to gauge when it’s done.
The main reason I recommend kneading by hand is so that you develop your feel for the dough. Thanks for the question, hope this helps!
Can’t wait to get started with your recipe/directions.
Thanks Tom, good luck!
I’m in the process of making this dough and can’t wait to try it. I do have one question, and I hope it’s not a repeat from a comment (I looked through most of them so I don’t think so).
Is there any reason technically why I couldn’t make 2 larger pizzas vs 4 smaller ones? Thanks for your help!
Hi Amanda, good question. You absolutely can make 2 larger pizzas instead of 4 smaller ones. However, there are a couple of things to consider.
Firstly, bear in mind that the pizzas will be around 14-16 inches instead of 10-12 inches.
Secondly, and more importantly, larger pizzas tend to be more difficult to shape, and rip easier. They are usually more difficult to turn and cook evenly in the oven, too. This is due to the much larger size and weight of dough.
For this reason, I would recommend mastering smaller pizzas first, before moving onto large pizzas if you like. Hope this answers your question. Cheers!
Great and easy to understand advice, for a novice, like myself…
Thanks
No problem Frank, hope it helps. Good luck!
Hello!
The step 8 (and each rest) is at room temperature?
Yep, that’s right Luiz, it’s all at room temperature. Good luck!
Thank you so much for this excellent explanation about poolish, I’m going to try it as soon as possible.
No problem, I hope it works out well for you. Good luck!
Hi Tom
Could you please explain to me how to increase the ratios of poolish, flour and water required to make different amounts of pizza?
Eg say I wanted to make 10 or 20 pizzas, how do I work out the amount of poolish and other ingredients required?
I hope I have asked this correctly. I do enjoy your article as I find them very informative.
Regards
Michele
Hi Michelle, thank you for the question. You can simply multiply all the ingredients to scale the recipe up.
For example, if you multiply all the ingredients by 3, you would end up with enough dough for 12 pizzas (4 pizzas x 3 = 12 pizzas).
To get enough dough for 20 pizzas, you would multiply by 5 (4 pizzas x 5 = 20 pizzas).
I hope this makes sense. Let me know if you have any more questions. Thanks
Hi Tom, thanks for this.
If I were to make more pizza, would I just add more flour to the poolish mix after it has risen or would I need to add more from the start?
Hi Riz, to ensure the timings are the same, you would need to add more ingredients from the start, rather than adding to the same size poolish.
The easiest way to do this is to simply scale the recipe (by multiplying all the ingredients).
For example, if you multiply all the ingredients by 2, you would end up with enough dough for 8 pizzas (4 pizzas x 2 = 8 pizzas).
If you multiply all the ingredients by 4, you would end up with enough dough for 16 pizzas (4 pizzas x 4 = 16 pizzas).
Hope this helps and good luck!
Hi, could you please let us know how big the 4 pizzas are that this recipe makes? Could you maybe compare it to an object that we use in everyday life?
I would like to know how big the pizzas turn out but I’m not great with measurements.
Hi Ashunaka, the pizzas should be around the size of the long edge of a sheet of A4 paper, or slightly less.
I hope this makes sense! Thanks for the question.
I started my poolish and the only difference was that I increased the recipe by 1.5. 450g flour and 450g water did not look anything like your liquidy poolish. It was more like a sticky dough ball. Any idea what I did wrong?
Hi, I’m not sure what went wrong but it sounds like there wasn’t an equal amount of flour and water in the poolish. As you say, it should be very liquidy.
Maybe your scales didn’t work properly or the poolish wasn’t balanced on them correctly?
The only other thing I could thing of is the flour. Was it fresh flour? And what type of flour was it?
Also, did you still make pizza with the poolish? It should still make nice pizza.
This would also be a sure fire way of telling if the hydration was correct. The dough would be too dry if there wasn’t enough water in the poolish. You could always adjust the dough as you see fit.
If you are usnure about your dough, you can always work from “feel”. This comes naturally from experience.
With enough practice, you can even make perfect dough without weighing any ingredients! I always weigh the ingredients though to ensure consistency and to reduce wastage.
Hope this helps and good luck!
Hi Tom, thank you for the beautiful article.
What is your suggestion for warmer room temperature conditions (25-30 celcious degrees)? I live in a warm country and we make a lot of pizzas in the summer.
How would your method work? Even less yeast? Put the dough for 5 hours in the fridge and the then 5 hours at room temperature?
Thank you
Hi Kostas, I’m glad you liked the article!
And yes, I would recommend using less yeast and proving at room temperature. I would probably start with half as much yeast and see how that works but you may need to use around a quarter as much yeast!
Check on the dough whenever you can. If it is overproving you can knock it back. If you like, you can click here to check out my article on knocking back. It’s a very useful technique!
Also, if you find you dough is rapidly overproving, you can regrigerate it as you mentioned. As a rough guide, it will probably take about 5 times as long to prove in the fridge. Cold temperatures really slow the yeast down!
Good luck with the pizza making!
I’m new at this so please correct me if I’m wrong but I can’t find in your instructions when and how to add the Poolish to the pizza dough?
Hi Bill, you can find this out in the recipe at the bottom of the page. Feel free to click here to skip straight to the recipe.
It is also mentioned near the start of the article under the heading “What is Poolish?”, as well as in other places.
Hope this helps Bill! Thanks
I would like to freeze some. At what point would you freeze?
Hi Kathy, I would recommend freezing after balling, before proving. The dough can then be proved once it has defrosted. Thanks
The dough was super easy to make and sooo elastic it’s unreal! Quick question, at what point can I freeze the dough for future use? Would it be at the point it’s proven after 8 hours and it’s already formed into a ball?
Hi Phil, I’m pleased you found the dough really easy to make!
And yep, I would freeze after forming into dough balls, prior to proving them. Once defrosted, you can then prove them.
Hope this helps and good luck!
I’ve seen other recipes that call for adding addition yeast during the primary dough phase, any thoughts on this? I plan to do a 10 hr Poolish, 24 hr cold bulk prove in the fridge and then 8 hr ball prove at RT the day I make them.
Hi Thushan, I would only add additional yeast if you need the dough to prove quicker. In your case I think you should be OK without adding any more.
However, if you find the dough is underproofed then next time you could add a pinch of yeast to the dough. As with any dough it just takes some trial and error to figure out what works for you.
Good luck with it!
Hi
Thanks for all the great pizza making help. I’m curious what adding some olive oil would do to the final product? Different amount would cause what?
Thanks
Hi Garth, the only reason I would add olive oil is to encourage browning in the crust if you are cooking the pizza at low temperatures (in a regular oven).
Adding olive oil is not Neapolitan since Neapolian pizza is cooked in a wood fired oven which already produces a lot of browning. Olive oil in Neapolitan pizza can lead to burning.
If you are cooking your pizza in a regular oven then you could try substituting around 3% of the water for olive oil. However, I have also had excellent results in a regular oven without using olive oil so it’s certainly not required.
Thank you for the question.
Thanks for the recipe!
At what point would you be able to freeze the dough?
Hi Ryan, I would recommend freezing after balling the dough and before proving. You can then prove the dough balls once they have defrosted. Good luck!
Hi there, I have a question. Can you freeze the dough balls to use at a later date?
Hi TJ, you can freeze though dough for later use. I would do this after balling the dough, prior to freezing. Once the dough has defrosted, you can then allow the dough balls to prove before making pizza. Good luck!
Okay, I’ve made my 1st poolish and am looking forward to tomorrow to finish my dough. I have tried quick and slow fermentation methods but never tried poolish.
Hopefully it works out well. Good luck!
Some great info, thanks. Going to try this with the Grandkids today.
Cheers. Hope it worked out well Kevin!
If my dough is hard to stretch and breaks tears easily, have I used too much yeast, or not kneaded enough, or something else?
Hi David, weak dough can be caused by many things.
The first place I would look is the flour. If it is old flour it may have lost it’s strength, producing poor dough. Also, I recommend using a high quality 00 pizza flour (such as Caputo) where possible.
Kneading does help to make the dough strong and stretchy, this is the main reason why we do it. So it’s definitely possible that your dough hasn’t been kneaded enough. Around 4 or 5 minutes of good kneading should be fine though.
If you haven’t already, feel free to check out my article (with a video) on kneading here. The technique I show may help you out. My article (with a video) on the windowpane test could also be useful to you as it shows you how to check if your dough is kneaded enough.
Additionally, the proving could also be the cause of the problem. Dough that is either massively underproved or overproved will generally be very difficult to stretch. I would check the timings and yeast amount to ensure they’re correct. I’m assuming you’re using instant yeast?
It’s also possible for old yeast to underprove dough, since it conatins more dead yeast cells. If everything else with your recipe seems OK, then it might be a good idea to get some more (fresher) yeast.
Finally, are you proving at room temperature as recommended in the recipe? If the temperature is much higher or lower than this, the amount of yeast would need to be adjusted.
Thanks for the question.
For all the Vito’s commenters, his pizza dough is overrated. Way too much yeast and sugar? That would cause the yeast to quick rise which contradicts his cold fermentation attempt.
Hi Brandy, yes I do find adding sugar and honey a bit strange. Sugar is not traditionally added in Neapolitan style dough, it is usually added in New York style dough to make it sweeter.
Also, as you mentioned, it would have a speeding up effect on the fermentation, by providing more food (sugar) for the yeast.
Personally, I prefer dough that is proved at room temperature without sugar, it tends to suit my palette better and it’s more traditional. But of course, this comes down to personal preference and there’s nothing wrong with experimentation!
Cheers
Making polish pizza dough today looking forward to seeing how it turns out. Will post results. Thanks for all your effort and sharing this recipe.
Thank you for the kind words william. Hope the pizza turns out well. Enjoy!
Thanks for the wonderful article.
One question I was looking for in your article was the longevity of the poolish. While a sourdough starter can live on via feeding, is the poolish a one-and-done where you make it and then have to use it?
If so, then each poolish is really a completely new one which could possibly have different flavor profiles.
Just wondering.
Hi Edward, yes you are right that poolish is a one-and-done method. That was actually why the method was developed in the first place. The idea is to be able to instantly and easily replicate sourdough.
In reality, the flavour won’t be quite the same as sourdough, although some people actually prefer poolish.
And in my experience, there’s no discernible difference between batches of poolish, unless you use different types of yeast. I find that fresh yeast tends to provide a slightly different flavour than instant yeast, for example.
Hope this helps and thanks for the question.
Hi, nice article. How do you scale for more pizzas? If I want to make 6 instead of 4, do I simply scale everything up (so a 450g poolish) or is it not that simple?
Hi Mike, yep you can simply scale everything up. Don’t forget to scale all the ingredients, including the later additions.
Also, if you sign up to my newsletter you get a free PDF guide which helps with recipe scaling and creation (including poolish).
Good luck!
I just wanted to let you know how awesome this dough turned out. It’s among the best I’ve ever tasted!
Thank you for taking the time to post such clear and comprehensive directions and videos!
Thank you so much Matt, it’s very kind of you to say so. If you want to keep updated, be sure to sign up to my newsletter, I have plenty more content on the way.
Kind regards, Tom
Thank you for sharing your wonderful skills! I love the way the dough came together and how delicious the finished pizza looked!
Thank you Laura, that’s very kind. I hope your pizza making goes well, good luck!
Can I use the same recipe for bread?
You certainly can use the same recipe for bread. For the best bread you would typically use a higher hydration. This is to encourage more oven spring, since the oven is at a lower temperature than for pizza.
Also, with bread, the dough doesn’t need to be as strong since it won’t stretched out so thin. This allows us to use a higher hydration dough for bread.
Having said that, pizza dough can still make nice bread and it works as a great beginner recipe. Once you get the hang of shaping the dough youy can experiment with increasing the hydration later.
Thanks for the question.
In this article of yours, it says a baker’s percentage for yeast is 1% of flour.
If we apply that here – is the yeast supposed to be more then 0.3 – 0.6g for the poolish?
Ie. Total flour here is 630g, but the yeast is only 0.6g?
Hi Jeremy, 1% was just used as an example in the baker’s percentage article. The percentage of yeast can be any value, depending on how fast you want the dough to prove.
In the case of the poolish, I recommend around 0.2% yeast (compared to the flour in the poolish) to achieve a prove of around 10 hours (for the poolish).
Hope this helps, thanks.
If I was going to do the kneading in a stand mixer (…arthritis in my hands) would we still be looking at around 10 minutes?
Hi Sam, thanks for the question. 5 to 10 minutes on a low setting (ideally with a dough hook) should be fine in the stand mixer (probably closer to 10 minutes). Good luck!
I thoroughly enjoyed your step by step tutorial as I’m struggling to achieve the intended results after many attempts.
I’ve attempted poolish and many other recipes. Everything is great until it gets to the part where you need to get the soft wet pizza dough ball out of the proving box and into the oven.
It all goes pear shaped. I loose all the air out of the crust and it’s the most painful experience attempting to get the pizza onto the peel, then even worse off the peel and into the pizza oven.
DISASTER every time!
Hi Steve, there is a steep learning curve to making pizza so don’t get disheartened.
I can highly recommend checking out my article (with a video) on shaping pizza here.
The shaping is in my view the most difficult part and I explain and demonstrate a few key steps that helped me. I’m confident that my shaping tips would help you significantly.
Another key to making the shaping as easy as possible is you use a low hydration dough. I’d recommend around 56% to begin with, only increasing to around 60% as you become very confident in your shaping.
Be sure to check out my entire pizza school here. There’s in detail instructions and videos for every step of the pizza making process.
The first step is on mixing the dough (includes a recipe) and can be found here.
Good luck!
Hi Tom, super clear instructions and can’t wait to try.
But one question, you mention using the same amount of fresh yeast if you use this instead of instant. However, on another page where you are talking about yeasts, you mention doubling the weight if using fresh. Is this because of the poolish?
I.e. for normal recipe, you’d double, but for poolish, it doesnt matter? Also, would you need to change anything other than % of water if I wanted to try experimenting with a 62% (or even 65%) hydration?
Hi Rhys, well spotted, it should be double, I’ve updated the page.
In terms of the hydration, you wouldn’t need to change anything other than the amount of water used.
Thank you and hope this clears it up!
Tried the poolish dough reecipe and it’s a total winner! I’ve tried a few different poolish recipes and this one is the best.
Easiest poolish recipe I’ve used to shape with, not too many steps in dough prep, and the result is great taste with super light airy crust. It’s a keeper!
Thanks Rizza, glad you like the recipe! A lot of work went into getting this right so I’m pleased it’s paid off! For you at least. Thanks
So total hydration ended up being almost 59%, my regular pizza dough is 60%
Hi Dickie, generally anywhere between around 56% – 62% is recommended for Neapolitan pizza dough. Personally, I would say around 60% is the sweetspot but I tend to recommend that beginners start at the lower end and work their way up as they become more confident. Thanks
Thanks for this recipe!
Quick question: can I skip step 6 or do I have to let the dough rest a second time?
Hi Khan, yes you can skip step 6 if you like, resting just helps with the shaping. Thanks for the question and good luck!
Hi Tom, the first time I made the recipe it came out amazing. Unfortunately, in the 2 times after that, the poolish separated from the water during the first overnight prove.
I had switched flours so maybe that’s the issue but I was wondering if you could shed some light as to why? I’ve searched the internet for answers with no success.
Thanks!
Hi Aimee, I don’t think a change of flour should cause the issue unless the flour is passed it’s best? You can usually tell because the dough goes a greyish colour when mixed and smells a bit strange (a bit like Play-Doh to me). I also find the flour itself smells a bit like this.
Other than that, it could be that your poolish has overproved. What was your room temperature, how long did you prove for, and how much yeast did you use?
Did you use accurate digital scales (to 0.01g) to measure the yeast? A tiny bit too much yeast can easily lead to overproving.
Thanks and good luck!
So no honey in the poolish to feed the yeast to start?
Hi Florie, thanks for the question but no, honey is not needed to feed yeast. Yeast feeds on the sugars in the flour, this is basically how fermentation of dough works.
Adding honey (or any other sugar) can speed up the process but you can also speed it up by adding more yeast if you like. However, I recommend a slow prove anyway to develop improved flavour and texture.
Also, adding honey or sugar can lead to a sweeter dough which is not really traditional of Neapolitan pizza. I think it would work better in a New York style pizza, for example.
Hope this helps!
Hi Tom, not sure exactly where I went wrong but all looked great until after the second 8.5 hour rise when I removed the dough balls from the proofing box.
They were definitely doubled in size and the dough looked perfect until I removed one to shape. It completely deflated and there was really no airiness to it and no air to push out toward the crust while shaping.
I still made pizza with it and had excellent flavor but just not airy and light. Any idea where I could have gone wrong?
Thanks for your time.
Hi Philip, thanks for the question. It sounds like your dough was overproofed. Check out my article on how to save overproofing dough here.
For next time, you can solve the overproofing by using a touch less yeast or proofing for less time. Alternatively, you can knock the dough back around 4-5 hours before cooking – this technique is explained in my article on fixing overpoofed dough.
Hope this helps!