With this easy recipe, you’ll learn how to make incredible authentic Italian pizza dough without any kneading at all. Keep reading for a detailed explanation of the techniques used and check out the recipe at the bottom.
With this Neapolitan pizza recipe, you will be able to make incredible pizza dough without kneading. That’s right, no kneading!
For people new to making fresh dough, kneading by hand is often seen as an intimidating proposition. Whilst it’s probably not as difficult as you think, it is a bit messy and it can be tricky to get the technique right.
I have spent a long time devising this no knead method in order to produce the best results with minimal effort, equipment, and technique required.
For this recipe all you need is a mixing bowl, weighing scales, and the ingredients. No electric mixer or anything else is required!
Everything takes place in the bowl and you never need to remove the dough. No mess, no hassle, just beautiful Neapolitan pizza dough!
Keep reading for a deep dive into no knead pizza dough. Alternatively, you can click here to skip straight to the recipe.
The autolyse is a technique used by artisan bread makers to improve the quality of a dough. What’s more, it’s super easy and requires no technique.
All you have to do is to roughly mix your ingredients, in a large bowl, into a shaggy mass – we’re not worried if it’s lumpy at this stage. Then we just leave the pizza dough, covered up, for at least 30 minutes but up to a few hours.
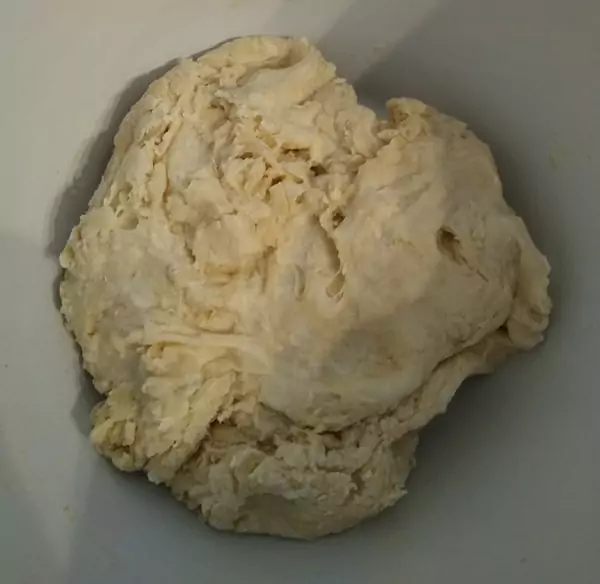
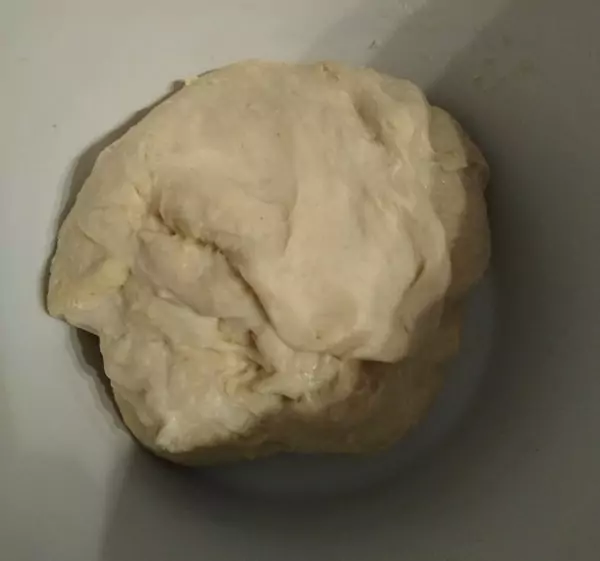
When we return to the dough it will be smooth, stretchy, and much less lumpy. How easy was that?! We haven’t even done anything! And that’s the beauty of the autolyse.
Over time, the flour absorbes the water and becomes hydrated. This is similar to the process that happens when dough is kneaded. It may seem like magic, but it works brilliantly!
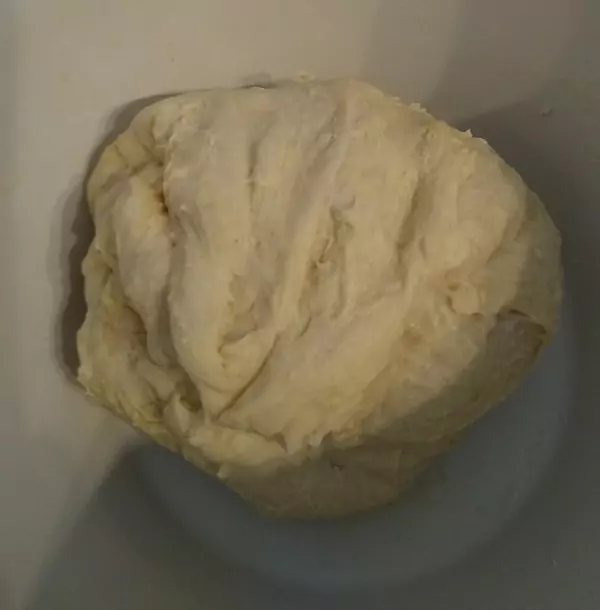
After the autolyse, your pizza dough will be smooth and stretchy, which is perfect for Neapolitan pizza.
The technique was discovered by French chemist, Professor Raymond Calvel. He had noticed the decline in quality of French bread following the second World War.
He devoted a lot of time to experimenting with dough and revealed that by mixing dough and allowing it to rest before kneading, it reduced the amount of kneading time required. It also produced a dough that had excellent flavour and texture.
Following the autolyse, the dough will still be somewhat lumpy. This is where the kneading would usually start. However, we can use another technique borrowed from artisan bread making. This technique is called the stretch and fold.
With the dough still in the bowl, grab an edge of the pizza dough and stretch it upwards, allowing the dough to stretch under its own weight. Then fold this down to the middle and grab another edge. Repeat this 5-10 times.
Once completed, the dough can be covered back up and left to prove/rest.
The stretch and fold mixes the ingredients whilst stretching and strengthening the dough, and incorporating air into the dough. After each stretch and fold, your dough should be well mixed and very smooth.
Generally, 2 sets of stretch and folds are enough but you can carry out this technique as many times as you like, just leave 30 minutes between each set of stretch and folds.
The more times you do it, the stretchier and stronger your dough will become. With each stretch and fold, it generally won’t require as many folds. Just feel the dough as you go along and if the dough becomes difficult to stretch, leave it to rest again.
However, you will still be able to make excellent dough after just 2 sets of stretch and folds.
There are a few things to look out for when checking if your dough is ready for proving. In fact, I’ve even written an entire article about how to tell if your dough is proved here.
One of the best checks is the windowpane test which I go into more detail on in this article. The easiest way to do this is to simply stretch a small piece of dough on the dough ball to see if it holds together without ripping (see image below).
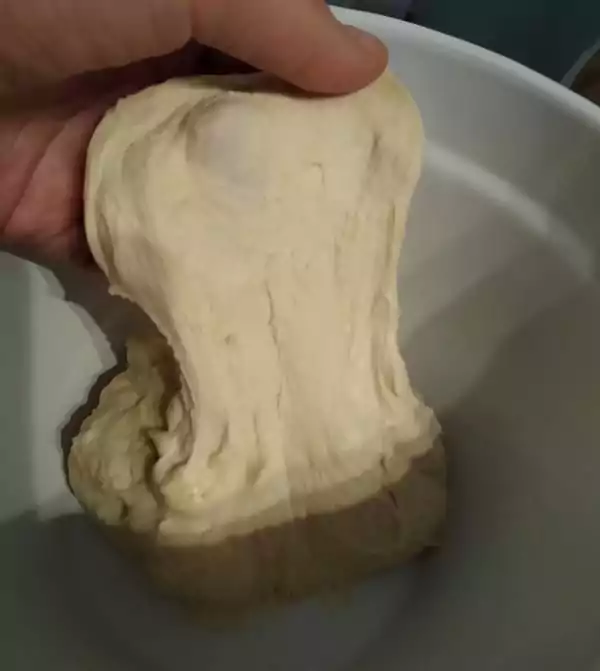
The best time to check your dough is 30 minutes after a set of stretch and folds. If the dough passes the test then it’s good to go. If it doesn’t, give it another set of stretch and folds. Be sure to rest the dough for 30 minutes again before testing.
A long prove is pretty much essential for great no knead Neapolitan pizza dough. The long prove will allow for greater gluten development and improved texture of the dough (and better flavour).
I recommend a 12 or 24 hour prove. Over the two, I prefer the 24 hour prove but a 12 hour prove will still yield excellent results.
A 12 hour prove allows you to mix the dough on the morning that you want to make pizza and the dough will be ready for the evening. This is great if you are making pizza over the weekend, for example.
With a 12 hour prove, you can mix the dough at about 10am, and it will be ready to use at about 7pm on the same day.
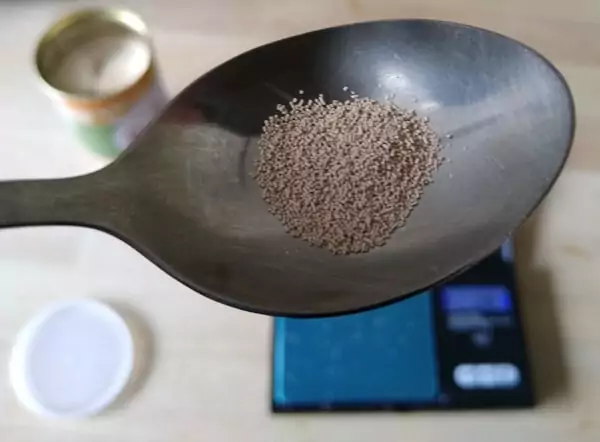
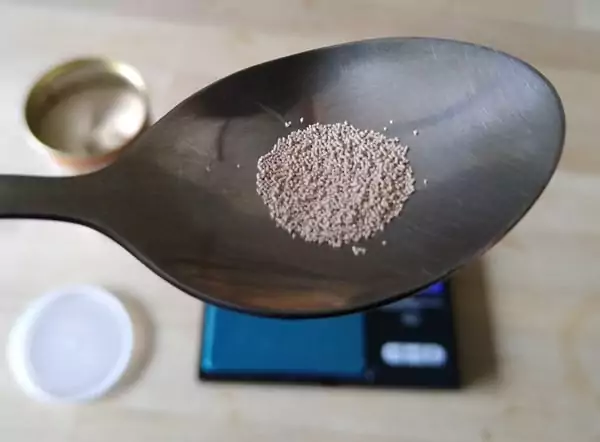
For a 12 hour prove at room temperature, use 0.2g of instant dried yeast (assuming room temperature proving of 22 Celcius). Yes that is a very small amount, which is why I recommend getting a set of digital scales that are accurate to 0.01g.
If you don’t have a set of accurate digital scales, the image below shows what 0.2g of yeast looks like on a regular teaspoon.
Being longer than a 12 hour prove, a 24 hour prove will generally produce dough with better texture and flavour.
I also like a 24 hour dough for convenience. 24 hours may sound like a long time but it doesn’t take any more effort, just a little more preparation.
The great thing with a 24 hour dough is that it can easily fit around your working day. You can mix the dough at 7pm and it will be ready to use at 7pm the following day. It’s super easy!
For a 24 hour prove at room temperature, use 0.1g of instant dried yeast (assuming room temperature proving of 22 Celcius). Yes that is a very small amount, which is why I recommend getting a set of digital scales that are accurate to 0.01g.
If you don’t have a set of accurate digital scales, the image below shows what 0.1g of yeast looks like on a regular teaspoon.
It is true that you can prove for any length of time but it requires a bit of maths to figure it out. Personally, I find that 12 and 24 hour pizza doughs are the most convenient as well.
Many recipes you see online use short proving times, such as 2 hours. Personally, I don’t think these short proves produce great results and they don’t really make the process any easier, just quicker. This is why I didn’t include a recipe for a shorter proving time.
If you want to experiment with proof times, check out my article on baker’s percentage here.
If you need to make dough for the same day, use the 12 hour prove. If you don’t need the dough until the following day, then use the 24 hour prove.
Whatever you decide, just adjust the yeast accordingly and you’ll be good to go.
Be sure to read the notes below this recipe as there are some important considerations. There is also a detailed explanation of the process with pictures, at the bottom of this page.
Difficulty: Easy
Serving: 2-4 people
Yield: 2x 10” pizzas
Prep Time (Dough Handling): 10 minutes
Cook Time: 2-10 minutes
Total Time: 24 hours
Not all the following utensils are required but these are what I use and they tend to make the process much easier.
Any large bowl could be used for mixing the dough but I like using the metal ones since they’re lightweight, stackable, and easy to clean.
Click here to check out metal mixing bowls like the ones I have on Amazon.

These are affordable, easy to use, and precise (accurate to 1g). I don't recommend using cups as measurements as they are inprecise.
Click here to take a look at the type of digital scales I use on Amazon.

These kitchen scales are accurate to 0.01g and are perfect for measuring the tiny amounts of yeast needed for long proves.

Pizza proofing boxes are an excellent investment. They are airtight and they make taking the dough out for shaping very easy.

An infrared thermometer allows you to instantly check the temperature of the stone, ensuring it is within the ideal range.
Click here to check out a pizza peel similar to the one I use on Amazon.

A 12 inch peel is ideal for Neapolitan pizza and makes loading and removing your pizza from the oven really easy.
Click here to check out a pizza peel similar to the one I use on Amazon.

A turning peel is designed for rotating the pizza during cooking. If you're using a pizza oven it should lead to a superior and more even cook.
Click here to check out a pizza peel similar to the one I use on Amazon.

A pizza oven is guarenteed to take your pizzas to the next level. I have an Ooni Karu 16 which reaches 500C/930F and cooks pizza in as little as 60 seconds! A regular oven simply cannot match the cook of a pizza oven. I love my Ooni!

That’s it, the dough is now ready to stretch and shape to make Neapolitan style pizzas with! For the shaping, you can check out part 6 of my Neapolitan Pizza School series where are show you the easiest way to stretch pizza Neapolitan style!
Be sure to check out the recipe notes below, as there are some important considerations with this recipe.
Keep reading after the notes for a more detailed explanation of this recipe.
A fantastic App I always use for calculating water and yeast quantities is called PizzApp+. I’ve provided the links to this app for both Android and iOS below:
For Android: PizzApp+ on Google Play Store
For iOS (Apple): PizzApp+ on the App Store
To use the app for this recipe:
That should look like this:

If you notice at the bottom, the app tells you the exact quantity of ingredients you need. Perfect! If you play around with it you will notice as you change the prove time (leavening) and the room temperature (RT), the amount of yeast will change accordingly.
This app really is so handy!
I know I went into a lot of detail for a simple recipe but I wanted it to be as clear as possible. So many articles out there leave a lot of questions unanswered.
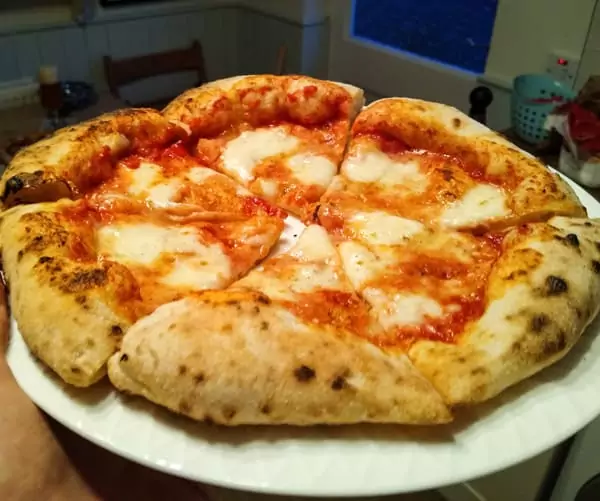
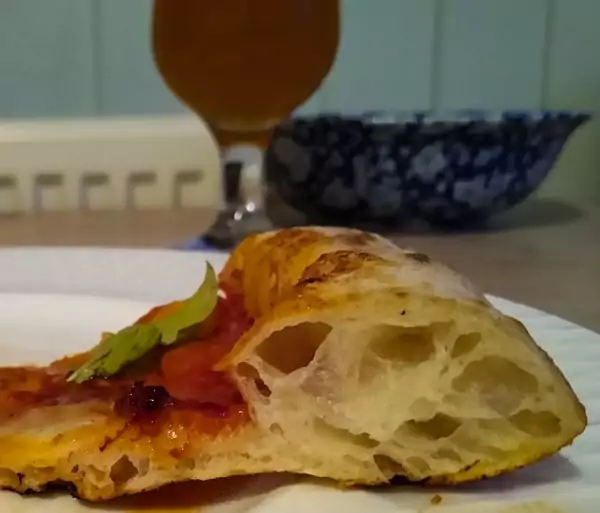
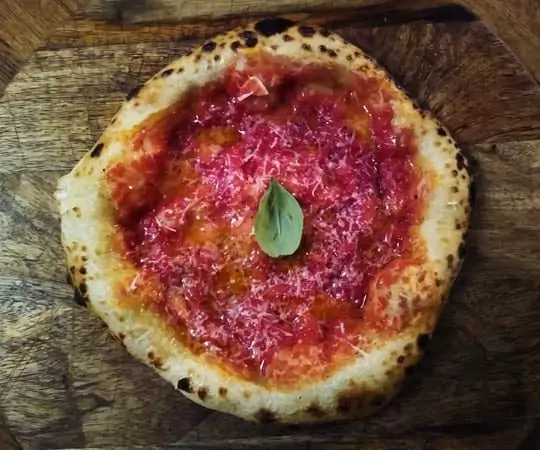
No knead Neapolitan nduja pizza!
Hopefully this makes it clear how to make great Neapolitan no knead pizza dough. Now just go and experiment, it’s all part of the fun!
Good luck, and get mixing!

I’m Tom Rothwell and I’m super passionate about all kinds of homemade pizza! In the last few years I've been on a quest to find the perfect pizza. Now I'm sharing what I've found out with the world!
If you're interested in hiring me for your event in the UK, feel free to check out my website with the link below.
Pizza Catering


I often get asked what type of oven I use for my pizzas. Well, I use a pizza oven made by a company called Ooni.
The range of pizza ovens that Ooni offers is just brilliant. They cover all bases, and all price points. There's affordable and portable models such as the Fyra 12 Pizza Oven and then there's state-of-the-art models such as the Karu 16 Pizza Oven pictured below.
In all honesty, I would say that the oven makes a huge difference. If you're looking to make authentic Italian pizza, a pizza oven is a must.
By clicking the link below and purchasing from Ooni, you would be supporting this website. I've been using their ovens for a long time now and I wouldn't recommend them if I didn't believe in their products.
Time to make some amazing pizza!
I’m Tom Rothwell and I’m super passionate about all kinds of homemade pizza! In the last few years I've been on a quest to find the perfect pizza. Now I'm sharing what I've found out with the world!
If you're interested in hiring me for your event in the UK, feel free to check out my website with the link below.
Pizza Catering


This article has been super helpful. We just got an Ooni and I’m trying to get better at the crust texture. I just learned about “00” flour! I’m not clueless in the kitchen but pizza is new to me. This is super helpful. Thanks!
Thank you for the feedback Ann, I’m glad I could be of assistance!
I can remember when I started making pizza, it really is a completely different animal to any other type of cooking! It can seem very complicated at first but it’s totally worth the initial investment. You’ll get a lot of satisfaction as your pizzas gradually get better each time.
I absolutely love my Ooni, the pizzas that come out of them are nothing short of amazing! I’m planning on doing many articles and videos on them so stay tuned for that. And good luck!
Any hints for stretching the dough without it sticking to the prep surface?
Hi Kathy, I’m bringing out an article and a video on this soon so stay tuned.
Basically, I recommend dropping the dough ball into a bowl of flour and coating both sides before shaping. This should prevent the dough from sticking to the surface and your hands. Cheers
I tried the aurolyse hydration method- amazing- very little kneading was needed post to get windowpane consistency— I used 00 flour-your post stated to use less water with this flour but recipe called for 190 g regardless of flour.
What is your recommendation for the 00 flour/ water?
Thanks
Hi Kathy, I’m glad it worked out well for you!
For 00 flour I would start at 56% hydration (between 56%-60% is good for 00 flour). So this would mean using 180g water instead of 190g.
Check out my article on baker’s percentage here if you need some advice on calculating percentages.
Thanks for the question and good luck!
Hi Tom I have read several comments on other web sites that when you autolyse you should only mix the flour and water together and then let it rest. After the rest period you then add the salt and yeast. Here are the comments from other sites. What do you think?
The reasons for delaying the other ingredients:
Salt greatly reduces the effects of the enzymes so it is important it is not added early. It also tightens the dough (you will notice this change when you add the salt after the autolyse) – this is counter productive as we want to make the dough more extensible.
Yeast has a similar yet lesser effect – fermentation produces acidity which can strengthen the dough.
Hi Brian, thanks for the question. I have tried delaying the adding of salt and yeast but I have found no noticeable difference. It may produce more of a difference when making high hydration doughs such as ciabattas.
For pizza dough (dry dough), I don’t think it will make a huge difference. I also like to keep the recipes as simple as possible. Adding yeast and salt at a later time is a real pain and unless you incorporate them properly, it will actually have a negative affect on your dough.
Even the best pizzerias in Naples add the salt and yeast to the dough from the start so I wouldn’t worry about it to be honest. But by all means feel free to experiment and see if it improves your dough. If you are going to try it I would recommend making 2 batches side by side, to see if you can tell the difference.
Have fun!
Love your recipes & Techniques Tom. Just a small note…
On your recipe for “No Knead” dough you specify 190g water. You also say if using 00 flour to reduce this to 190g – same number used both times!
Hi CM, well spotted. It should’ve read “reduce the water to 180g” which equates to 56% instead of 60%. I’ve just corrected this. Thanks for letting me know!
Hi Tom,
Great information all the way around. Can’t wait to try the recipe. FYI, you initially say to use 0.2 grams of yeast for the 12-hr. prove and then at another point 0.1 gm for that same time.
Jack
Hi Jack, thanks for the heads up. I think the confusion came between a 12 hour and 24 hour prove but it’s fixed now.
Hi Tom,
I was just trying your recipe and can’t seem to mix all the flour in with the amount of water. The water seems to be too little. Is there something I’m doing wrong?
Hi Rick, thanks for the question. I wouldn’t worry too much about this it is very dependant on the particular flour you are using. Just try to mix in as much flour as you can and that should be fine.
Be sure to check out my article (with a video) on mixing here. It should help you to visualise the process better. Good luck!
You say to mix all the ingredients together but no mention of whether the water should be tepid.
Hi Elaine, the temperature of the water isn’t really that important for long proves. Cold water or room temperature water is fine. Thanks
I believe it’s called “proof” or “proofing” the dough, as opposed to “prove” or “proving”.
Good Neapolitan pizza dough, I like the recipe you have here, it’s delicious and has nothing to “prove”! 😃
Thanks Charles, I’m glad you like the recipe. With regards to “proofing” and “proving”, the two words can be used interchangeably.
Since the words originate from the verb “to prove”, I would argue that “proving” is more gramatically accurate. “Proof” is the noun form of the verb ” to prove”. But somewhere along the line, it seems to have gotten mixed up with the present tense form of the verb – “proving”. Hence, the word “proofing”.
For example, I think it would be gramatically OK to say “I’ve done a proof with this dough” (even though it’s rarely said), since that is the correct useage of a noun (“proof”). However, I don’t think it would be gramatically correct to say “I’ve proofed the dough”, since the correct past tense form of the verb is “proved” not “proofed”. I hope this makes sense?
Whilst not strictly correct, in my view, I still use the word since I know it is very common, especially in the US. “Proving” is also by far the most common in the UK.
I try to be somewhat diplomatic and use both words. Hopefully this way I can please everyone!
Cheers
Hi Tom, loving this tutorial and looking forward to giving it a whirl tonight.
Should I cover with clingfilm each time I prove?
Thanks in advance
Hi Jonny, yes you should cover with clingfilm each time or use an airtight container, such as a pizza proving box. If you don’t do this your dough will dry out and form a skin on the surface. Thanks for the question