Being able to tell if your pizza dough is kneaded enough is a key part of learning to make great dough. There is no correct way to knead dough, everyone has a different technique and it doesn’t really matter how you do it.
Once you can tell when pizza dough is fully kneaded, you can experiment and find your own technique that works for you.
Kneading is essentially a fancy way of mixing dough. We’ve all seen people kneading dough before, probably on the TV.
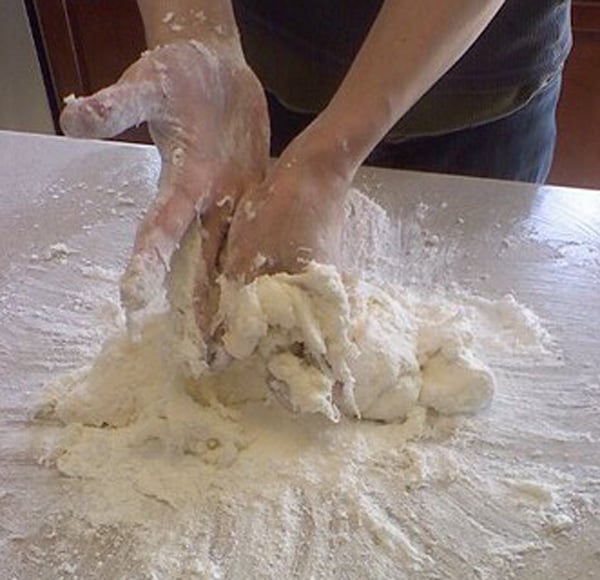
Kneading usually takes place on a work surface, and it usually looks like a floury, doughy mess. But there is method in the madness! And it doesn’t have to be really messy!
The reason we knead pizza dough, simply put, is that it produces a nicer dough. Kneading improves the texture of the dough and increases its strength and stretchiness.
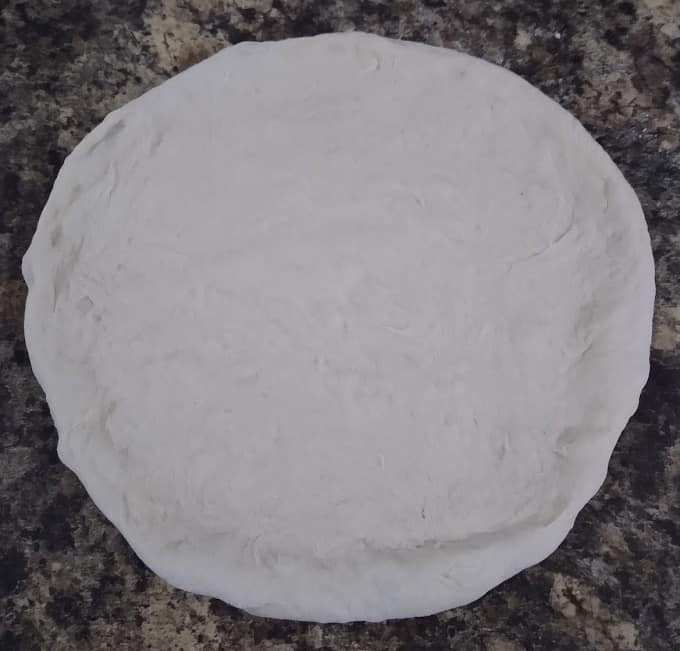
To understand how this happens when we knead dough, we’ll have to go into a bit of the science:
Kneading pizza dough achieves 3 main things:
Let’s take a look at these one at a time:
First and foremost, kneading combines all the ingredients into one single lump of dough. Evenly mixing the ingredients is very difficult, if not impossible, to achieve without some form of kneading.
Some recipes instruct to mix the dry ingredients (flour, salt, yeast) first but this is unnecessary, the kneading process will mix all the dry and wet ingredients together at the same time.
When flour and water are mixed together, the flour starts to absorb the water. This is often referred to as the flour becoming hydrated. When we talk about the flour becoming hydrated, this is different to when we talk about the hydration of a particular dough recipe. Although related, they two are different things.
(If you have never heard about hydration and baker’s percentage, check out my article here. I explain everything you need to know, in simple terms.)
As dough is left to rest, the flour will become hydrated on its own. The water will slowly soak into the flour over time. However, kneading helps to speed up this process by forcing the water into the flour. This can be seen as a dough goes from lumpy to smooth during the kneading process.
As soon as flour comes into contact with liquid (water in the case of pizza dough), gluten strands are formed. This is where the proteins in flour, known as glutenin and gliadin, combine with water to form a new protein called gluten.
As kneading takes place, gluten strands become aligned and this allows them to stick together. As the strands stick together, bonds are formed which in turn, creates a gluten network.
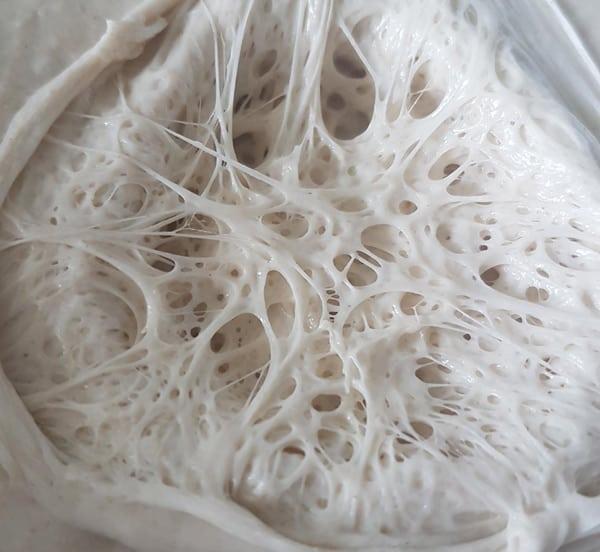
With continued kneading, this gluten network becomes larger and stronger. During the kneading process, air is also incorporated into the dough, which further helps to strengthen the gluten network. Ultimately, the dough becomes stronger and stretchier (extensible) the more it is kneaded.
Strength and stretchiness are the 2 most important characteristics to seek in a pizza dough. They allow us to produce a dough that we can stretch out really thin, in order to make the perfect pizza. This is why kneading is so important.
Many people assume that kneading pizza dough by hand is too difficult, messy, and time consuming. This is definitely not true. In fact, I do all my kneading by hand. As well as being relatively easy, and not as messy or as time consuming as you think, it is also really fun and rewarding (and quite therapeutic).
I have an article on the kneading technique that I use here. It also has a video that shows you the method. It works well for me and you may find it works well for you also!
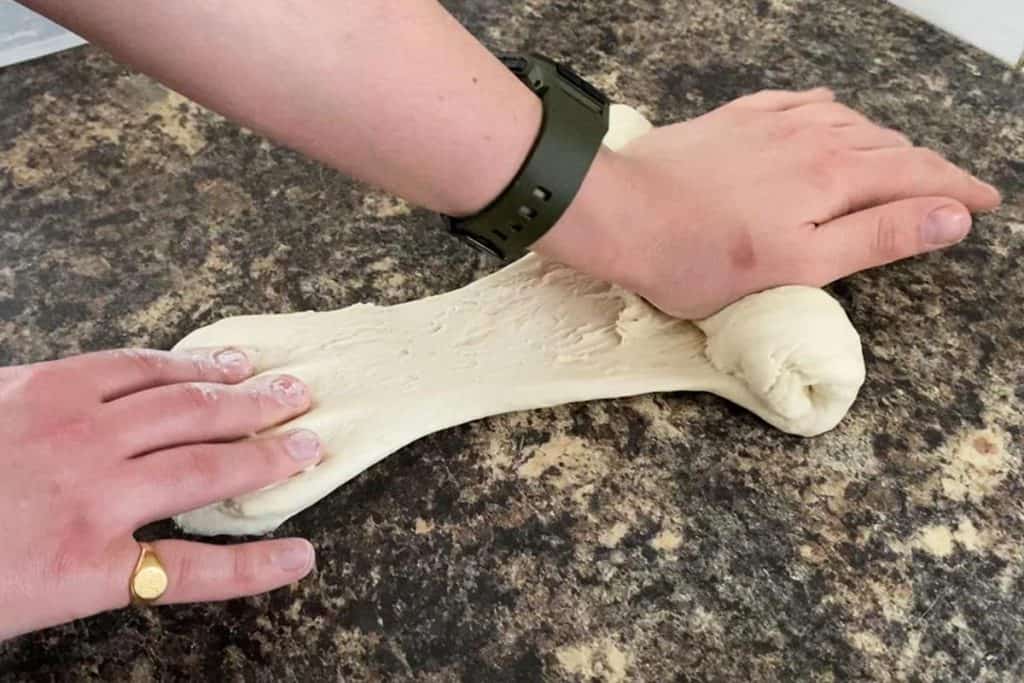
Kneading by hand will also speed up the learning process. You will quickly find out what you are looking for in your pizza dough, and what you need to do to get there.
Using an electronic stand mixer with a dough attachment is a very popular way of making pizza dough. It takes out a lot of the work and also frees up your time to do something else whilst the dough is being mixed (kneaded). You also don’t need to worry about your kneading technique.
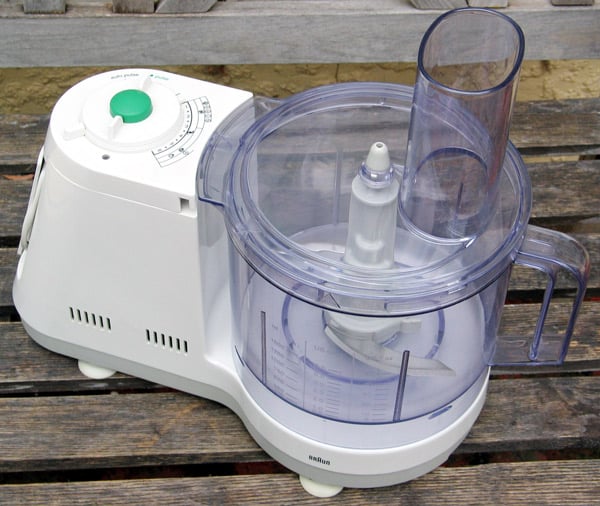
A word of warning, though. Never use a food processor or bread maker for mixing pizza dough (or any dough for that matter). They tend to mix the dough too quickly and aggressively, and they produce too much heat. This can destroy the gluten structure and kill the yeast.

A stand mixer on a slow setting mixes the dough much slower and steadier, more closely replicating hand kneading.
There are arguments for and against kneading by hand and using an electric stand mixer. Below I have highlighted the main reasons, to help you decide how to knead your dough.
| Stand (KitchenAid) Mixer | Hand Mixing/Kneading |
|---|---|
| Kitchen mixers reduce the amount of time spent handling the dough | Using your hands will allow you develop a feel for the dough |
| Kitchen mixers require very little physical strength or technique | Hand kneading requires some physical strength and technique |
| Quite easy to over knead dough in a KitchenAid mixer | Very difficult to over knead by hand |
| Stand/KitchenAid mixers are expensive, bulky, and heavy | Kneading by hand is very cheap and requires very little to no equipment |
| Electric mixers and dough hooks need cleaning out | Hand kneading makes more mess on the work surface |
Overall, I recommend people to knead by hand, at least to start with. This will enable you to quickly develop a feel for the dough and learn how to handle it. You will also quickly learn which characteristics to look for in pizza dough.
Kitchen mixers are also expensive and bulky but if you already own one then by all means give it a go. If you are older, or don’t have as much strength, then a kitchen mixer may make more sense for you.
Whichever you chose, the rest of this article will still be useful, I’ve written it with both methods in mind. If you do use a KitchenAid mixer then be sure to stop it regularly in order to feel the dough and check its progress.
Exact times will depend on the ingredients, especially the type of flour you use, and your kneading technique. If you are using a flour with a high protein content, such as strong white bread flour, then you won’t need to knead the dough as much. Likewise, if you have a good kneading technique, you won’t have to knead for as long.
Different types of flour contain different amounts of protein. When mixed with water in a dough, this protein turns into gluten. Therefore, flours with a protein content produce doughs that contain more gluten. With more gluten, these flours are naturally stronger and therefore require less kneading.
The ideal flour for pizza dough is generally considered to be 00 flour. This is a fine flour with quite a high protein content of about 11% (compared to about 9% for plain/all purpose flour). Some flours, such as strong white bread flours can be as high as 13% (hence the name strong). Strong white bread flours can also produce excellent pizza doughs, and they typically require less kneading.
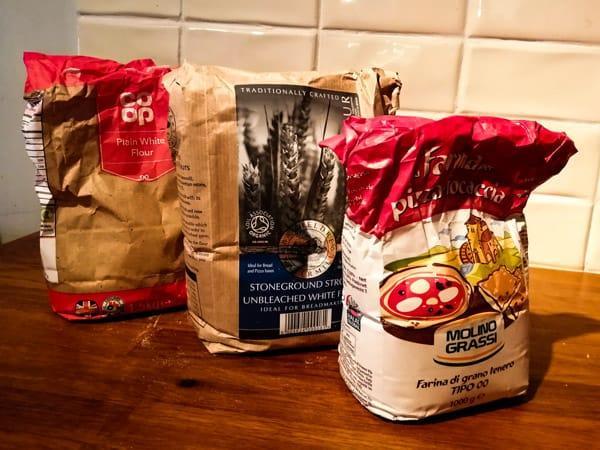
The ingredients in a flour are usually listed on the packet as a value per 100g – eg 11g protein per 100g. This can also be expressed as a percentage – in this case 11% protein.
Expressing protein as a percentage of the flour’s weight is the most common way amongst pizza chefs. To find out more about pizza percentages, take a look at my article on baker’s percentage here.
I have heard many times that salt hinders the gluten development but this is simply not true. Whilst salt does slow down the fermentation (proving/rising) slightly, it actually strengthens the gluten network.
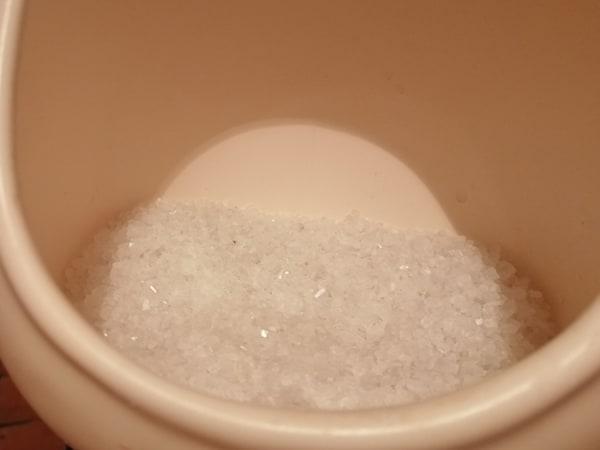
Many recipes advise to leave salt out of the kneading process and to add it later. I recommend adding it as early as possible in order to assist in gluten development.
Adding the salt straight away also saves us time and ensures we don’t forget to add it. Afterall, dough without salt is a disaster! – It’s very bland!
Although uncommon, it is possible to over knead pizza dough. Over kneading most commonly occurs when an electric mixer is used. To avoid this from happening, be sure to use a stand mixer (not a food processor) on a very slow setting (or the slowest) and don’t leave it running for too long.
Over kneading dough by hand is very difficult to achieve, this is one of the advantages of kneading by hand. Unless you have a very efficient kneading technique and you are kneading for over 10 minutes, it is pretty much impossible to over knead by hand.
When people have a problem with their pizza dough, they often think it is caused by over kneading but this is usually not the case. I would look to other aspects first, unless you are using an electric mixer on a high-speed setting.
Over kneaded dough will go from being strong and stretchy to being weak and sloppy. It will rip easily when stretched and will struggle to hold its shape.
During shaping, an over kneaded dough is difficult to stretch and once baked, the pizza will be tough and dense.
Under kneading is a lot more common than over kneading and it can cause similar problems. In fact, under kneading is often confused with over kneading, although its effects are generally not as bad.
Under kneading causes a lack of strength and stretchiness in the pizza dough. The dough will tear easily when stretched and will not hold it’s shape as well as a fully kneaded dough.
A sure-fire way to tell if your dough is under kneaded is if it’s lumpy, because the ingredients won’t have been mixed properly. With a well kneaded dough, the surface of the dough will be very smooth.
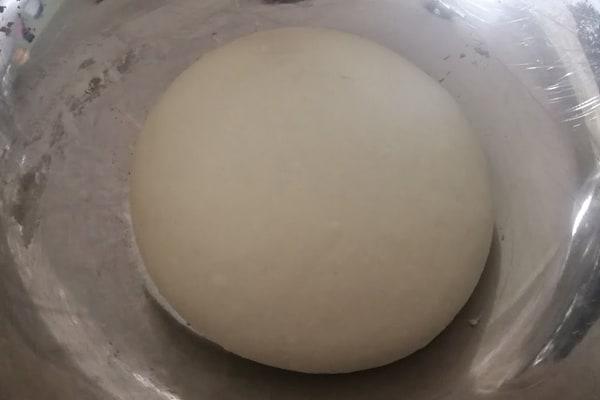
Being able to recognise when a dough is properly kneaded is half the battle. Once you’ve figured out what you’re looking for, you’ll quickly figure out how to get there.
As you knead the dough, pay attention to how the dough is changing. This is where kneading by hand really comes into its own. Feel the dough as you mix it in order to determine how much kneading it requires.
If you are using a machine, stop it regularly to feel the dough with your hand. This will allow you to keep track of the dough’s progress.
Below I’ve outlined the 5 main things we’re looking for:
The windowpane test is a great way to tell if your pizza dough is properly kneaded. This test on its own is a great indicator.
All you need to do is to try to stretch a piece of dough out between your hands as thin us you can and hold it up to a window (or light). You should be able to stretch the dough so thin that you can see through it.
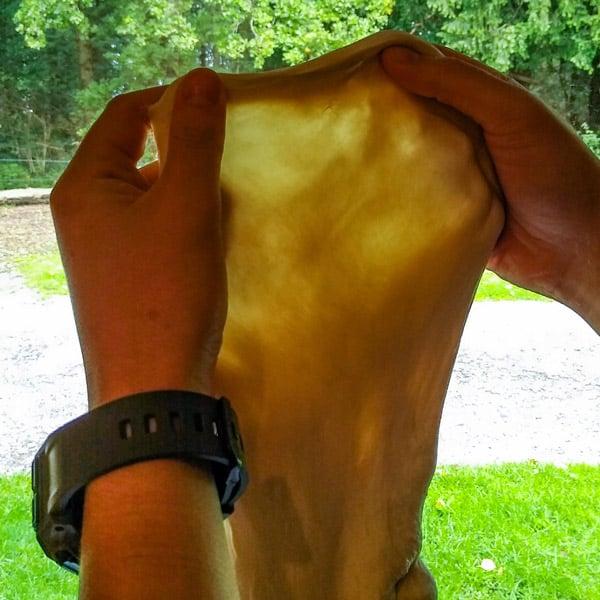
With practice you will be able to stretch it so thin that you can see the gluten network. To start with, it’s easier to use a small piece of dough about golf ball size.
If your dough has all these 5 characteristics then you’re good to go. And congratulations, you have made a wonderful dough!
Learning to knead pizza dough can be quite an intimidating proposition but it doesn’t have to be. As well as being easier than you think, kneading dough can be really fun and rewarding.

What’s more, there is no substitute for fresh dough and once you’ve mastered your kneading, you’ll be one step closer to that perfect pizza.
To get going with your dough, check out my article on kneading by hand here.
If you’re ready to get making the perfect pizza, check out my authentic Neapolitan pizza recipe here.
Good luck, and get mixing! (Or kneading!)

I’m Tom Rothwell and I’m super passionate about all kinds of homemade pizza! In the last few years I've been on a quest to find the perfect pizza. Now I'm sharing what I've found out with the world!

If you're interested in hiring me for your event in the UK, feel free to check out my website with the link below.
Pizza Catering
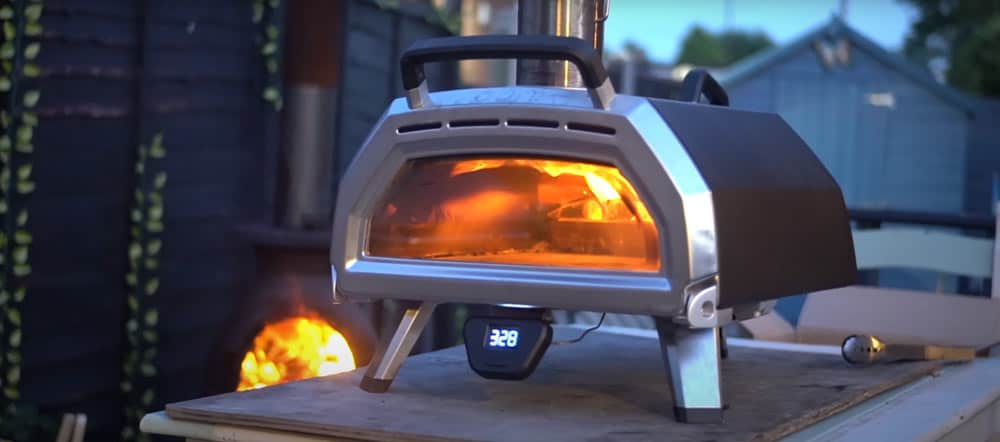
I often get asked what type of oven I use for my pizzas. Well, I use a pizza oven made by a company called Ooni.
The range of pizza ovens that Ooni offers is just brilliant. They cover all bases, and all price points. There's affordable and portable models such as the Fyra 12 Pizza Oven and then there's state-of-the-art models such as the Karu 16 Pizza Oven pictured below.
In all honesty, I would say that the oven makes a huge difference. If you're looking to make authentic Italian pizza, a pizza oven is a must.
By clicking the link below and purchasing from Ooni, you would be supporting this website. I've been using their ovens for a long time now and I wouldn't recommend them if I didn't believe in their products.
Time to make some amazing pizza!

I’m Tom Rothwell and I’m super passionate about all kinds of homemade pizza! In the last few years I've been on a quest to find the perfect pizza. Now I'm sharing what I've found out with the world!

If you're interested in hiring me for your event in the UK, feel free to check out my website with the link below.
Pizza Catering
Hi Tom,
Great website, thanks for your effort and sharing!
I tried your Neapolitan dough and produced a good result once I’d got my outdoor oven running near hot enough (a bit of a struggle).
I found the dough hard to work with though as it was so soft after proving in balls, it seemed to go a bit too thin in places and have a tendency to get the odd small hole, if not very careful. It seemed a bit too fragile for the slapping and knuckle dropping techniques you see. Is this to be expected or have I likely over proved or more likely my stretching technique? I’m using Sainsbury’s taste the difference tipo 00 described as pasta flour. Protein is 13.2 per 100g.
Hi Guido, it sounds like your dough could be under kneaded. Could also be over proved but this is usually easy to spot. If your dough has expanded with lots of bubbles and then started to shrink then it’s over proved.
Stretching technique is very important, I’m bringing an article and video out on this soon. However, a good dough shouldn’t rip easily, it should be very strong.
I’m thinking that the flour you’re using could be an issue. I haven’t tried that particular flour before but I have tried Morrison’s 00 pasta flour and found it made excellent pasta dough but lousy pizza dough. I found it to be quite course for a 00 flour actually.
I would recommend buying some quality pizza flour so that you know for sure whether that is the issue or not. I can highly recommend Molino Grassi 00 flour which you can usually get on Amazon for a great price. Caputo pizzeria is regarded as one of the best flours for Neapolitan pizza and that is usually available on Amazon. It is rather expensive though which is why I recommend Molino Grassi if you can get it, there isn’t much difference (unless you’re doing really long proves).
Thanks for the question. Good luck!
Hi Tom,
This is a great and detailed article, thank you. I have question, what is the difference between pizza dough and pita (pocket) bread dough, why does the pocket bread rise but the pizza doesn’t?
Hi Ahmed, that’s a good question! I’m not sure on the exact reason but I think it is mainly to do with the toppings. A pita doesn’t have any toppings, which allows it to expand upwards.
I think the toppings on a pizza prevent this rise by weighing the dough down (and possibly reducing the direct heat on the dough surface). This can be seen if you try loading a pizza without any toppings. The pizza rises up just like a pita. However, it doesn’t tend to develop the pocket in the middle.
I would guess that pitas are left a little thicker in order to allow for the pocket to develop but I’m not sure!
Great question!
That sounds logical, thanks for replying.
Hi Tom,
Glad I found this article!
Absolute rookie when it comes to making dough; I’m on my third attempt.
There is a main issue i’ve had when kneading, I hope you can shed some light. The dough keeps on breaking when kneading. I assume this is due to a lack of moisture?
Any suggestions would be great!
Hi Jamie, it’s hard to say, it could be many things. I would look at the flour first though. Is it fresh flour? If the flour is quite old it can lose it’s strength. Also, is it a high protein flour? It should have around 12g protein per 100g. The best flour is 00 flour, followed by strong white bread flour.
Also, make sure you rest your pizza for at least 30 minutes before kneading. After kneading a little you could also try resting again for 30 minutes and coming back to knead again. It’s possible you could be over working your dough during kneading. Resting will help this.
It is possible that you don’t have enough water in your dough but in my experience most people add too much water. I recommend weighing all your ingredients with some digital scales so you can be sure of the hydration of your dough.
Be sure to check out my pizza school series where I have videos showing every step of making Neapolitan pizza. You can check out the part on kneading here but I recommend watching it from the beginning here.
Good luck!
Definitely keep the stand mixer on low or you’ll make white bread. Nothing wrong with white bread but if you want those big airy crust holes it’s low and slow and just a couple minutes for me. Good stuff here thanks.
Hi Rod, yes that’s a very good point. A stand mixer can make great pizza dough on a slow setting.
Thanks for the kind words!
I’m new at making pizza dough, and I’m trying different recipes. My hands aren’t strong enough for hand kneading so I use a stand mixer. No matter how I vary the ingredients (Including AP, 00, semolina) or how long I let the dough rest, it simply will not stretch.
I leave it on the counter covered with a little olive oil and plastic wrap and come back to it in 15 minute intervals, and eventually give up and go to bed. The next morning (after the dough has had a better rest than me) it’s in no better mood to be stretched than the day before.
I’ve been kneading with the stand mixer for longer than 5 minutes because the dough is always WAY to gooey with whatever amount of water the recipes call for, and I have to add more flour before I can get it out of the bowl in one clump, so maybe that’s where I mess up?
Hi Wendy. Have you had a look at my pizza school series? I go through every step of the way with videos as well. You can check out part 1 on mixing the ingredients here.
For you, I would recommend doing the first part, mixing the ingredients together, by hand in a bowl. It doesn’t take any strength at this stage. You are not trying to knead the dough, just combine all the ingredients together. After resting your dough, you should then be able to tell whether your dough is too gooey before adding to the stand mixer.
When it comes to the stand mixer, are you using it on a slow speed and with a dough attachment? Stand mixers can over work the dough, destroying the gluten network.
You could also be using too much water. If you follow my recipe from the pizza school series, you should notice that it is a drier dough. I do not recommend wet doughs for beginners as they are difficult to work with.
When you say it will not stretch, are you trying the windowpane test? I would try leaving the dough at least 30 minutes, covered, before trying the test.
When you mention stretching the dough the next day, I assume you are using yeast in the dough, and allowing it to prove covered up? A properly proved dough will stretch much easier than an underproved or unlevened dough.
Also, are you weighing your ingredients? Using cups is a very inaccurate way of measuring and this could lead to adding way too much water to your dough.
I wouldn’t recommend adding flour to remove the dough from the mixer, you should be able to remove it without. Any flour you add needs to be mixed into the dough. If you need to add more flour, I recommend doing this as the dough is mixing. At the end of mixing, all the ingredients should be combined and you should be able to handle the dough (pizza dough shouldn’t be really sticky).
I’m not sure if any of this was useful Wendy. But if you get back to me with some answers I may be able to help further. Thanks
Hi Tom! Your dough lessons are simply terrific. I’m an artisan bread baker, author, and teacher. And I’ve never run across a collection of detailed discussions of a particular type of dough anywhere else.
The depth of your knowledge–plus your ability to clearly explain things–is lauadable. As I write to my students when they post beautiful loaves of bread, your site is “ChefMike Approved!”.
I’d like to ask your help in troubleshooting a problem I’m having. It’s with the Roman style pizza bianca dough. I’ve got a formulation with great flavor, aroma, and chew. But my pizza slabs tend to puff up unevenly, meaning there are some really large surface bubbles. And beneath the crust layer of those bubbles, there is an air gap. A distinct separation of the crust from the rest of the dough that forms during the bake. So I end up with a thin layer of crust, a layer of air, and then a nicely webbed dough structure across the bottom half of the cross section slice.
Have you ever seen this problem? And if so, what if any ideas can you share with me about remedying it.
Thanks from one baker to another.
@ChefMikeBreads
Hi Chef Mike! Thank you for the words of encouragement, it means a lot!
With regards to your specific question though, I haven’t experimented with this type of pizza. Yet! I don’t think there’s any advise I can dispense, especially considering this type of pizza is so different from the Neapolitan variety that I work with.
Perhaps the issues you’re experienceing could be due to the oven? I’m assuming you’re using a bread oven with steam?
Thanks for the comment! Hope you figure it out!
Hello!
First of all, congratulations on your website and thank you for providing such a thorough guide for us begginers. I am currently having a little mishap with my dough.
I am using regular bread flour (13-14% protein) mostly because of availability reasons, and even though I knead for at least 12-13 minutes I cant get to the point where the dough is stretchy enough for the windowpane test. I use your kneading method and I use your calculator for the recipe. I typically make about 1kg of dough.
I don’t know if there are some additional considerations to be taken with this kind of dough or if I am simply doing it all wrong. Altough I have used the dough anyway, I do notice that it gets a little sticky when I put in the peel.
Thanks in advance for any help you can give me. Greetings from Panama!!
Hi Jose, thanks for the question.
Are you resting the dough before trying the windowpane test? This is very important as the dough will be tense following kneading. Try resting for 30 minutes or so before trying the windowpane test.
Also, are you resting the dough before kneading? 12-13 minutes of kneading is an awfully long time. 5-7 minutes should be fine if you rest the dough first.
In general, using high protein bread flour should be fine. I would just recommend increasing the hydration by 2% – 4% when compared to 00 flour.
Hope this helps!
Hi Tom, I came across your site looking to debug an issue with my pizza crusts. I think I may have found the root cause … fingers crossed. It has to be the bread machine … ugh!
Here’s my story. Over the last year, I have made several dozen pizzas in my Ooni. They’ve always looked great. BUT … I’ve not been able to nail down that perfect airy-and-crunchy crust.
I go with 00 flour, use a poolish, do cold ferments and my stretching is not too shabby. And yet, my crusts are a bit doughy and appear undercooked. They do rise up but I rarely see the open pockets. It’s so frustrating.
I thought I merely needed more practice so I kept at it. But now I know I’m making at least one big mistake: I’m using the bread maker to mix the poolish with the rest of the ingredients before I cold-ferment the dough balls.
The machine must be over-kneading the dough. Plus, the dough is so warm to the touch when it’s ready. The machine has a cycle time of 45 min although it probably kneads for only half that time (and has warm rests in between).
I guess it’s designed to quick-prep dough for a home-oven pizza, and totally ill-suited for napoletana-style. Suddenly, I have hope.
I am going to start kneading the dough by hand! Let’s see if that does the trick. I will try to report back here.
Thanks so much for your blog. I love it.
Thanks Adarsh, I’m glad you like my blog and you’ve found it helpful.
I always recommend to start off mixing by hand and then you’ll get to understand the dough better. Once you’ve honed your skills you could then switch to a machine if you like, and you should be able to get it to work for you.
The only other thing I would mention is that if you’re doing cold proves, you need to use a lot more yeast. If your dough isn’t proving enough then you won’t end up with nice air pockets.
As a rough guide, for cold proving vs room temperature proofing (24 hours) you probably need about 8-10 times as much yeast!
Hope this helps and good luck!